Welcome to one of the most active flamenco sites on the Internet. Guests can read most posts but if you want to participate click here to register.
This site is dedicated to the memory of Paco de Lucía, Ron Mitchell, Guy Williams, Linda Elvira, Philip John Lee, Craig Eros, Ben Woods, David Serva and Tom Blackshear who went ahead of us.
We receive 12,200 visitors a month from 200 countries and 1.7 million page impressions a year. To advertise on this site please contact us.
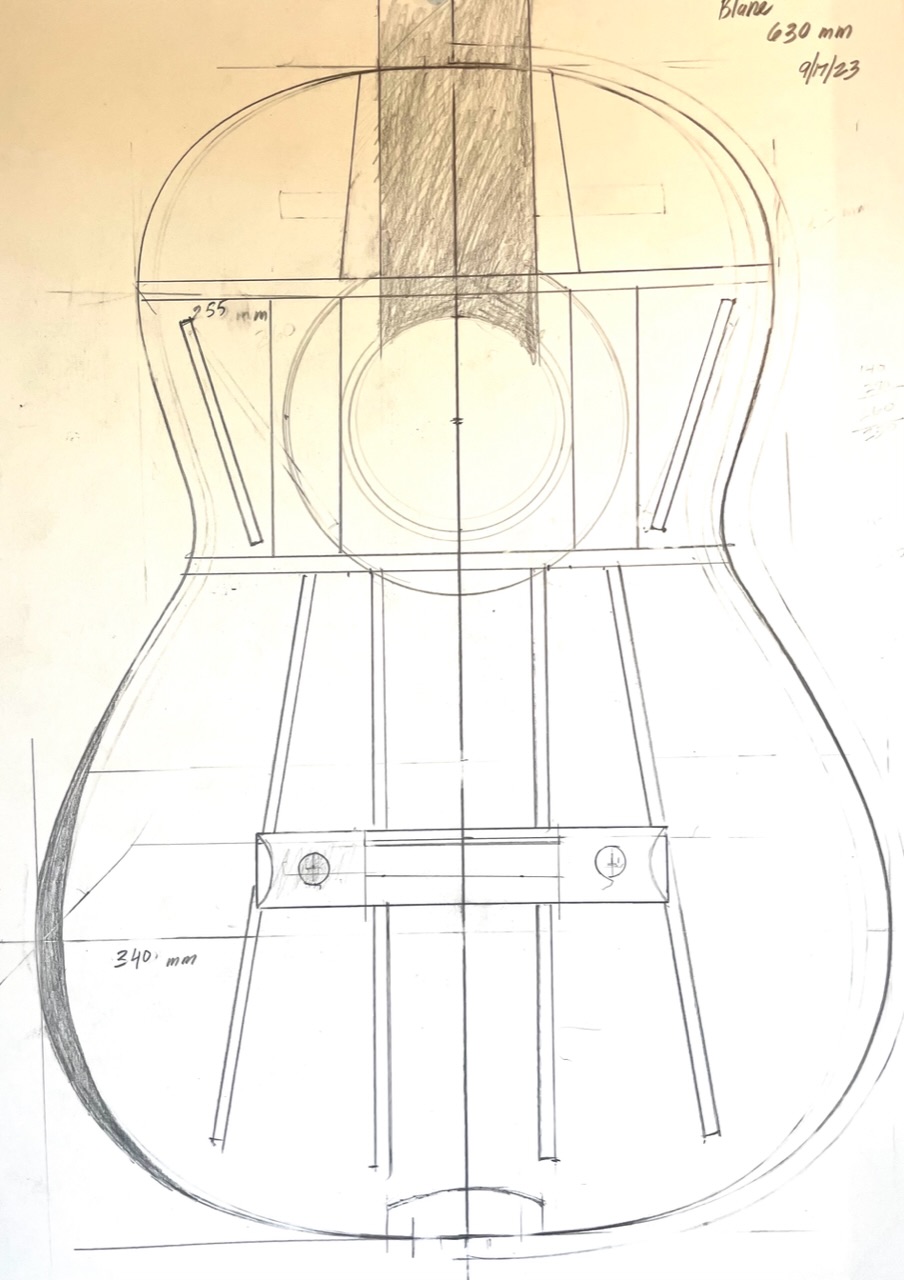
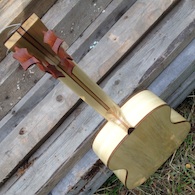
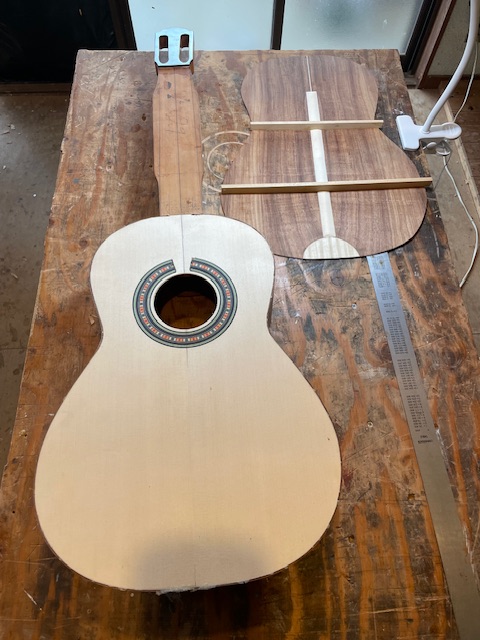
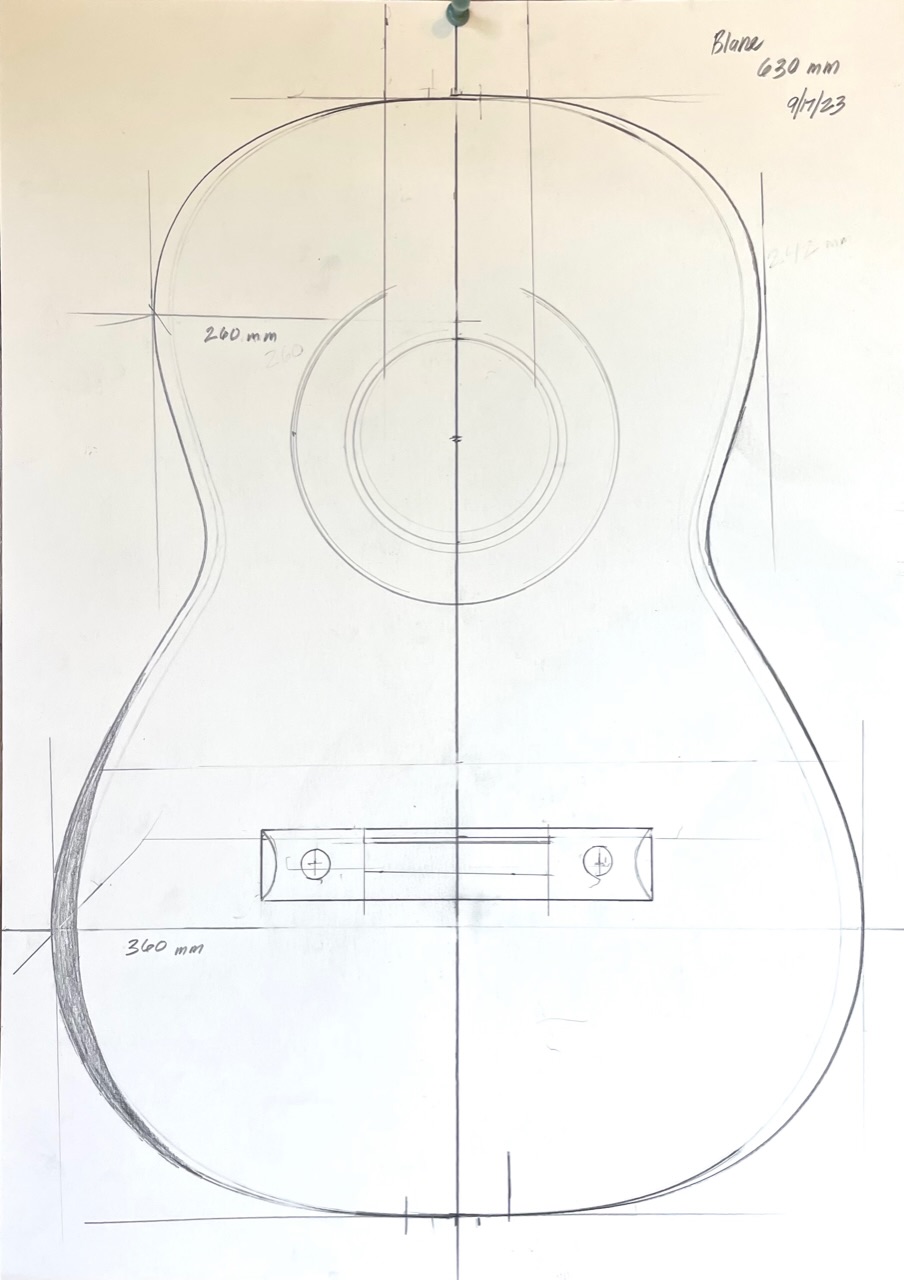
Custom making another plantilla on late 19th c. lines. A bit wider than the Calle’ model. I can’t even say how happy I am to be getting these requests.
Images are resized automatically to a maximum width of 800px
RE: Next 19th c. Spirit guitar (in reply to estebanana)
Amateur question - and if it's something that can be explained in a post - how do you determine where to place your upper bout, waist, lower bout, etc.... when you're drawing a new plantilla? Do you kind of free-hand the curves until it looks good, or is it a lot more complicated than that?
RE: Next 19th c. Spirit guitar (in reply to estebanana)
quote:
ORIGINAL: estebanana
Custom making another plantilla on late 19th c. lines. A bit wider than the Calle’ model. I can’t even say how happy I am to be getting these requests.
Wow such an interesting question. The Occam’s razor answer is fast: my customer wanted a smaller body than a normal guitar. ( normal: lower bout width of 14 to 14-1/4”) . But the customer wanted to work in metric units, so he told me the small Calle’ model I make was too narrow in the lower bout, and the full size guitar was too big. He gave me the Goldilocks Dimensions, 340mm lower bout width.
I worked with those dimensions and that he wants a 630mm scale length. First I drew a center line down the paper and use my collection of plantilla templates to rough in a guitar that would fit those dimensions. At the same time I was thinking a lot about the bridge and the bracing, but that’s a separate issue.
First I try to make a beautiful outline, then I try to get the upper bout large enough to get as much air volume in the body as I can for a small guitar. After I have a rough plantilla drawn in I erase and redraw until all the lines feel blended and flowing. I like certain things, a feeling of uplift, a narrow waist, slightly flat bottom… it’s a thing you do by eye after lots of looking at many guitars.
Once I got the plantilla looking correct to my eye, I thought about how it would work with the bridge design I will use. Once that’s drawn in I decided on the bracing based on recent patterns I’ve been using and have a feel for.
At this point I start thinking about aiming at F# for a main air resonance ( lots of controversial stuff and infinitesimal details can be said about resonance modes most of which I don’t think about. I think there’s something to the saying ‘analysis paralysis’ ) I think for these smaller lighter Spanish style guitars making them with thin plates and ribs is important to keep the air resonance low. Even my small Calle’ models have surprisingly low main air resonance for their size.
Ok why is that important? It’s important because you don’t want the main air resonance to match any open string or couple that resonance between the back and top. This produces real resonances that beat together, but do not decay at the same rate. All that is bad news. I don’t worry too much about it. It becomes more critical when making more modern style guitars with thicker backs and ribs and lots of top bracing.
I think about the bridge first, the plantilla width and shape, the placement of the sound hole and the scale length. Once all that sifts into place, the transverse braces above and below the sound hole find their places by virtue of being near the sound hole. Then after all that I think about a brace pattern. Most people design around a brace pattern and the other elements fit in to the top bracing scheme, I feel that is backwards and counter intuitive. Probably a result of so many makers simply copying store bought plans without making the model themselves over the years by trial and error.
People say they want to build a certain brace pattern by a certain maker, but probably that maker arrived at the brace pattern by setting up a whole bunch of other ideas first. At least that’s how I see it.
Does that answer anything?
Images are resized automatically to a maximum width of 800px
RE: Next 19th c. Spirit guitar (in reply to estebanana)
Nice plantilla. Are you putting an armrest on the lower bout?
Agreed re. bracing, there’s too much focus online on bracing patterns at the expense of understanding the whole system. Also agree that everything flows from the bridge and scale length.
RE: Next 19th c. Spirit guitar (in reply to estebanana)
He needs a very small bevel, or a section of wide binding I can round over in a slightly bigger radius. I’m considering maple binding and that leads to interesting possibilities.
RE: Next 19th c. Spirit guitar (in reply to estebanana)
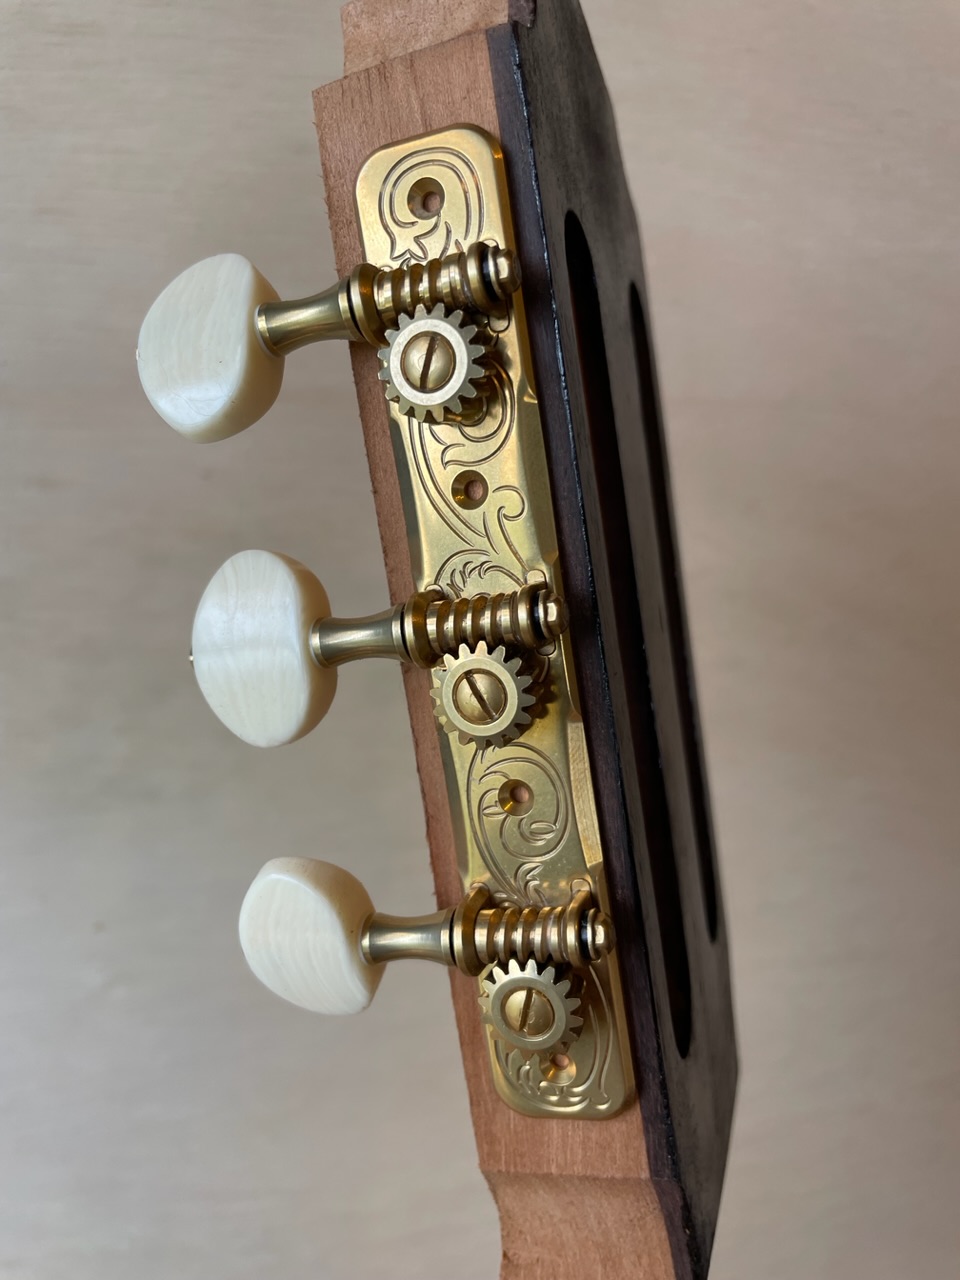
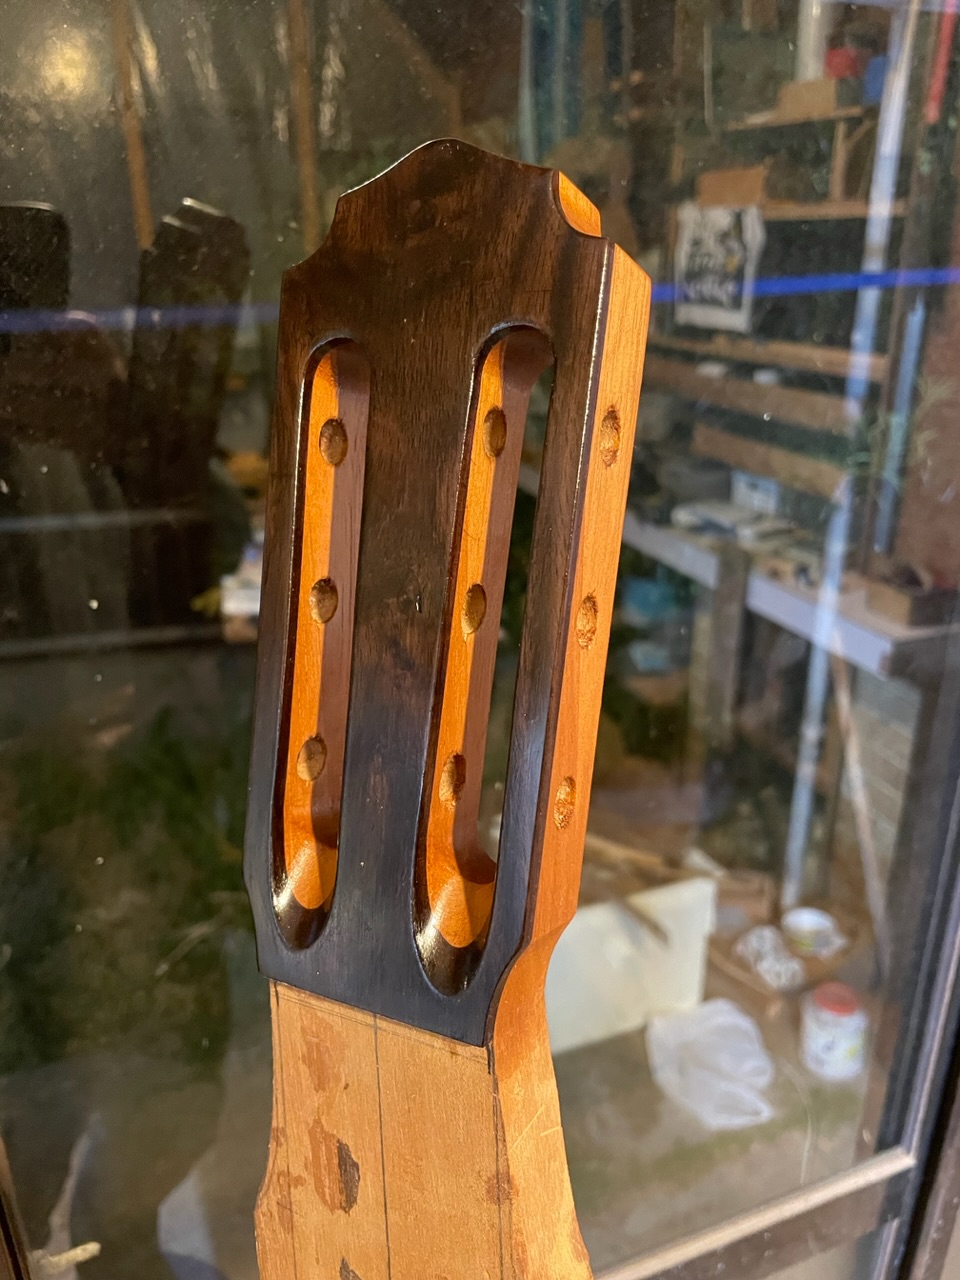
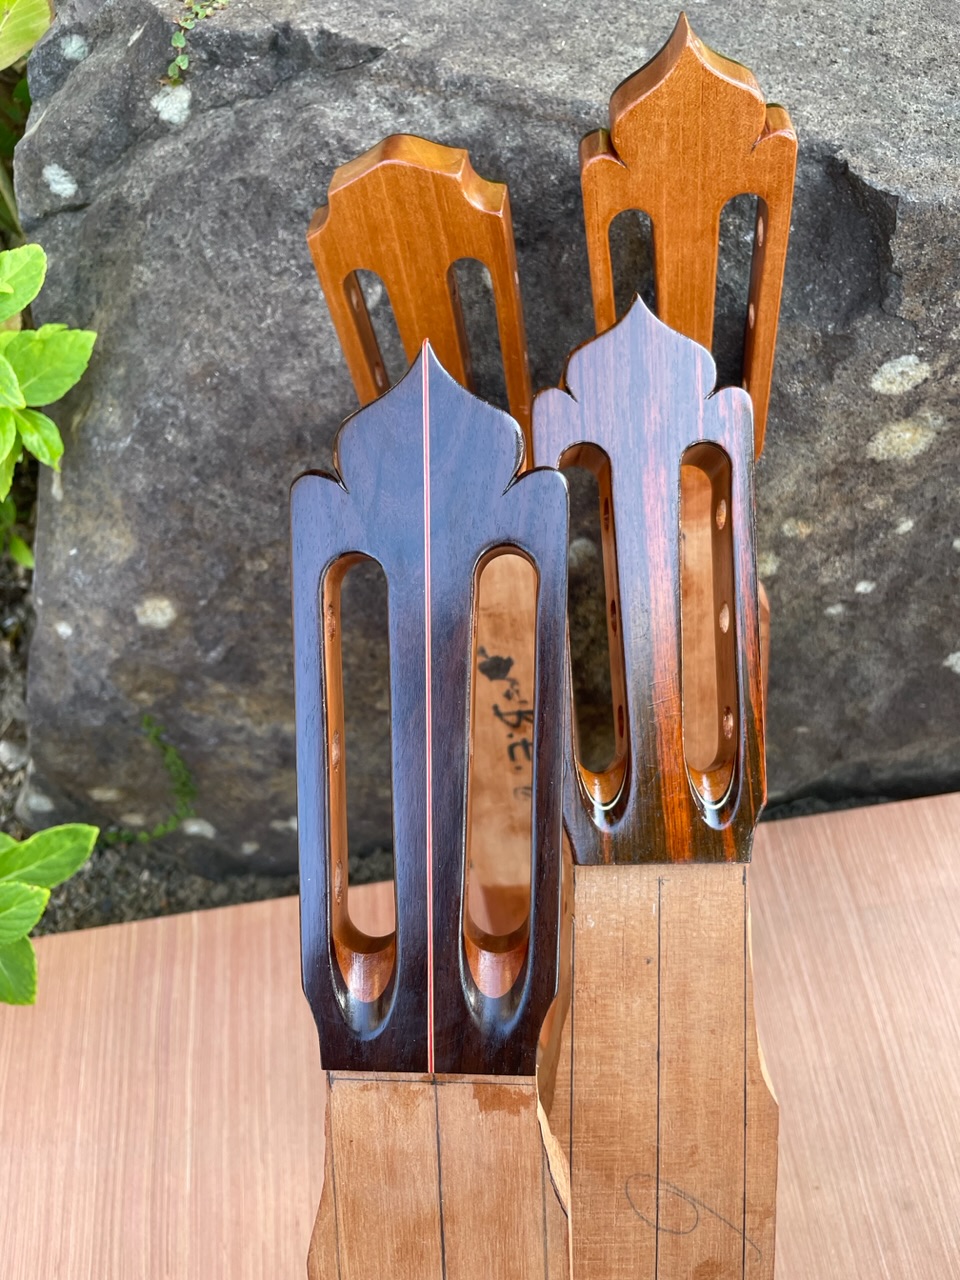
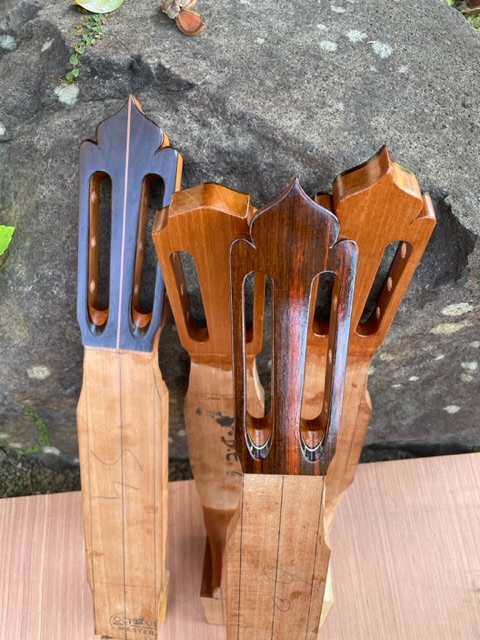
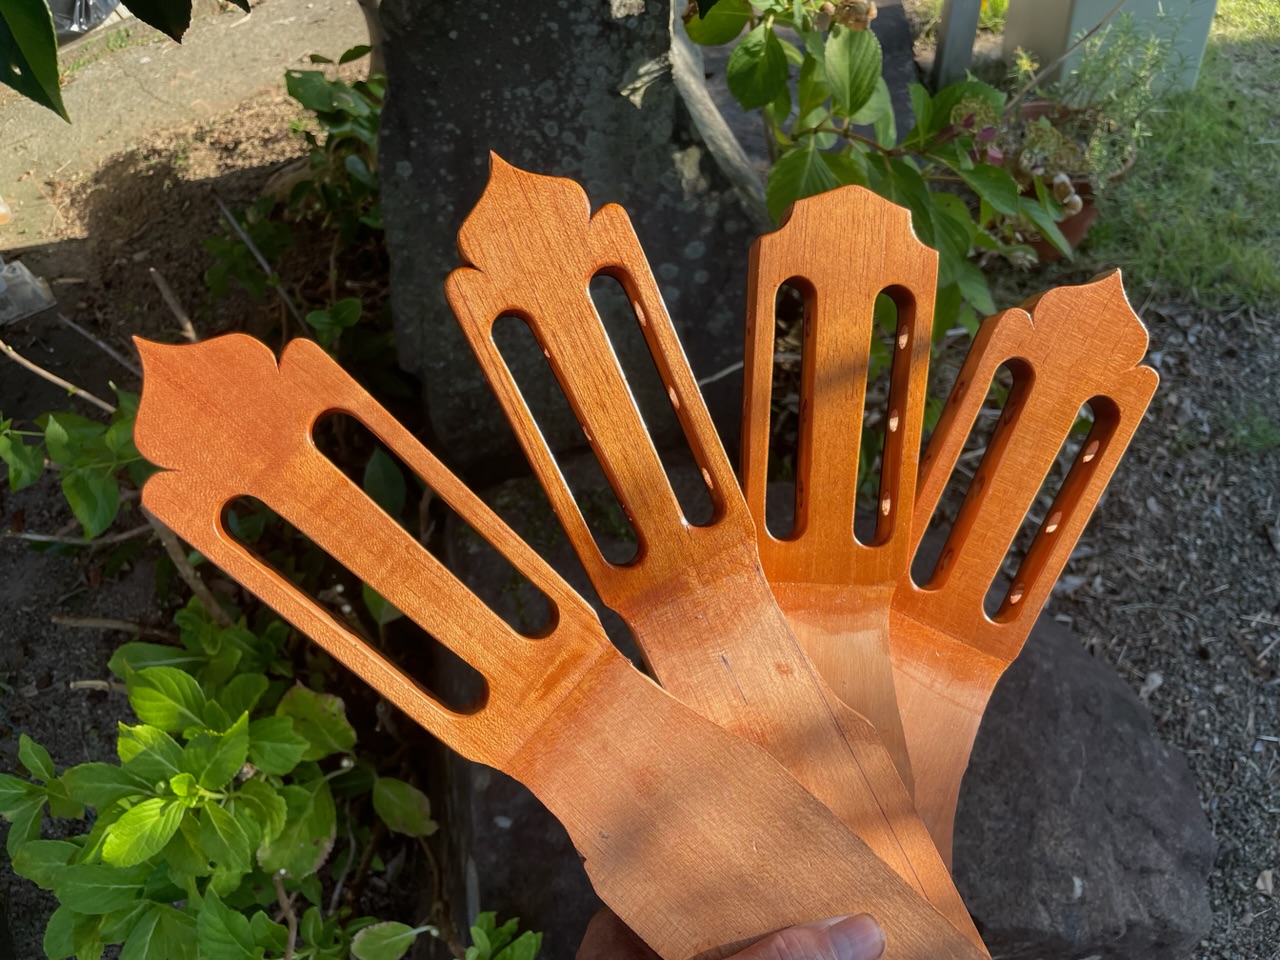
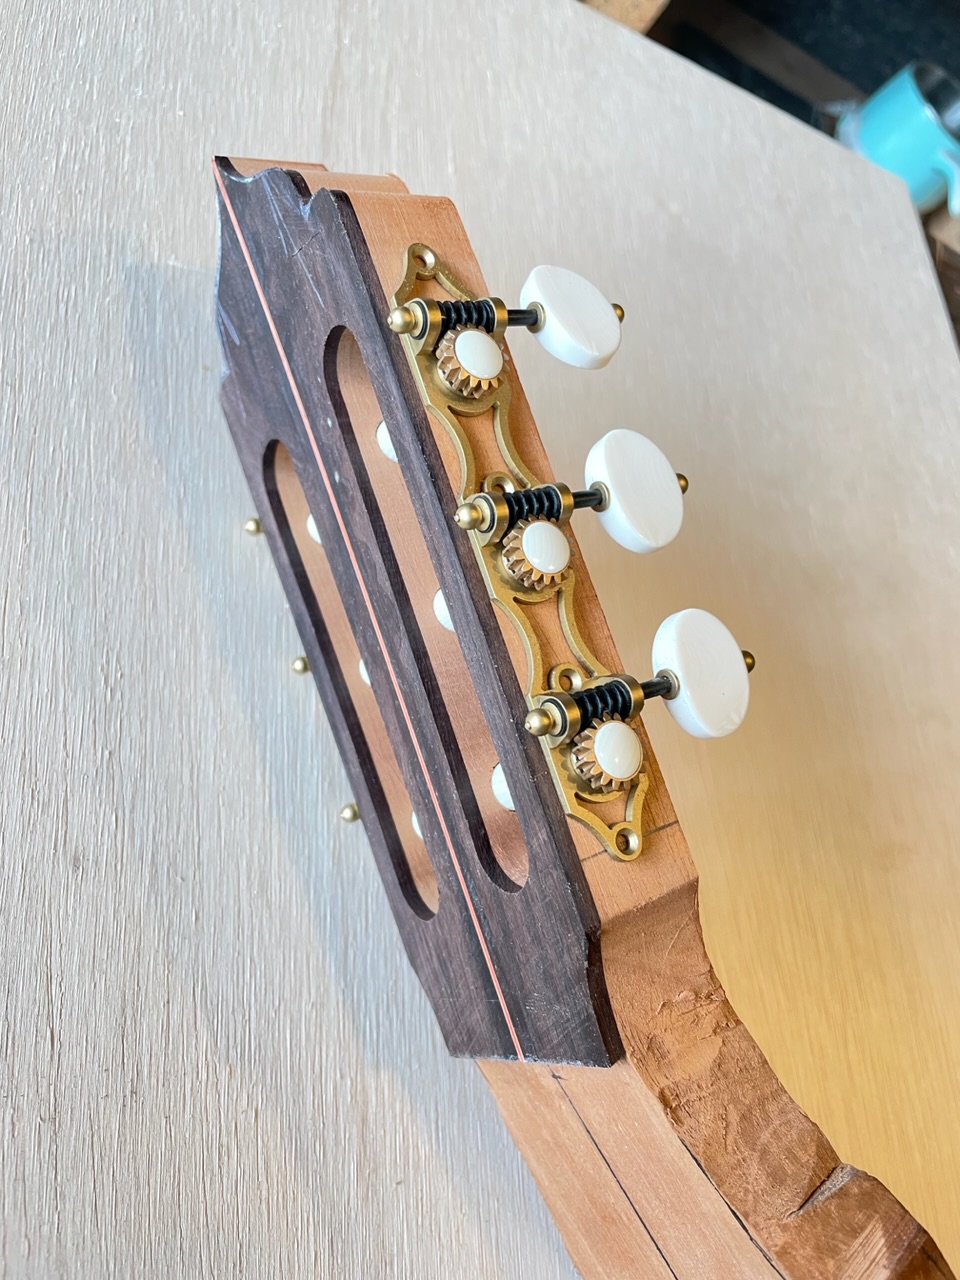
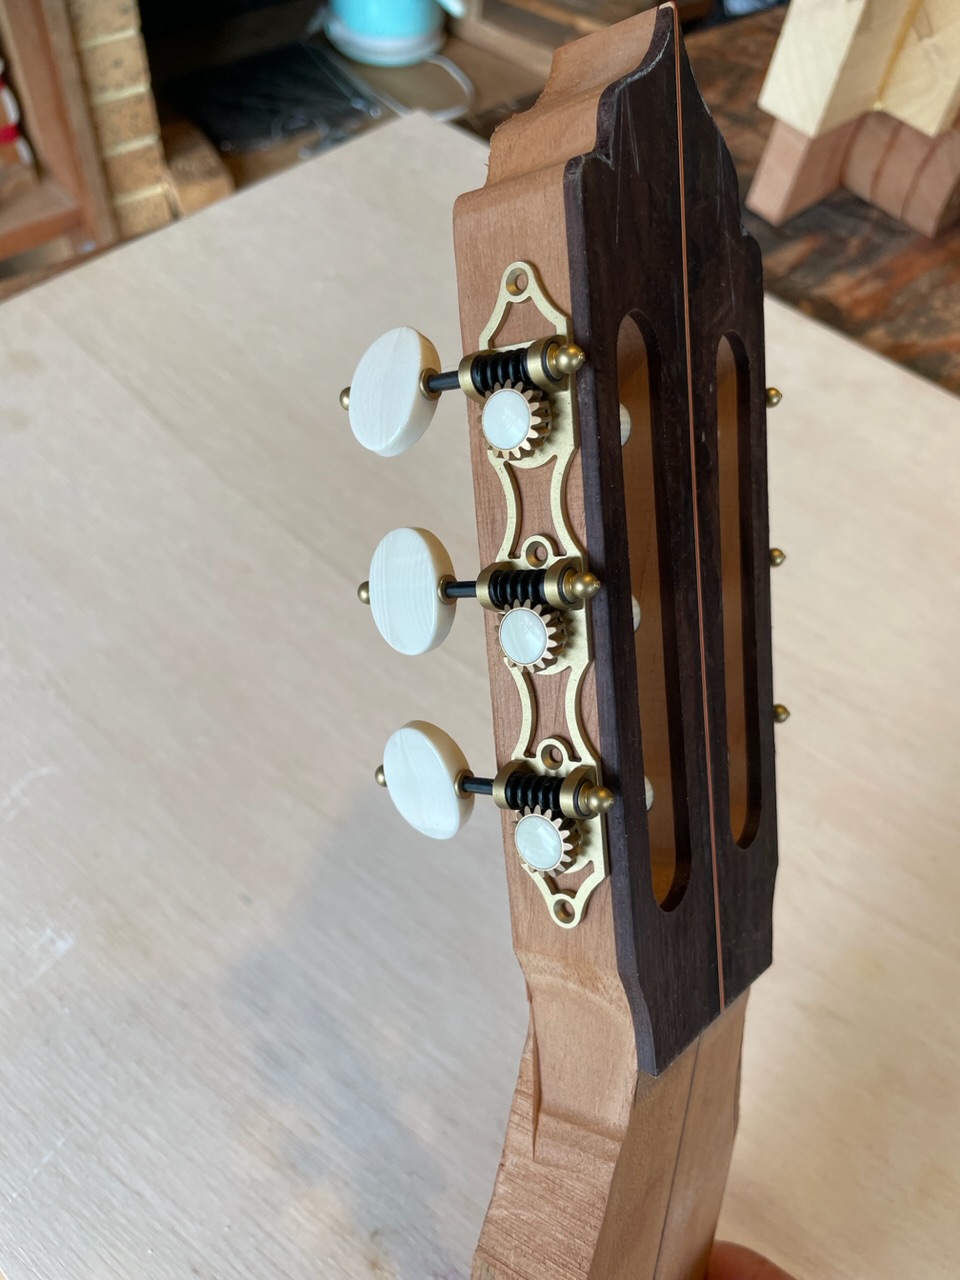
The headstock of this one was modified from my own regular design to this. The person who commissioned it wanted a more late 19th - early 20th century vibe so we worked this out, which is vaguely Manuel Ramirezish and fits the vibe.
Images are resized automatically to a maximum width of 800px
RE: Next 19th c. Spirit guitar (in reply to estebanana)
It’s all going ok, but building many at a time at a slower pace. I’m wondering if it just seems slow. I began finishing the entire headstock to almost final French polish before assembling the guitar. I found it’s easier to move the neck around and hold it in a vice while polishing and sanding the final sculptural piece than waiting to detail it out after assembling. What I found is that it’s more consistent from neck to neck, but still with small individual touches on how each one is cut. This feels slower, but in fact I think now that I’m beginning the assembly process this week the process of getting the headstock out of the way will slingshot the rest of the project faster. You don’t have to double back and detail the neck, it’s all done when the neck is easy to handle and move around.
Images are resized automatically to a maximum width of 800px
RE: Next 19th c. Spirit guitar (in reply to estebanana)
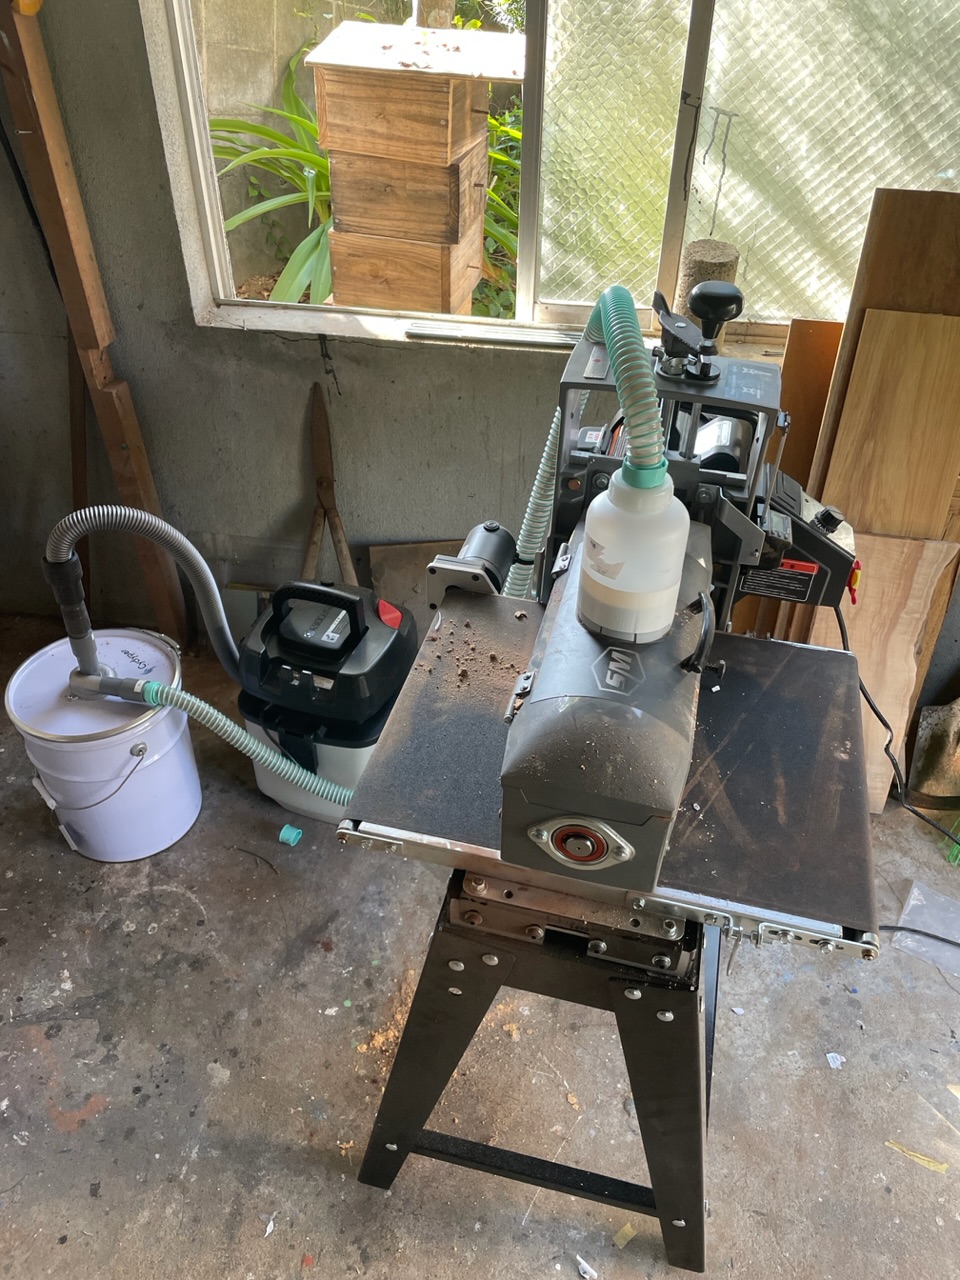
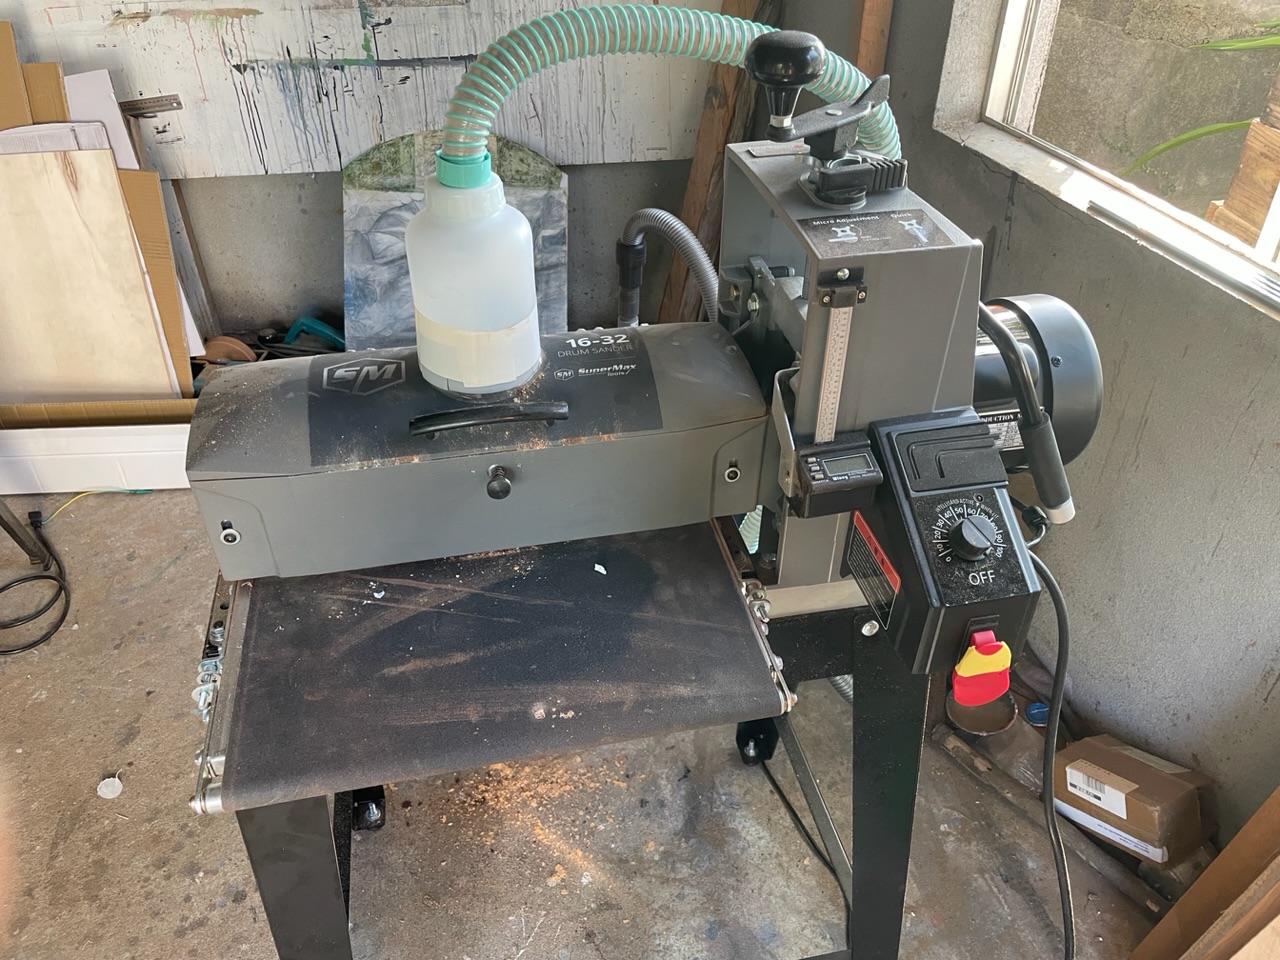
The biggest thing I was waiting for was this new drum sander. It arrived on Monday and by Monday night I had assembled it and dimensioned three guitar backs. It took an absurdly short amount of time to thickness the backs, so this will cut down on dimensioning materials time to a fraction of what it was. I used to have a drum sander in California before 2013, but I never bother to get one here because I thought drum sanders had inherent structural problems made them sand out of true flat parallel surfaces. I think the Delta drum sander I had bought in 2002 was just not as advanced in design as the ones we can get now. For $1400.00 you can get this Laguna ( super max brand overseas) and it’s quite substantial. The frame is cast and much more solid than the older Delta design. It has a feed table that automatically controls feed speed if the sanding pressure or friction on the work increases too much. It just slows the feed by itself. It has a quick up-down adjustment lever that moves the drum up and down fast, but also a screw adjustment that is extremely fine, you can easily hit 10ths of a millimeter in accuracy.
So less planing and scraping is going to be good for my hands and faster🙏
Images are resized automatically to a maximum width of 800px
RE: Next 19th c. Spirit guitar (in reply to estebanana)
Nice! You know I made a drum sander a few years ago, super simple, but I always dream of a power feed etc…
A good tool is a good tool. As we age we need to work smarter not harder.
Picking a good dry day with a breeze then your sander outside will save a lot of shop mess. Also might need more vacuum CFM to pull dust and heat buildup out of the tool to keep the paper from loading up.
Couple times I’ve had some scruff from the paper make what look like gauges in a top. Had a good laugh when I was raising the grain with water and the popped up proud of the surface.
Remember sandpaper is cheap although a bit if a pain to change. I would do as much as I I could with course paper to thickness then replace with finer paper to finish.
_____________________________
I prefer my flamenco guitar spicy, doesn't have to be fast, should have some meat on the bones, can be raw or well done, as long as it doesn't sound like it's turning green on an elevator floor.
RE: Next 19th c. Spirit guitar (in reply to estebanana)
On a drum sander I made back in the 90s I used hose clamps at either end to hold the spiral of sandpaper in place. Worked great as long as I remembered to never ever let the wood go off the sides of the platen.
RE: Next 19th c. Spirit guitar (in reply to estebanana)
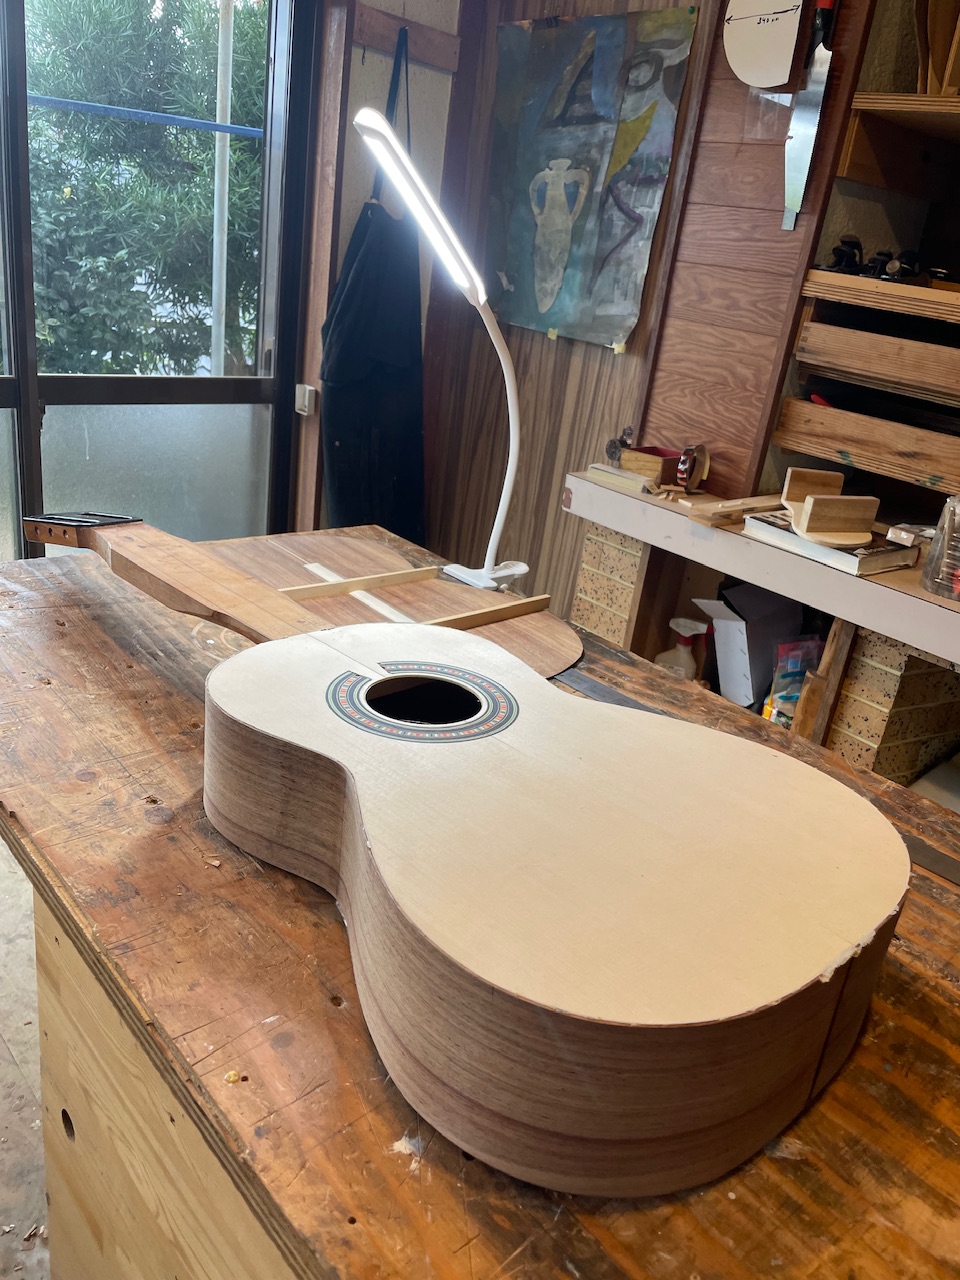
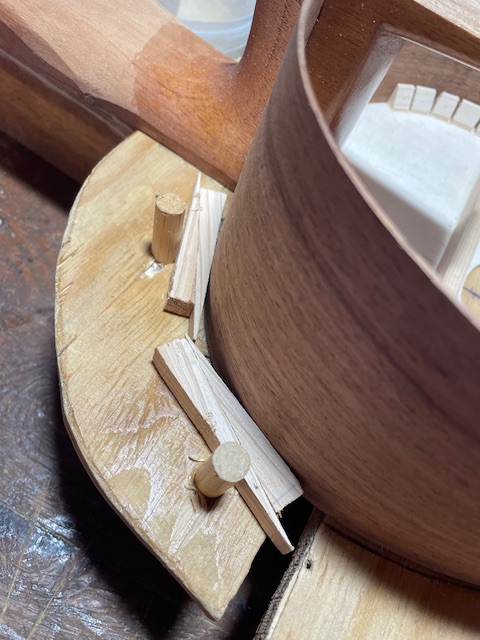
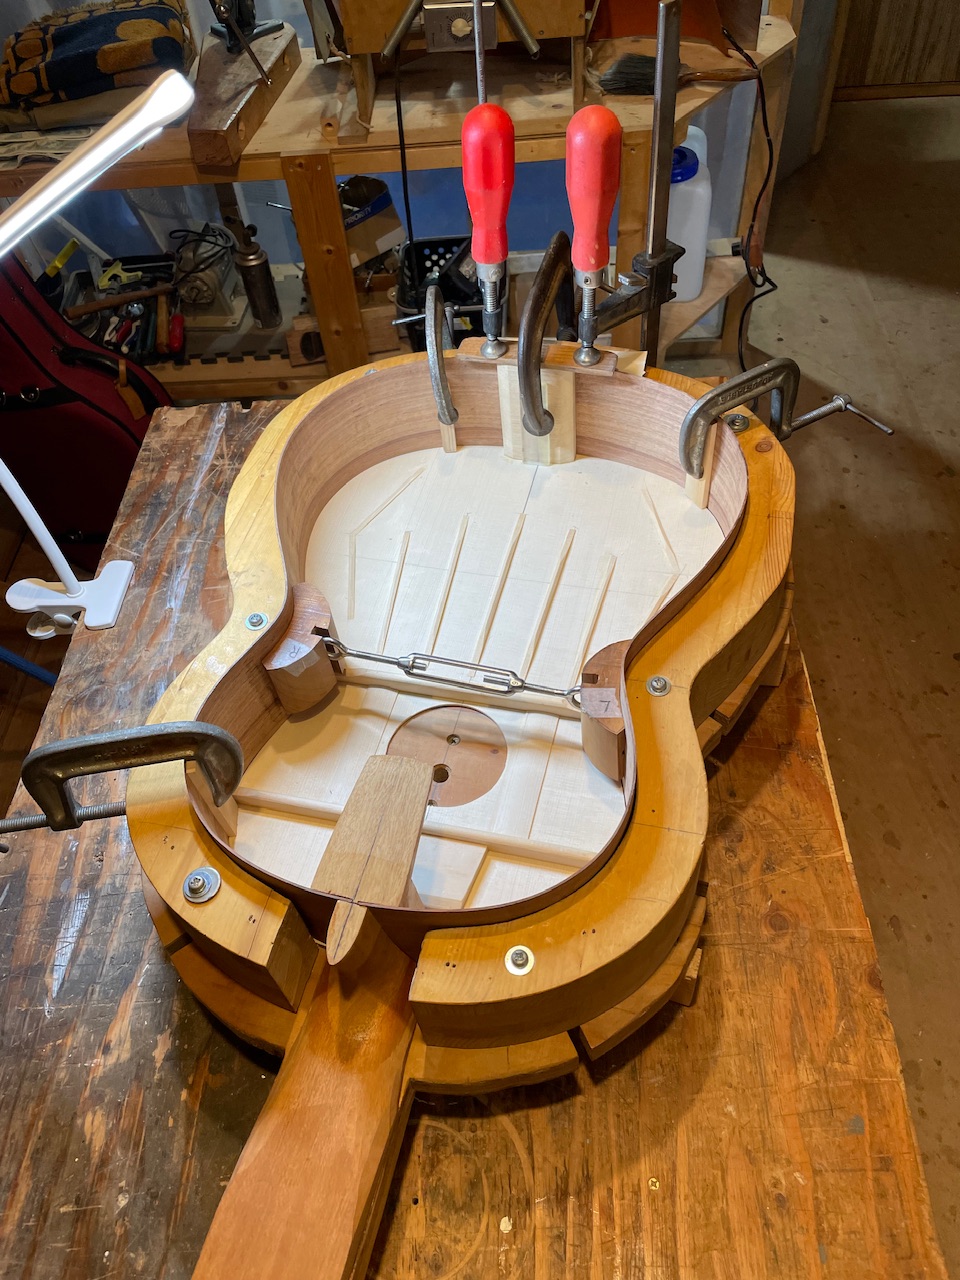
This plantilla is bespoke to this order, so there is no outside mold to build it in. The solution is to attach the top to the neck, put it face down in the solera and then gently wedge the ribs up to the perimeter of the top. The top has been accurately trimmed to the outline of the plantilla. If you pay attention and bend the ribs accurately they should snug up to the outline of the top. I used some waist supports cut out of bass wood to help out.
I have to build a Fleta model next year, instead of making a separate mold for a Fleta plantilla I will just do it this way, one off Fleta copy. ( which will didn’t solicit to build, a friend wanted one)
Images are resized automatically to a maximum width of 800px
RE: Next 19th c. Spirit guitar (in reply to estebanana)
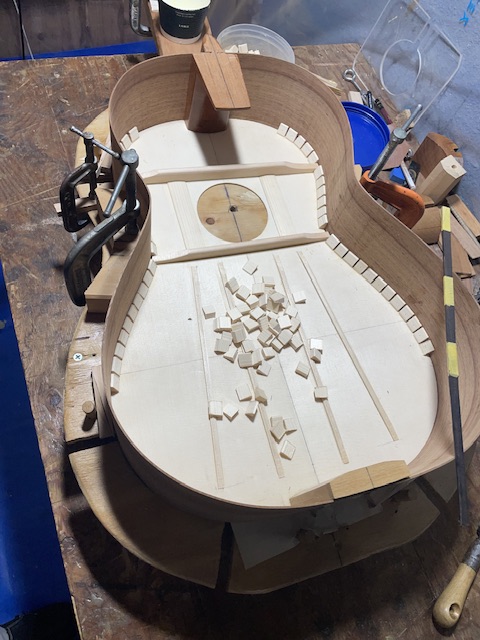
I’m building a pair of Black Acacia guitars right now ( I have four guitars under construction total at the moment) here is the full size BA/Spruce - glue blocks next - this one is for a long time Foro member, so I’m in the hot seat to make this one great.
I’ll be featuring the Black Acacia pair as they evolve
Images are resized automatically to a maximum width of 800px
RE: Next 19th c. Spirit guitar (in reply to estebanana)
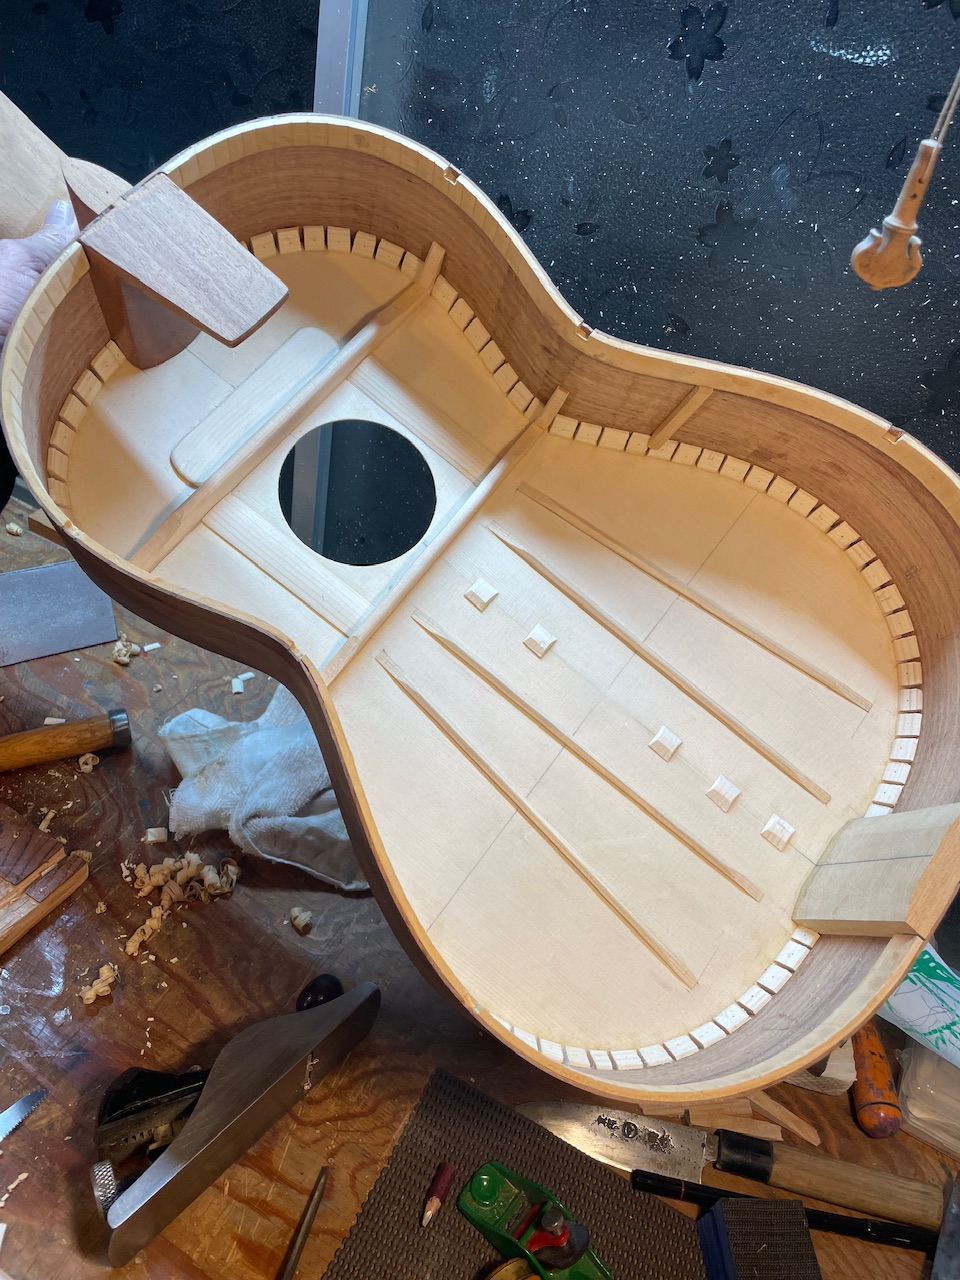
I think my 19th century style guitars are starting to look pretty good on the inside. Imbued with some historical building points like crimped liners. If I may say so myself.
Images are resized automatically to a maximum width of 800px
RE: Next 19th c. Spirit guitar (in reply to estebanana)
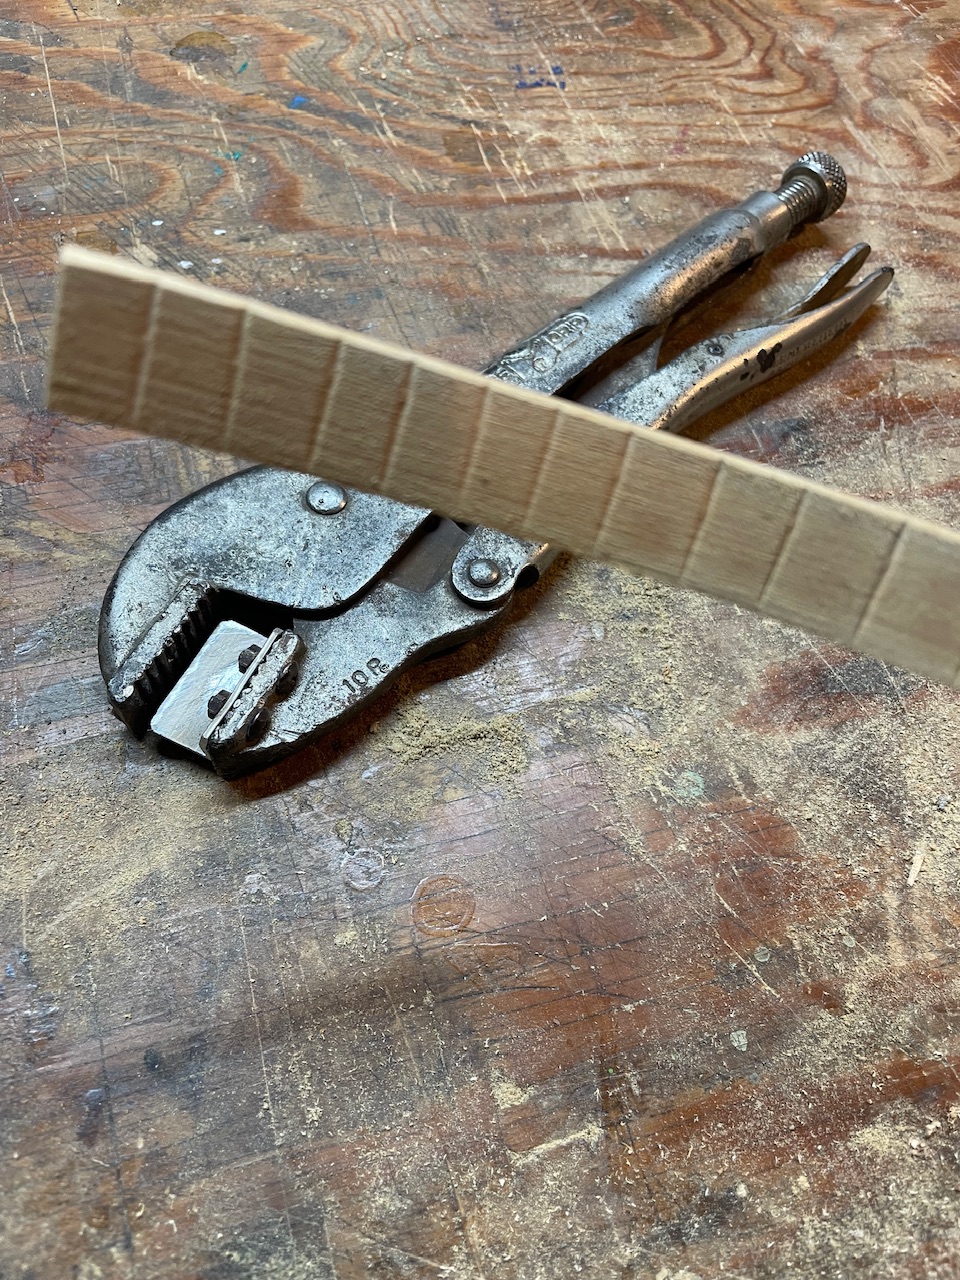
The ugly improvised crimping on pliers I use to make old fashioned looking liners. And in reality this has taught me a lot about ways the old boys might have done things. It’s a very easy and effective way to make a liner.
Dimension the liner, I use 3/4” by 3.5 mm x 28 “ Soak the liner in water for a few hours, then wipe the excess water off the wood. I start in the mid lower bout and crimp a pinky finger apart, amazingly the liner just takes a natural curve. Then for the waist I crimp the other side of the liner and the curve reverses, change to the other side for upper bout.
It gets trimmed to fit snug from top to bottom of the side, then I use binder clips to clamp it to the rib to dry over night. No heat.
Images are resized automatically to a maximum width of 800px
RE: Next 19th c. Spirit guitar (in reply to estebanana)
quote:
I think my 19th century style guitars are starting to look pretty good on the inside. Imbued with some historical building points like crimped liners. If I may say so myself.
It looks beautiful.
I will risk venturing onto your lawn to ask a couple of questions.
Is the top centre seam having cleats, rather than a strip also a historical building point?
I see each kerfing block/peone has a dot on it. Is that do with evidence of it's construction?