Welcome to one of the most active flamenco sites on the Internet. Guests can read most posts but if you want to participate click here to register.
This site is dedicated to the memory of Paco de Lucía, Ron Mitchell, Guy Williams, Linda Elvira, Philip John Lee, Craig Eros, Ben Woods, David Serva and Tom Blackshear who went ahead of us.
We receive 12,200 visitors a month from 200 countries and 1.7 million page impressions a year. To advertise on this site please contact us.
|
|
|
RE: Bogdanovich´s method for flamenco guitars
|
You are logged in as Guest
|
|
Users viewing this topic: none
|
|
Login  | |
|

   
Richard Jernigan
Posts: 3436
Joined: Jan. 20 2004
From: Austin, Texas USA

|
 RE: Bogdanovich´s method for flamen... (in reply to Tom Blackshear) RE: Bogdanovich´s method for flamen... (in reply to Tom Blackshear)
|
|
|
quote:
ORIGINAL: Tom Blackshear
Andy, correct me if I'm wrong but my memory goes back to Yuris Zeltins creating the cross stiffener for the top, which I think actually impedes some of the fuller effect of tonal quality.
I say this as I had access to a 1977 Miguel Rodriguez classical guitar with the converted stiffener, in and out of the guitar quite a few times over the years, and I can attest that the guitar sounded better without it.
And I think that Yuris might agree that most traditional Spanish guitars will collapse between the sound hole and the bridge to a certain point, then stop when they reach their point of resistance to string torgue.
I remember years ago when some master builders would say: If the top doesn't bend a little in this area, then it is not a good guitar :-)
A friend had a spruce/Brazilian Contreras Sr. "doble tapa" from the early 1990s, which had a cross stiffening brace for the top between the bridge and the soundhole.
The "doble tapa" was actually a spruce double back. The cross stiffener was a piece of rosewood that went from the treble to the bass side of the lower bout, maybe 5/8" below the top. A block of spruce resting on the cross brace contacted the top.
While in Madrid in the early 2000's my friend visited the Contreras shop at Calle Mayor 80. He mentioned the cross brace to Pablo ("Manuel Contreras II), who offered to remove it at no charge.
I liked the guitar better without it. It had a fuller tone.
RNJ
|
|
|
|
REPORT THIS POST AS INAPPROPRIATE |
Date Apr. 11 2020 2:18:26
 |
|

   
Richard Jernigan
Posts: 3436
Joined: Jan. 20 2004
From: Austin, Texas USA

|
 RE: Bogdanovich´s method for flamen... (in reply to Tom Blackshear) RE: Bogdanovich´s method for flamen... (in reply to Tom Blackshear)
|
|
|
quote:
ORIGINAL: Tom Blackshear
quote:
As said, Yuris fixed the problem of a collapsed top with a floating bar.
Yuris is a great guy and full of ideas how to make things better. The floating bar was his thought on how to keep the Rodriguez guitars with thin tops, from collapsing any further, thereby damaging their collect-ability.
My friend said that when he asked Pablo Contreras whether the top of his guitar was any different from those without the bar, Pablo assured him they were the same.
I never measured the top of my friend's guitar, nor that of my own 1991 spruce/Brazilian Contreras Sr. doble tapa, but I don't think mine is thin. Both have a brilliant, penetrating tone, which I find a little lacking in warmth. Maybe I would like them better in a bigger room than my 14x22-foot practice room, with high ceiling and hardwood floor.
RNJ
|
|
|
|
REPORT THIS POST AS INAPPROPRIATE |
Date Apr. 11 2020 23:38:56
 |
|

   
RobF
Posts: 1621
Joined: Aug. 24 2017

|
 RE: Bogdanovich´s method for flamen... (in reply to Richard Jernigan) RE: Bogdanovich´s method for flamen... (in reply to Richard Jernigan)
|
|
|
I have a 1980 Contreras Blanca in dire need of attention. It’s signed by him and shows evidence of the supports for a transverse bar across the lower bout stuck on the sides, although the bar is long gone. I’m not sure if the supports for the bar were original as they’re pretty sloppily done.
The guitar is in need of repair and I bought it quite cheaply as a fixer-upper. It was originally a peghead, but had a poorly executed conversion done to it. I have to clean up the conversion slots, fill and redrill the tuner holes, replace the fingerboard and straighten the neck while I’m at it, repair cracks in the top and back, and that’s about it. But the guitar sounds super good, loud and flamenco, the high ‘e’ is something else, so it’ll be worth doing the restoration. It’s also pretty funky looking, in a good way.
It’s been set aside for years awaiting me having the time and inclination to tackle the job. I’ll pull it out of its case over the next few days and have a closer look, take some measurements and tracings, etc.. Maybe it would be a fun isolation project, kind of like a present to myself for all my good behaviour.
|
|
|
|
REPORT THIS POST AS INAPPROPRIATE |
Date Apr. 12 2020 0:15:43
 |
|

   
Richard Jernigan
Posts: 3436
Joined: Jan. 20 2004
From: Austin, Texas USA

|
 RE: Bogdanovich´s method for flamen... (in reply to RobF) RE: Bogdanovich´s method for flamen... (in reply to RobF)
|
|
|
I bought my doble tapa from Manuel Sr. in the summer of 1991. I knew I was heading to Kwajalein in the central Pacific, and I wanted a professional quality classical to take with me.
I tried out instruments in a small back room at the Calle Mayor 80 shop, while Manuel Sr. stood by. He had lost an eye to the illness which eventually took him, but he was at the shop, kind and friendly as always.
In the rack in the room was a spruce/cypress blanca. I picked it up it and played for a while. I liked it a lot. At the time I had not played much classical, so my flamenco chops were a good deal better.
Manuel Sr. immediately recognized Ramon Montoya's Rondeña, saying he liked it a lot. I took it to mean the piece, not necessarily my playing. He asked about a Mario Escudero soleá I played. When I told him who I had copied the piece from, he said he wasn't very familiar with Escudero's work, but it was a nice piece.
As I left, Manuel's niece, who minded the counter out front, mentioned she was going to Juilliard in the fall to study 'cello. When I congratulated her, she said, with a tear in her eye, that she would miss her uncle.
RNJ
|
|
|
|
REPORT THIS POST AS INAPPROPRIATE |
Date Apr. 12 2020 1:46:58
 |
|

   
RobF
Posts: 1621
Joined: Aug. 24 2017

|
 RE: Bogdanovich´s method for flamen... (in reply to mango) RE: Bogdanovich´s method for flamen... (in reply to mango)
|
|
|
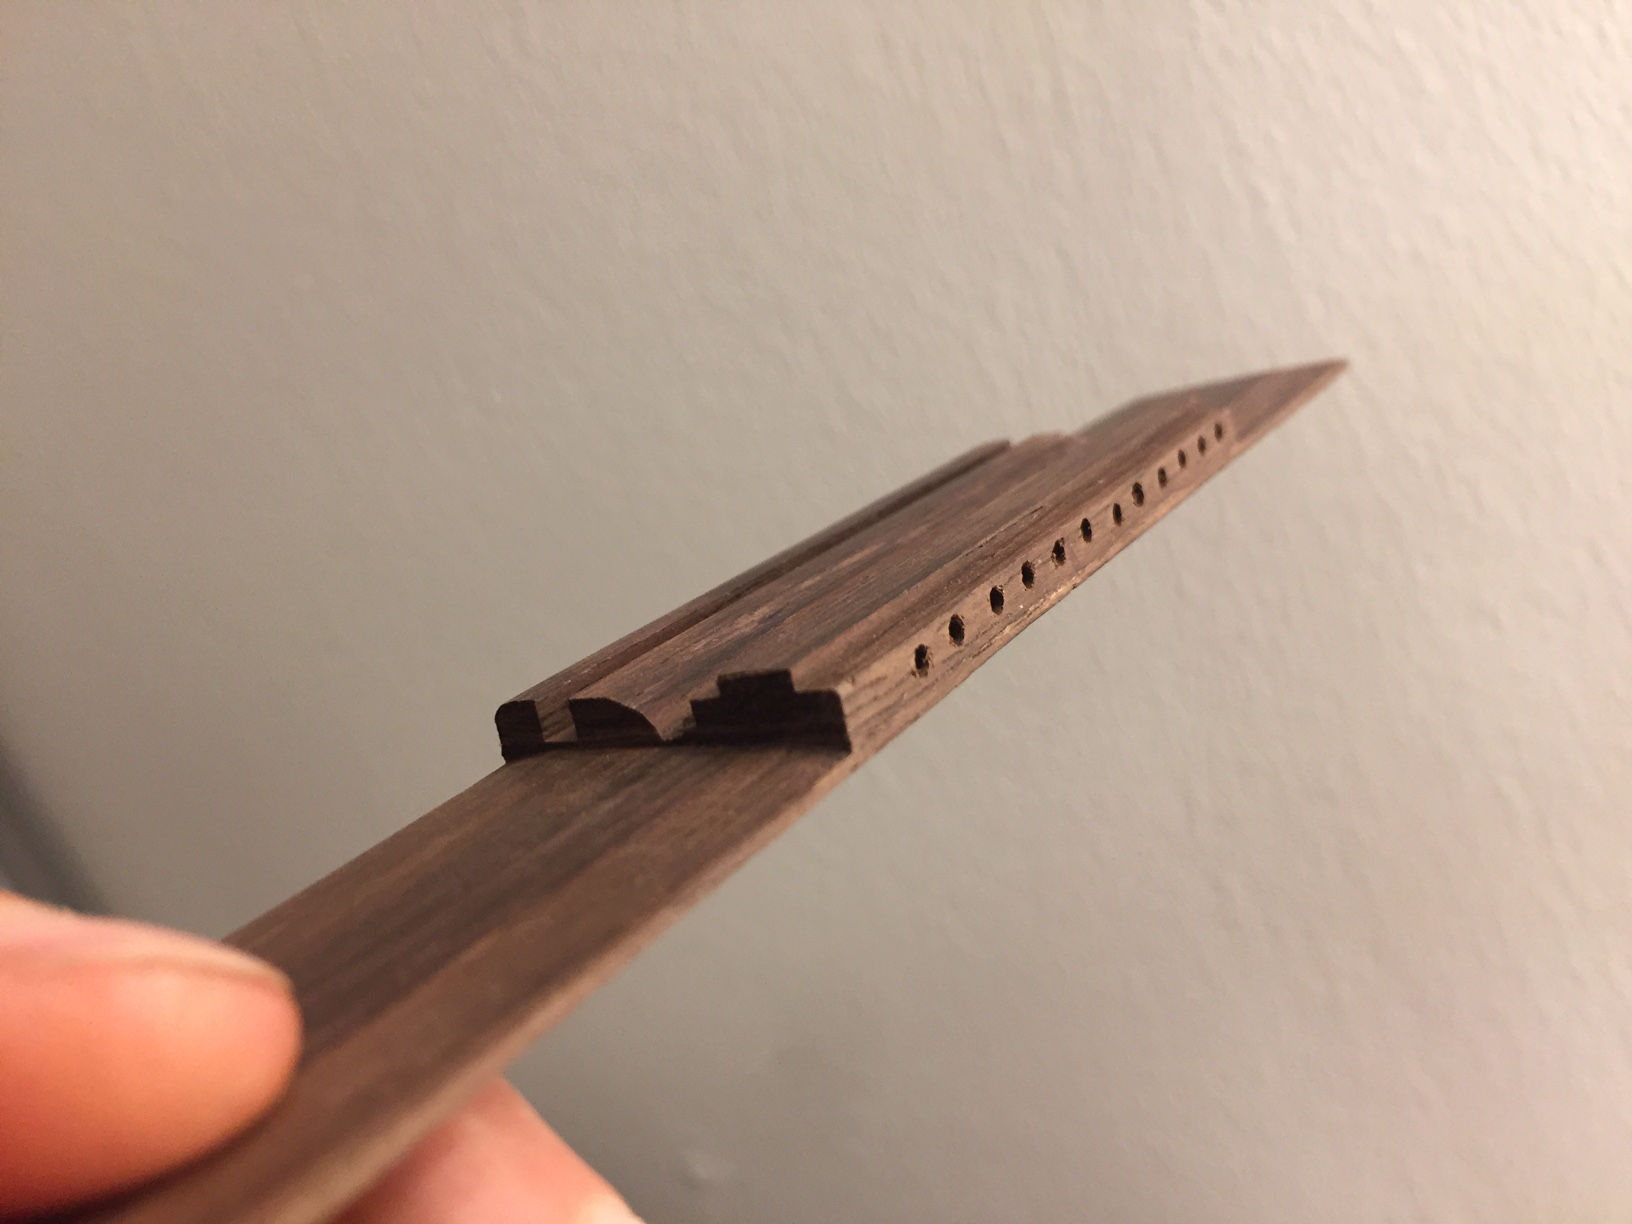
I think you may want to analyze your reasons for having the string holes very close to the soundboard before committing to the decision. I assume it’s to achieve a reasonable break angle, but in reality, something along the lines of 15 degrees is sufficient. There’s no practical need to go further. As a matter of fact, too much break angle just breaks strings. Maybe that’s why it’s called “break” angle, lol.
The problem is if the holes are really close to the top and you drill straight across then you will have to do some serious undercutting to clear the holes on the saddle side. And, if you angle the holes upwards to reduce the undercutting then one has to question why the entry point at the back is so low to start with. What is being gained?
It’s best to determine a placement that will allow sufficient wood under the tie block laminate to be practical both for tying the string, as well as having structural integrity. The holes should be high enough off the top to allow ease of access for your fingers, as well as not being so close that the top is at risk of damage every time a string is changed. Maybe 3mm for the bottom of the hole is a good starting point. With a 7mm tie block and, say, a 1.5mm bone insert, that will place the hole roughly between the bottom of the bridge and the bottom of the bone insert and will give about a 3mm space to thread the string underneath itself when tying. On the other side there will be a rise to the saddle of approximately 3mm or so, if the string height above the top is 8mm. If you want to increase break angle from that, consider moving the saddle slot towards the tie block, as opposed to lowering the holes. Just a thought.
Some makers angle the hole towards the top on the saddle side to increase break angle, leaving the entry point at the back higher. To each their own, but it will increase the undercut, where a 12 hole bridge might be a better idea, if break angle is really such a concern (it isn’t, IMO). Angling it down like that could also lead to more string breakage.
Just thinking out loud, so my numbers might be a tad off...as Ethan said in response to a different question, making a full size drawing isn’t a bad idea.
*edit* come to think of it, I’ve also at times angled the holes downwards too, in order to follow the line of the tie block when I’ve done a low tie block with a forward slant. On those occasions, the reason is so that the holes will clear the tie block’s bone insert at the saddle side of the tie block more than to increase break angle. Forgot about that. The take-away here is to check the line of the holes from the side before drilling to ensure you have proper clearance.
|
|
|
|
REPORT THIS POST AS INAPPROPRIATE |
Date Apr. 24 2020 23:01:52
 |
|

   
RobF
Posts: 1621
Joined: Aug. 24 2017

|
 RE: Bogdanovich´s method for flamen... (in reply to mango) RE: Bogdanovich´s method for flamen... (in reply to mango)
|
|
|
Looking good. Even if you have misgivings, it’s good practice to complete the bridge, regardless, then evaluate the result. The strings will go a long way to mask little discrepancies in the hole spacing and, once on, I suspect nobody but you will notice. Mind you, it will probably drive you nuts, lol. But carrying through to the end is good and might bring to light some more info, and can help clarify things if a second attempt is done. Plus, carrying through may also reveal that everything is acceptable, and a second attempt unnecessary.
A little concerned about the wings, however. Are they 4mm? It can be helpful to sketch the curve on the side of the wing before starting. That can give an idea of how deep the saddle slot can be without compromising the depth of the wing. Remember, the bridge is also a brace; it doesn’t hurt for it to have some mass, there is a sweet spot to the weight and going lighter after that can work against it. Two lines drawn 1/3 of the way in from each edge as witnesses for the initial shaping can help ensure a consistent curve. They can act as starting points for facets shaped between the lines and the edges of the wing.
I liked HR’s advice about using a wipe of CA glue as a stiffener to help reduce bit wander; I’m going to try that hint out myself. I also only clamp the bridge vertically to maintain 90 degrees. I freehand the lateral movement but I use a piece of wood clamped across the table to act as a guide. I also made a little template with equally spaced guide holes, but I’m not convinced it’s any more effective than accurately placed awl punches.
One maker I know in Granada uses a punch with six equally spaced awls to mark the perforations. It’s basically just a piece of wood with the awl nails embedded in it. It also allows marking a consistent distance from the soundboard when rested on the bench and the bridge brought up to it.
|
|
|
|
REPORT THIS POST AS INAPPROPRIATE |
Date Apr. 28 2020 13:10:05
 |
|
 New Messages New Messages |
 No New Messages No New Messages |
 Hot Topic w/ New Messages Hot Topic w/ New Messages |
 Hot Topic w/o New Messages Hot Topic w/o New Messages |
 Locked w/ New Messages Locked w/ New Messages |
 Locked w/o New Messages Locked w/o New Messages |
|
 Post New Thread
 Reply to Message
 Post New Poll
 Submit Vote
 Delete My Own Post
 Delete My Own Thread
 Rate Posts
|
|
|
Forum Software powered by ASP Playground Advanced Edition 2.0.5
Copyright © 2000 - 2003 ASPPlayground.NET |
0.078125 secs.
|


 Printable Version






 New Messages
 No New Messages
 Hot Topic w/ New Messages
 Hot Topic w/o New Messages
 Locked w/ New Messages
 Locked w/o New Messages
 Post New Thread