Welcome to one of the most active flamenco sites on the Internet. Guests can read most posts but if you want to participate click here to register.
This site is dedicated to the memory of Paco de Lucía, Ron Mitchell, Guy Williams, Linda Elvira, Philip John Lee, Craig Eros, Ben Woods, David Serva and Tom Blackshear who went ahead of us.
We receive 12,200 visitors a month from 200 countries and 1.7 million page impressions a year. To advertise on this site please contact us.
|

|
|
Building a Flamenco 7
|
You are logged in as Guest
|
|
Users viewing this topic: none
|
|
Login  | |
|

   
Ramón
Posts: 440
Joined: Feb. 23 2005
From: La Jolla, Ca
|
 Building a Flamenco 7 Building a Flamenco 7
|
|
|
Hola all,
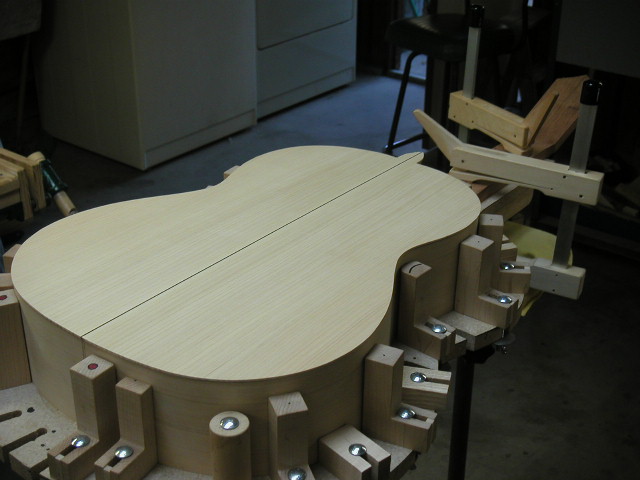
Well, I thought today would be the day to box it up and glue the back on, but there is ALWAYS some little detail I've missed...
Bob walks out into the workshop, and I said; "Well, I'm about ready to put the back on, I guess..."
He looks in 'the box', and says; "Have your side braces all glued in? Did you let in the side of you back linings for the crosss braces? Did you sand the insides up to 400 to 600 grit paper"?
"uuuuuhhhhh.....nooooooooo"...
So I spent the day cutting in the braces, and sanding, sanding, sanding. My 'flamenco thumb; is sore as hell, even using soft blocks, etc...
The school of thought in Romanillos style is that the finer the finish on the insides, the more the sound is 'bounced' or projected from the wood, where a rough, scratchy finish will absord sound. Like playing inside your house, and then playing in your bathroom.... Big difference!
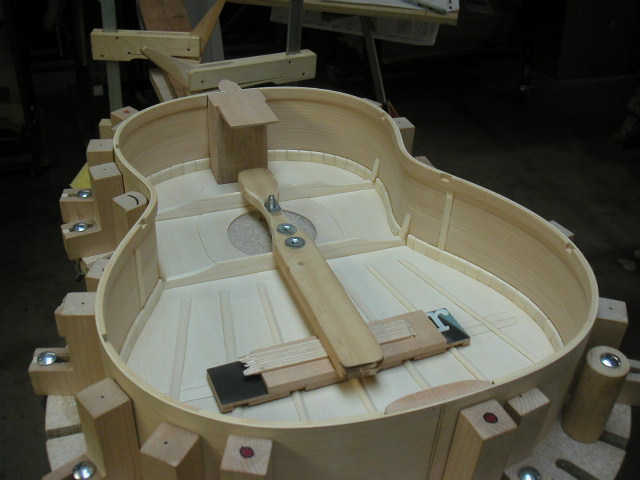
I saved my side braces a bit long, so once the back was aligned on-center, the cross braces sat over the sides a bit, so I took a thin pencil and blackened around each brace, so that I could cut them out pretty accurately.
There's several schools on this. Some glue the braces into the sides, then glue the back onto these and the side. I don't know...I might try this next time. You could definitely do a super-clean brace cutaway and glue-up.
Takes some time and 'eye' to shave the sides, heel, and foot, too, to dimensions, with no low spots, dips, bumps, etc., along the way. It's VERY easy to get a low spot at the waist, too, so make sure your block is long and keep the longest contact-length you can when sanding.... I also measured with a flexible steel mm rule in several areas, each side, making marks, to make sure I was pretty even side to side.
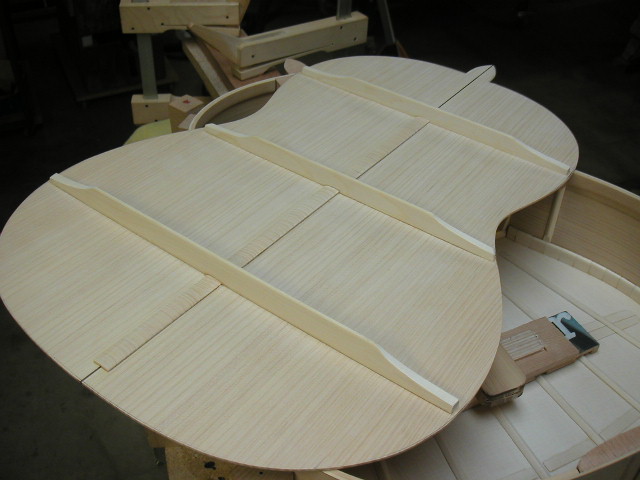
Here's the finished insides - finally...Euro spruce individual tentallones, spruce side braces, spruce on the back, and cypress backlinings.
R
Images are resized automatically to a maximum width of 800px
 Attachment (1) Attachment (1)
|
|
|
|
REPORT THIS POST AS INAPPROPRIATE |
Date Jun. 19 2006 3:45:21
 |
|
 New Messages New Messages |
 No New Messages No New Messages |
 Hot Topic w/ New Messages Hot Topic w/ New Messages |
 Hot Topic w/o New Messages Hot Topic w/o New Messages |
 Locked w/ New Messages Locked w/ New Messages |
 Locked w/o New Messages Locked w/o New Messages |
|
 Post New Thread
Reply to Message
Post New Poll
Submit Vote
Delete My Own Post
Delete My Own Thread
Rate Posts
|
|
|
Forum Software powered by ASP Playground Advanced Edition 2.0.5
Copyright © 2000 - 2003 ASPPlayground.NET |
0.078125 secs.
|
 Printable Version


 It certainly looks a lot neater than mine!


