Welcome to one of the most active flamenco sites on the Internet. Guests can read most posts but if you want to participate click here to register.
This site is dedicated to the memory of Paco de Lucía, Ron Mitchell, Guy Williams, Linda Elvira, Philip John Lee, Craig Eros, Ben Woods, David Serva, Tom Blackshear and Sean O'Brien who went ahead of us.
We receive 12,200 visitors a month from 200 countries and 1.7 million page impressions a year. To advertise on this site please contact us.
RE: hijos de vicente tatay (in reply to mecmachin)
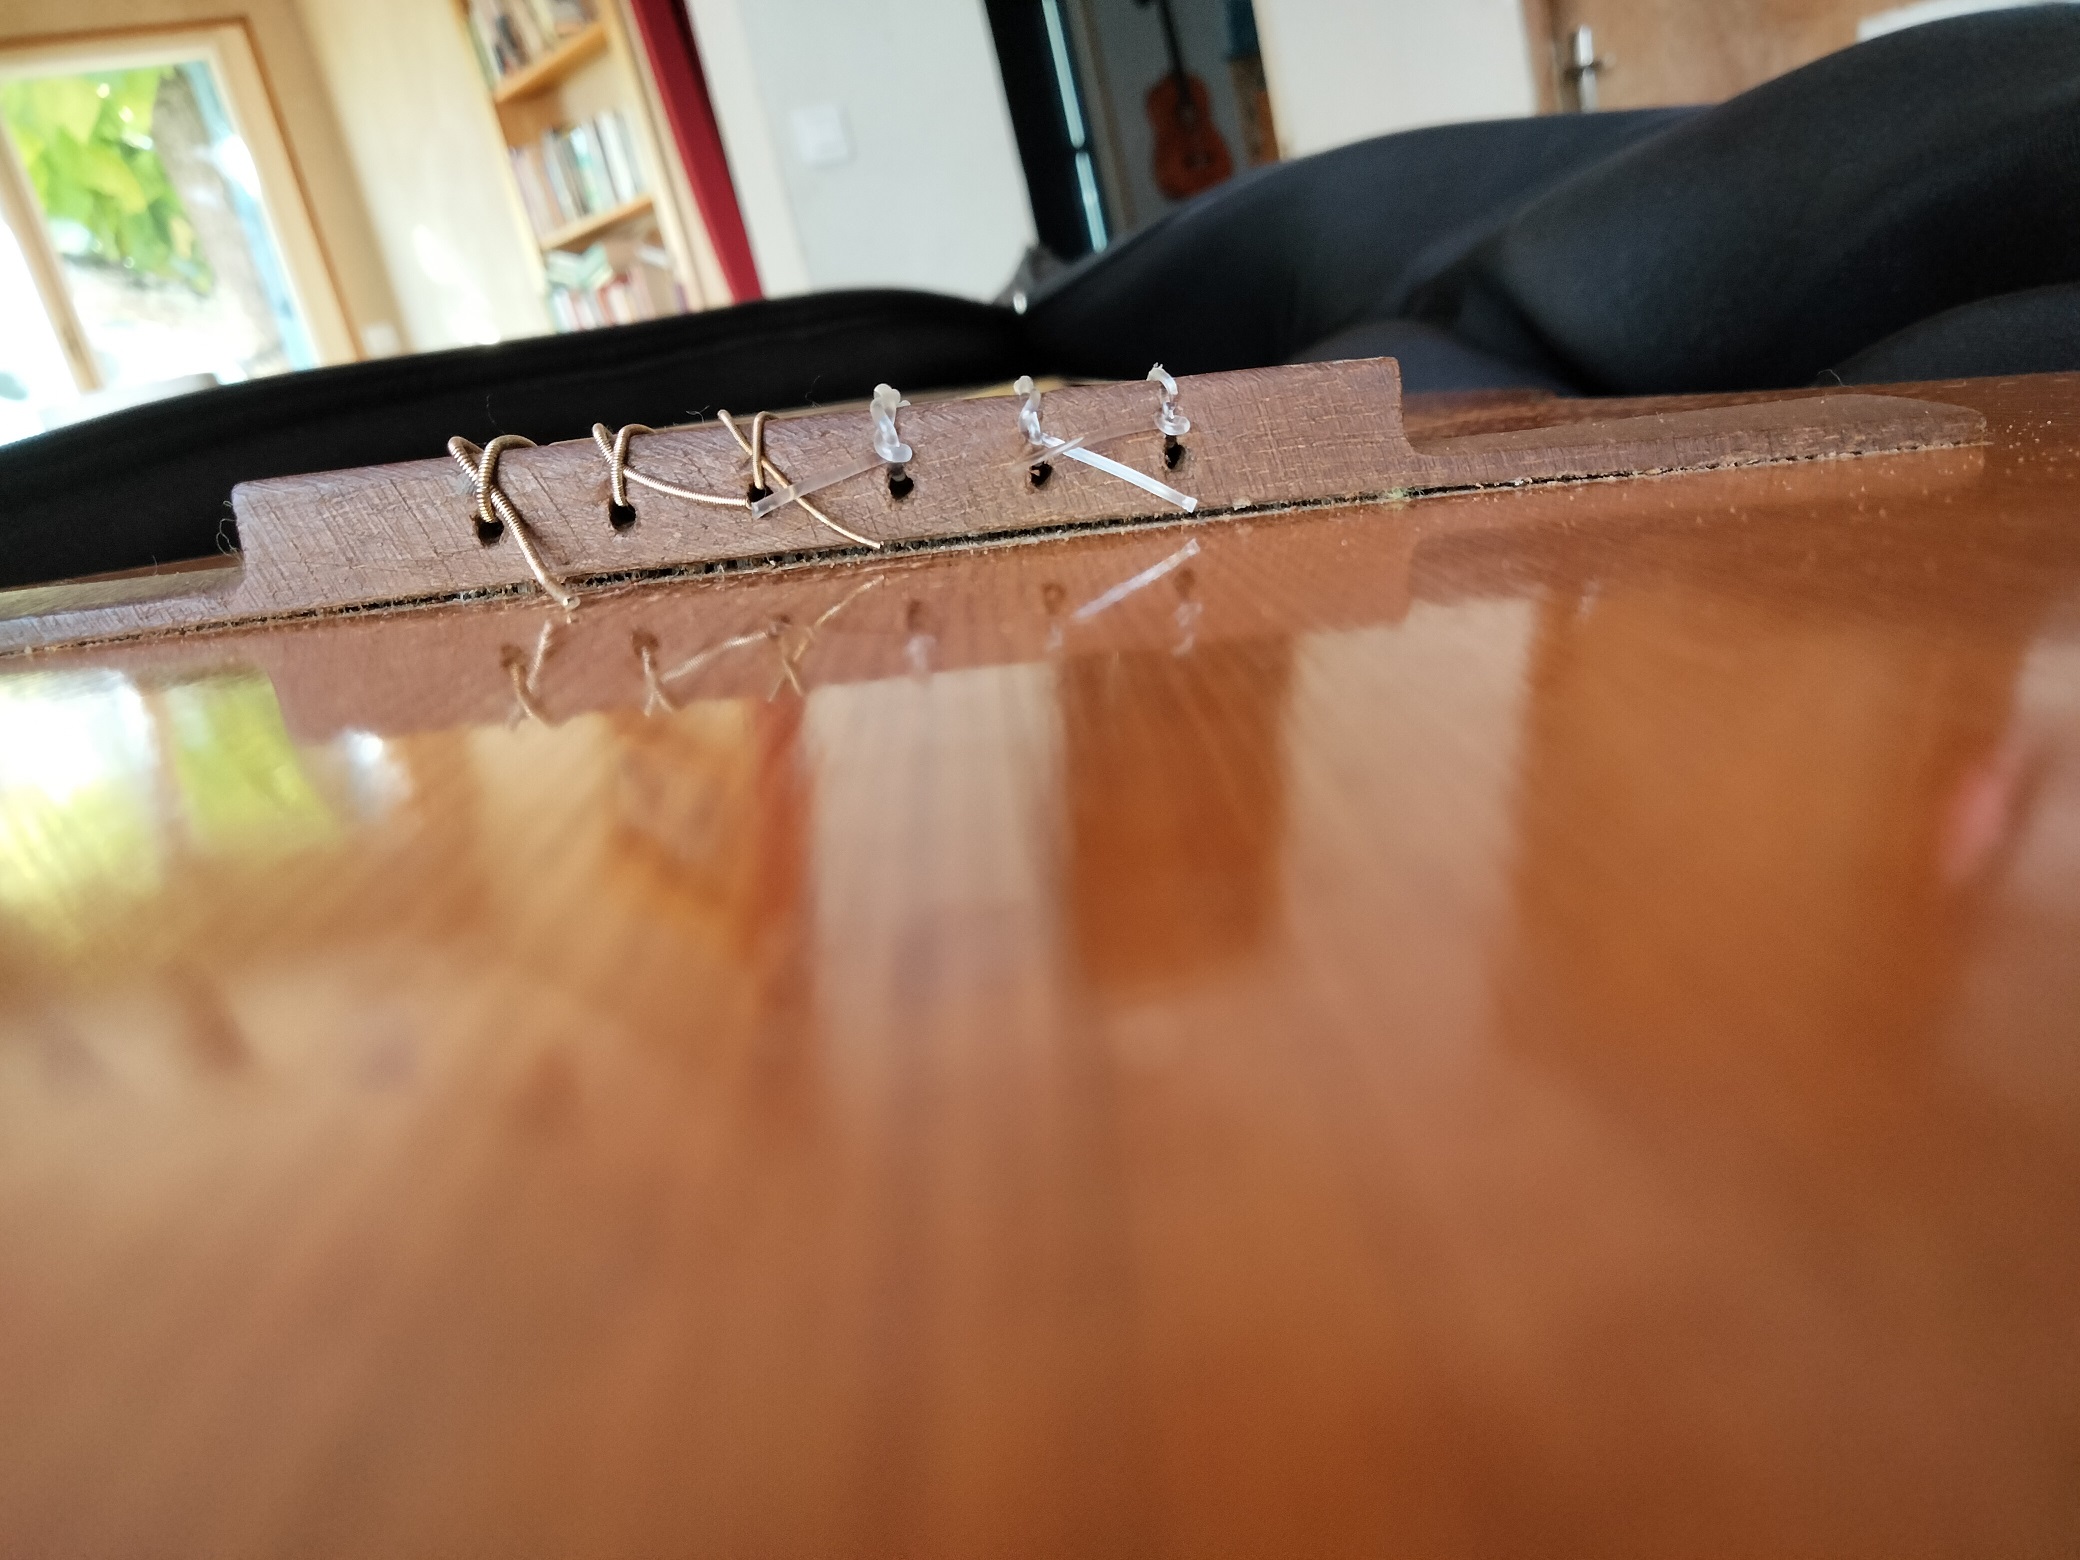
The bridge models at madinter aren't bad because you can choose the interstring spacing. https://www.madinter.com/es/nuevo-puentes-clasica-y-flamenca.html#676=918 The flamenco one with 185mm length isn't bad, but very flat. It certainly will need sanding as the soundboard isn't all flat. The classical one is 8mm high, that would be great, but it is too short (183), leaving 2mm at each side...
Images are resized automatically to a maximum width of 800px
RE: hijos de vicente tatay (in reply to mecmachin)
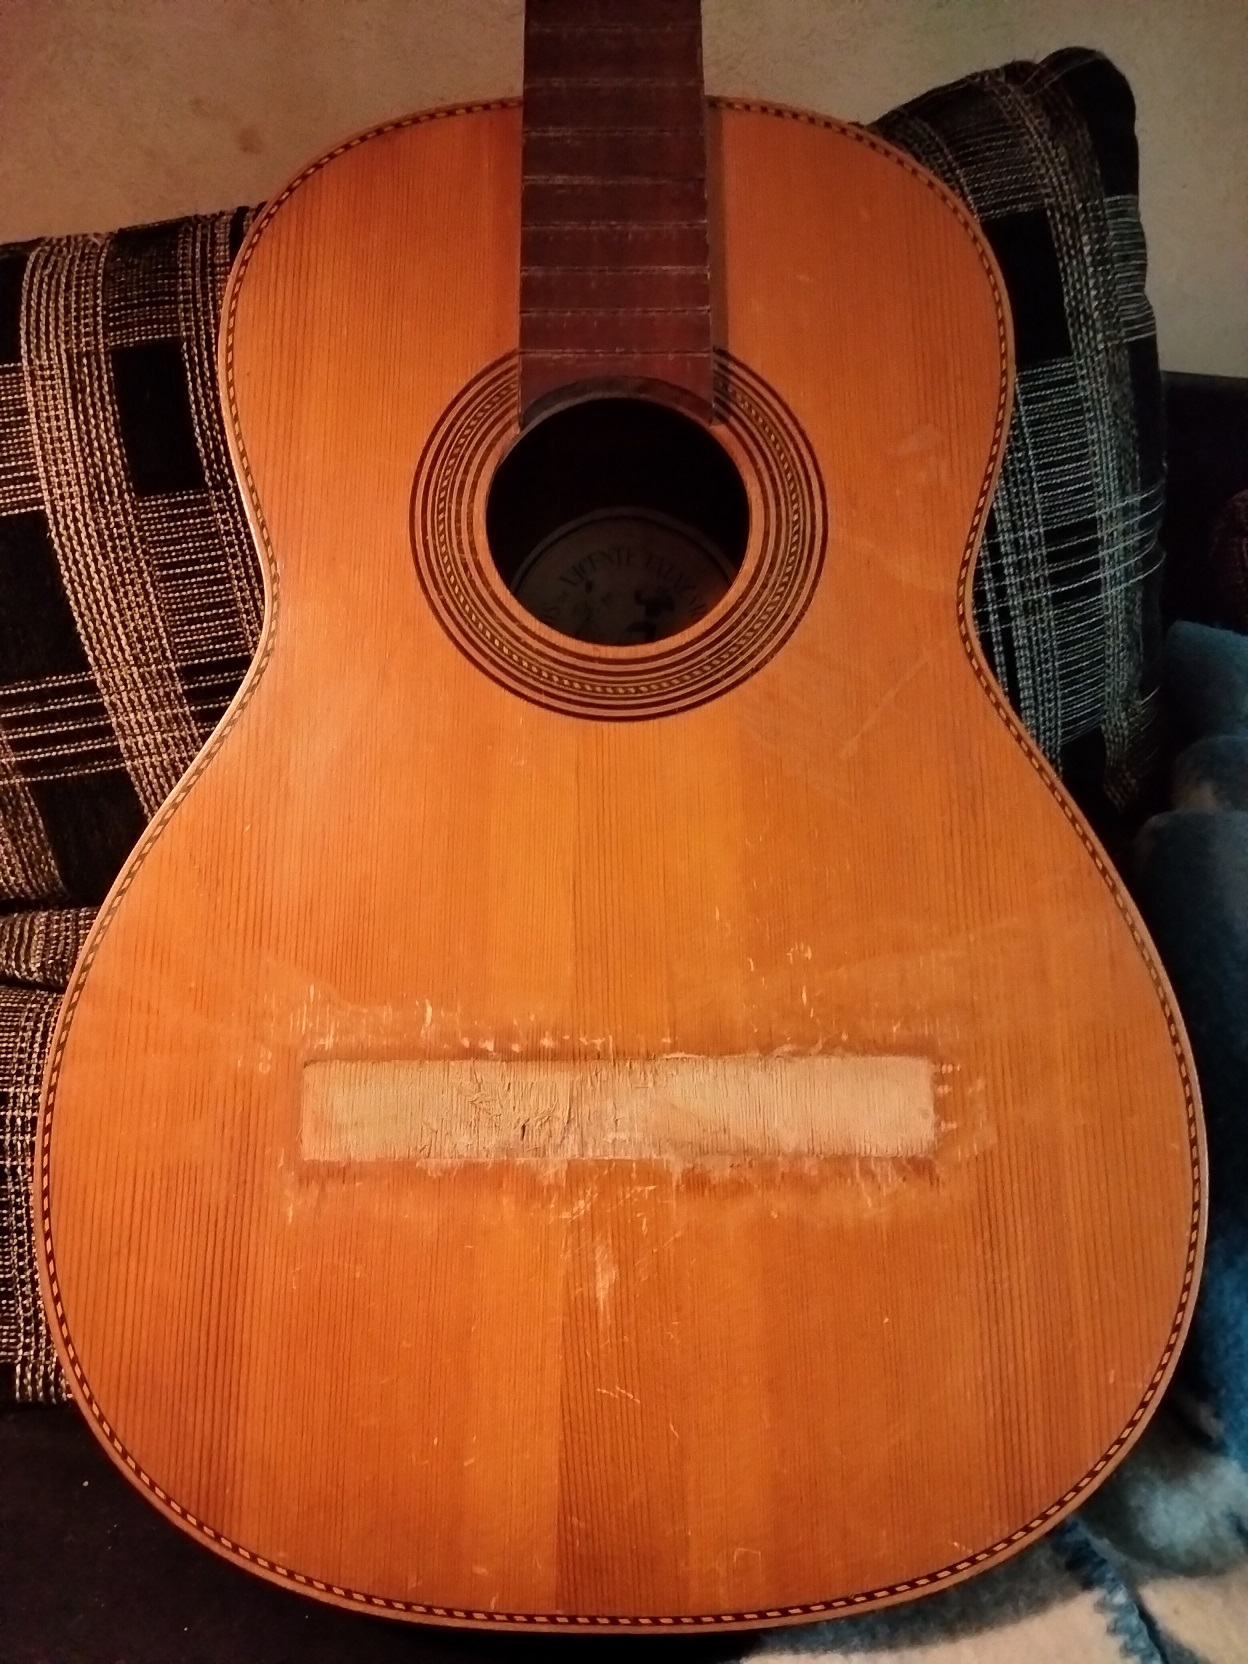
Just pop it off, clean it up, and glue it back on. Doesn't make sense to put a new one on, it's best to keep these things original. Honestly, it looks eminently repairable.
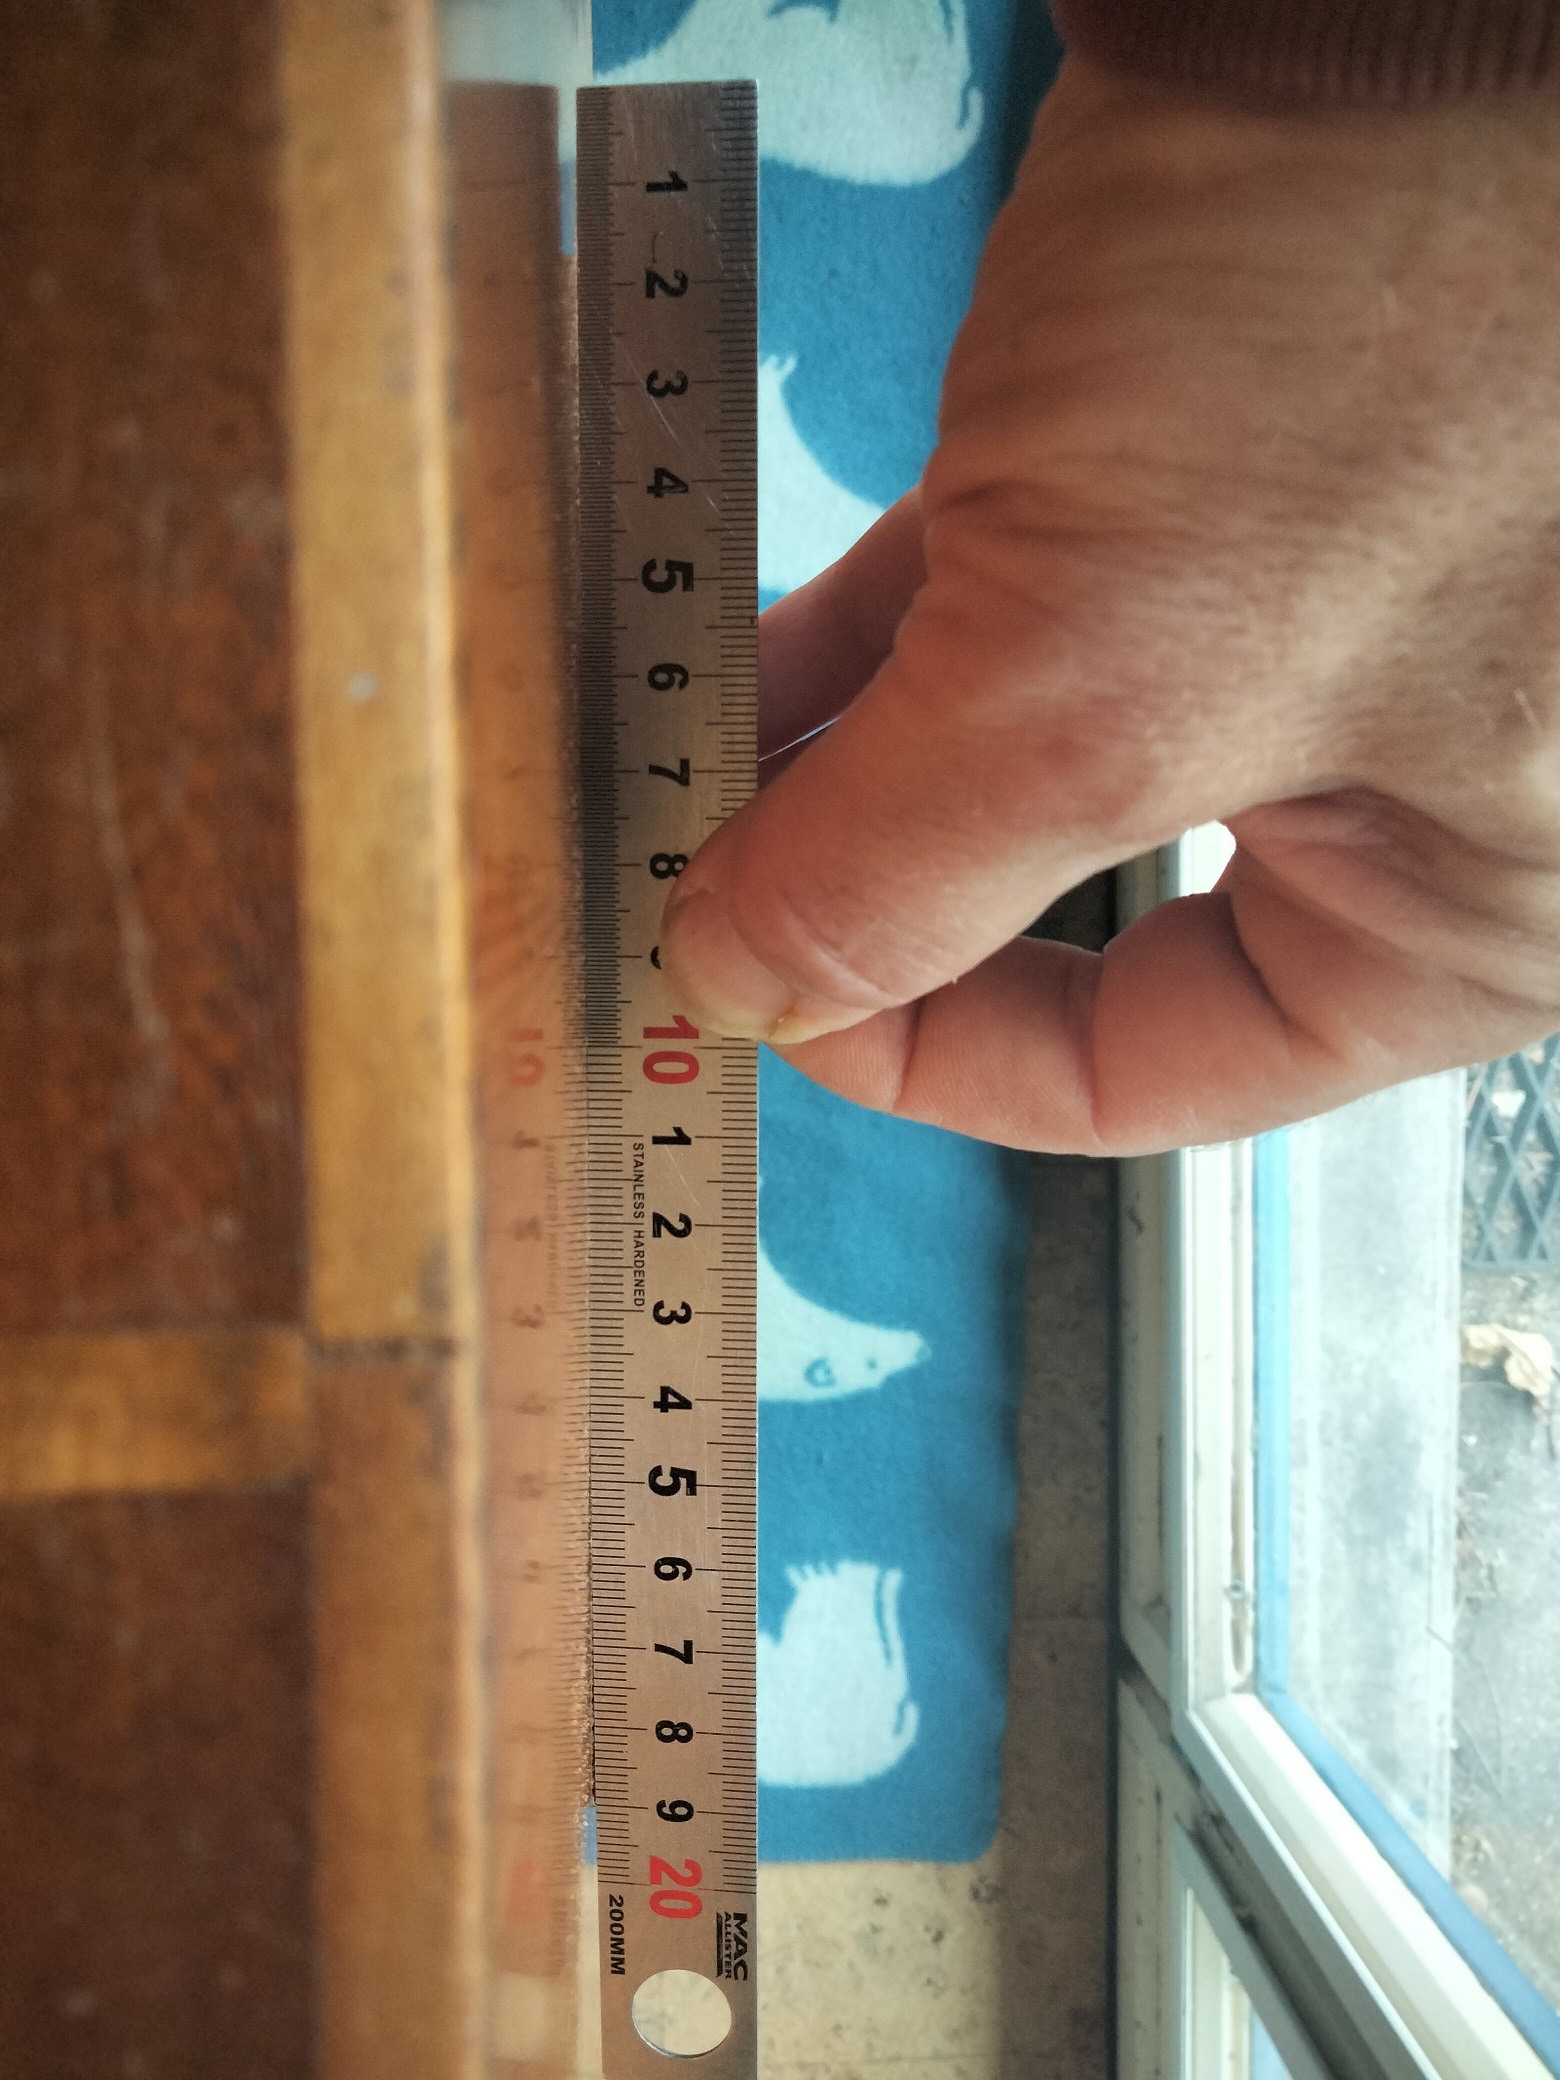
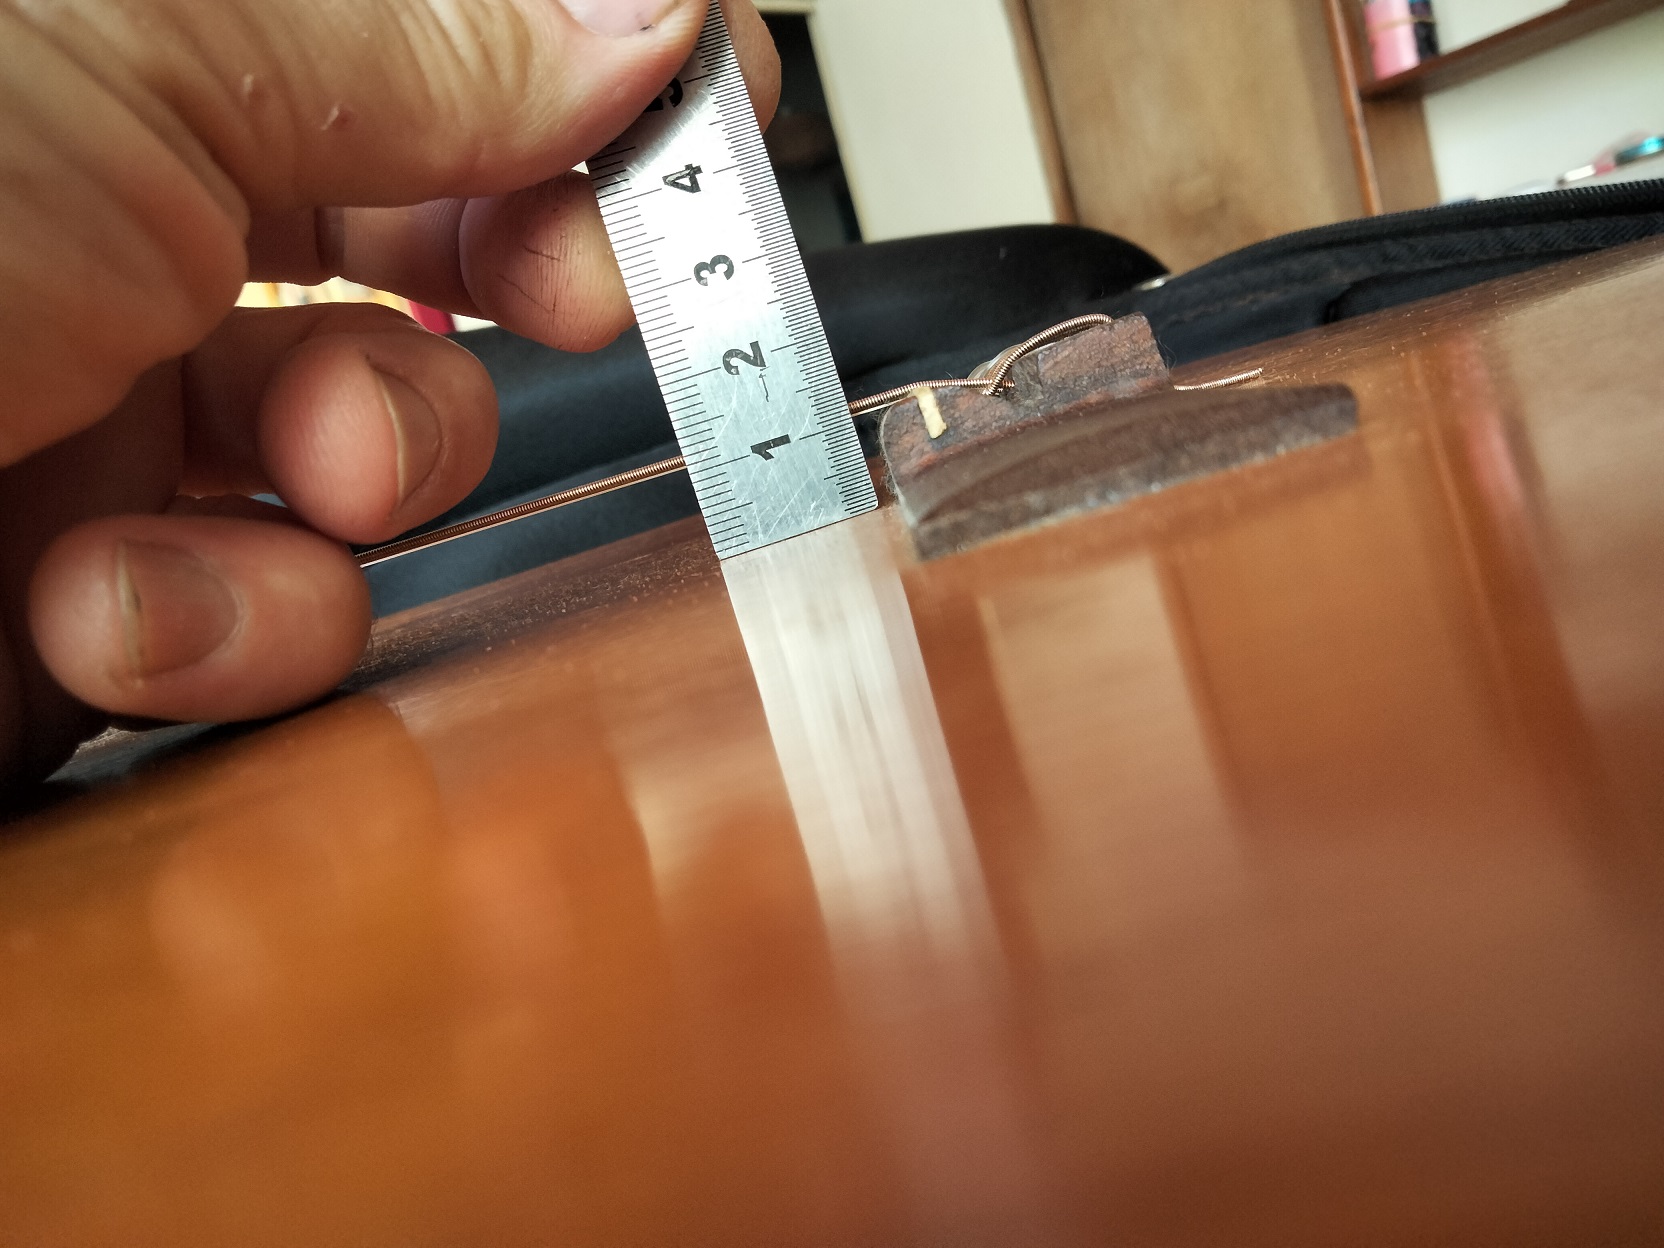
it makes sense insofar that the action is too high (like 5mm 6th string at 12th fret), the bridge itself being too high, and the breaking angle is pretty flat.
Pop it off with a bit of heat?
Images are resized automatically to a maximum width of 800px
RE: hijos de vicente tatay (in reply to mecmachin)
If you're looking to turn it into a flamenco action then you could probably get away with it by making a new bridge. If the action is now 5mm at the 12th then knocking 4mm off at the saddle gives you a nice 7.5mm string height there with 3mm at the 12th, which are nice numbers (on paper). So that's an idea. I'm not sure anyone sells flamenco dimensioned pre-made bridges, however, so you'll probably have to carve your own.
But that doesn't mean it's going to work. You still have to evaluate why the action is sitting at 5mm to start with. Was it by design or has the neck angle changed, or is it the neck itself that's out of whack? The reason I'm asking is just getting the action down at the bridge isn't going to do much good if the neck itself is in unplayable shape. So you could be looking at a fingerboard adjustment and refret as well as a new bridge.
You might be falling into one of those "lipstick on a pig" scenarios. The current bridge does have to come off and re-attaching it is no big deal, but the whole system should be analyzed before committing yourself to doing much more than that, IMO.
Oh, and for removal, for sure you'll need heat, some moisture, and a good thin spatula. Generally if you get the bridge up to about 145-150 degrees F the glue should start to loosen (depending upon what they used). If it's hide glue you'll have to introduce moisture and it won't hurt doing that if it's aliphatic too. You've got a lot of gap already to get in there with the spatula, just work sideways so it doesn't jab into the long grain. There's lots of helpful videos online about bridge removal, it's not so difficult if you're patient and don't force things, just take your time and let the heat do the work. Mark the spatula at less than the width of the bridge so you don't push it past the mark across to the other side and muck up the finish. Mainly be careful about not imbedding the spatula into the top wood when you work with the grain as you can go right through the top. It can feel just like you're pushing against glue, so that's why it's best to work sideways when possible and give the heat a chance to loosen everything up.
One last thing...if it's held on with hide glue sometimes you can just knock the bridge off with a sharp rap. I've only heard that it can be done that way, however, I've never had the guts to try it myself. But sometimes that's all it takes (apparently).
Posts: 4848
Joined: Aug. 9 2006
From: Iran (living in Germany)
RE: hijos de vicente tatay (in reply to mecmachin)
Is it really worth it to invest money and lot of effort in to this guitar? Unless it's just a fun project I mean these are very cheap factory beaters which sell brand new for 150 to 250 dollars.
RE: hijos de vicente tatay (in reply to mecmachin)
I’d just make some hot hide glue, put the bridge under a hot light for 15 minutes and use pallet knife to shove a whole bunch of hide glue in the seam. Then put a few clamps on it. I’ll last another 50 years.
Then you could just operate on thr bridge in place. Take some cardboard from a shoe box and cut a hole the exact size as the bridge and put it over the top and tape it down with the bridge peaking out of the hole. A mask to protect the top. Use a chisel or plane and cut the tie block lower until it’s just above the string holes, glue a thin piece of something hard on top of the tie block. Viola!
Take out the saddle and shave down the saddle hill with a chisel or plane and reshape it into a dome shape. Take off about 3mm- then put the saddle back in and shave down 2mm off the saddle.
If you did that you’d get a 4mm string height at the 12th fret on the bass E
Break angle? Fill the string holes with toothpicks and super glue. Buy a long 1.5 mm drill bit at Ace Hardware. They used to sell one about 6” long. Drill an extra hole 3mm to the right of each hole, voila! 12 hole bridge, that probably buys you 3 to 5 degrees break angle.
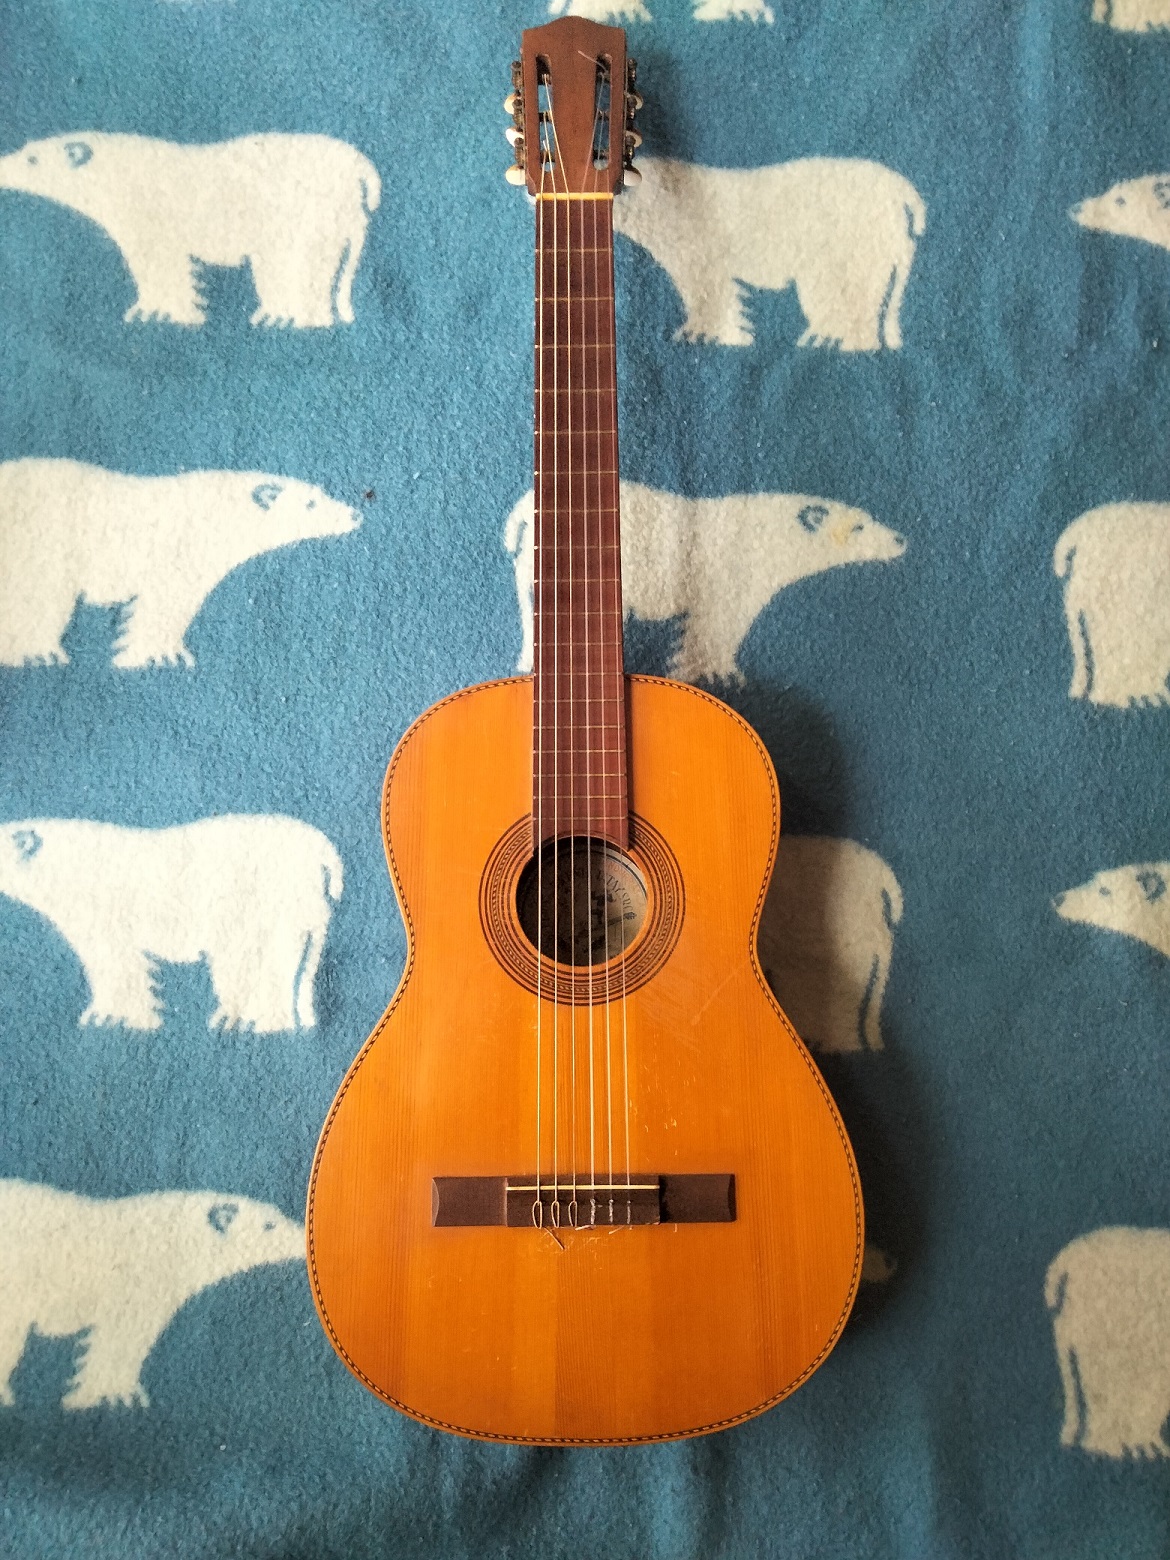
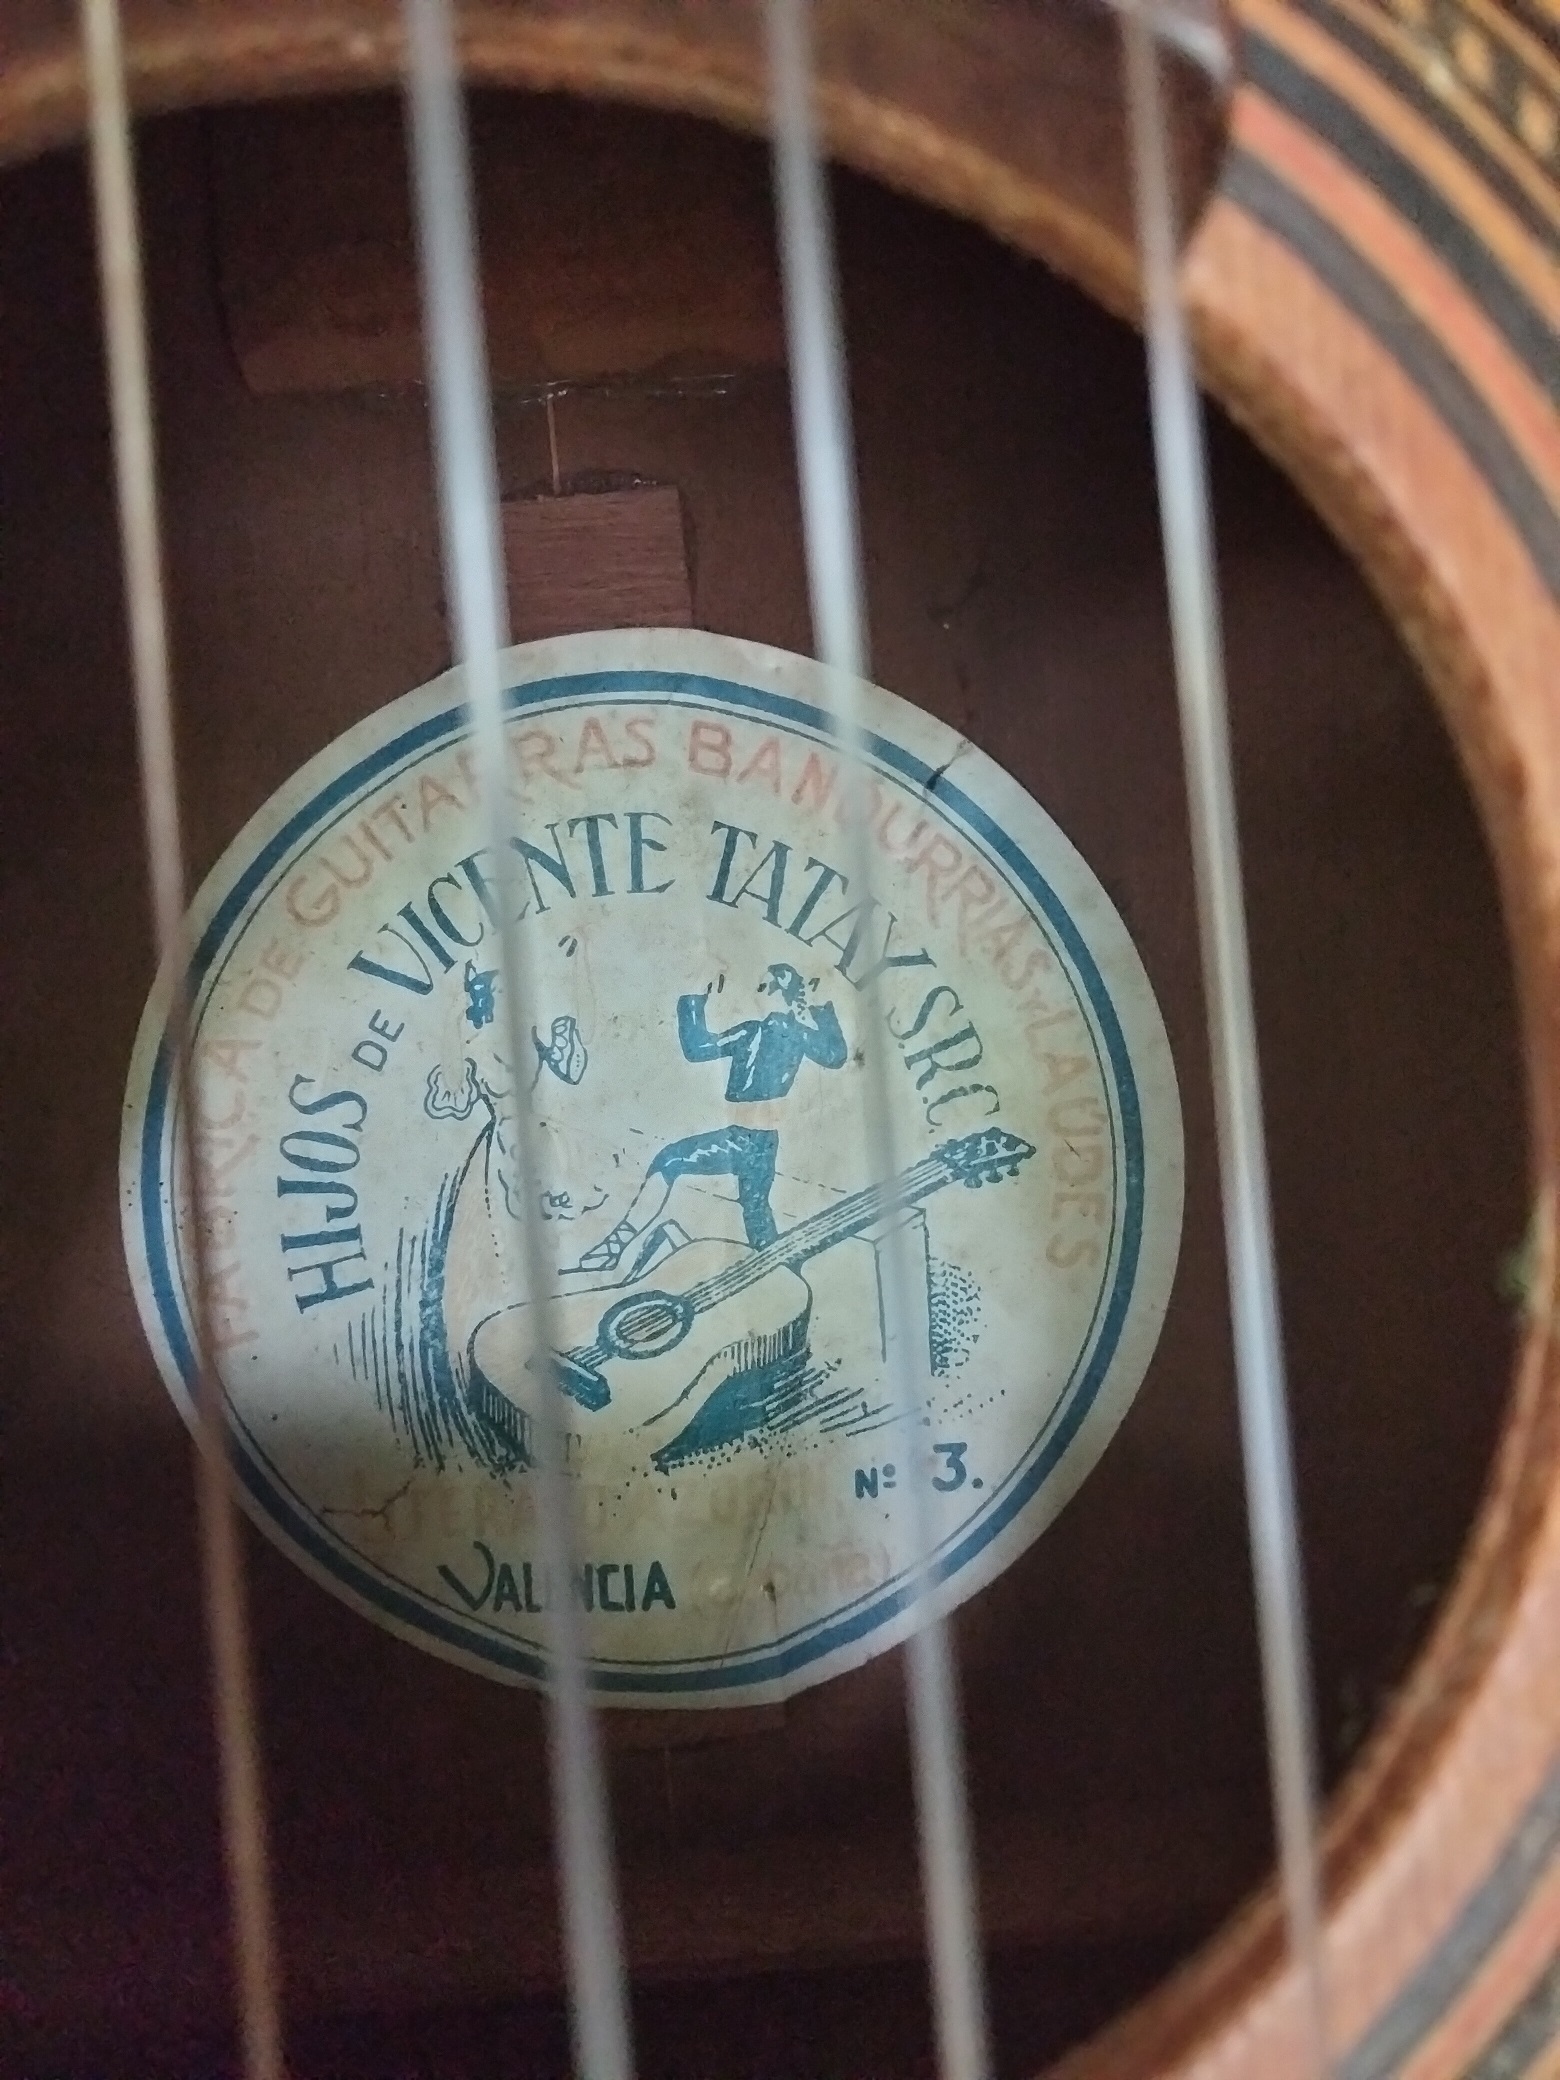
If it were me, however, I’d hang it on the wall as is and admire the beautiful Tatay label.
RE: hijos de vicente tatay (in reply to mecmachin)
Tatay guitars are cheap rough cut guitars, and mostly look like they were thrown together in somebody's dinner hour. You can tell how much they cared by the stamp they used to put on the back of the headstock, that was rarely central. E hijos means 'and sons' so it was built by his descendants.
Your high action is nothing to do with the bridge. It's likely the neck has too much relief causing the neck angle to be off. If that's the case, you can heat clamp it back, or even pull the frets and plane the fingerboard.
Then you'll need a new saddle for sure, and probably a new nut. The bridge itself just needs to be removed and reglued.
Is it really worth it to invest money and lot of effort in to this guitar?
I think, in the interest of science, he should rest a block of wood against the front of the bridge and give it a good whack with a hammer and see if it'll pop off without taking half the top off along with it. Or give the guitar to one of those arty dancers and they can flail away with it and eventually Mr. Windmill will bang it against something and then maybe the bridge will come off on its own.
The problem with trying to glue it back down "in situ" (is that even a word?) is sometimes the bridge will take on a curl along the bottom as it slowly lifts. Then no clamping in the world will get it back down. In those cases it has to be removed and the bottom shaved/scraped.
RE: hijos de vicente tatay (in reply to mecmachin)
Thank you guys for all the valuable input.
Well, the overall geometry isn't perfect, but not hopeless either. When pressing down the chord at first and last fret, there is less than 1mm of space in the middle of the neck. The neck itself looks straight, but the frets have a little concave bent, sooner or later refretting would be a good idea, but first I want the bridge issue to be solved. The original is 10mm + bone exceed, which I find too much.
I will meditate on this and keep you posted once a reasonable result is in view. I d certainy prefer being a guitarrista to being a guitarrero...
Posts: 16444
Joined: Dec. 14 2004
From: Washington DC
RE: hijos de vicente tatay (in reply to Firefrets)
quote:
Your high action is nothing to do with the bridge. It's likely the neck has too much relief causing the neck angle to be off.
It is a classical guitar man. That is how they are all built except in rare cases where the Luthier didn't care or notice the neck locked in position a little forward. For me 9mm is the cut off, above is a classical set up, below flamenco. It SHOULD be by design, but for whatever bizarre reason, many flamenco builders don't concern themselves with it too much. As one boasted to me before his build "I can hit any number I want in MY solera, you will see 8 mm and no buzzing". Final result? Way over 9mm and buzzing like heck.
Posts: 16444
Joined: Dec. 14 2004
From: Washington DC
RE: hijos de vicente tatay (in reply to Firefrets)
quote:
ORIGINAL: Firefrets
Is he wanting to change it from a classical to a flamenco?
Not so much as he needs to fix the action over the fingerboard issue. My point is you can see from the bridge it is set up for classical type neck angle. Likely the neck came forward or top sunk, since he said the neck was "straight". When this happens to flamenco guitars they typically have a ridiculous low bridge and people that don't get it scratch their head why it is so hard to play (he says 5-6mm fingerboard height).
RE: hijos de vicente tatay (in reply to mecmachin)
I agree with Ricardo and begrudgingly, oh so begrudgingly with Firenuts that it should checked for neck scooping. I assumed that the OP wanted to convert it to a flamenco action.
If neck is bowed it can be heated and bent back, or carbon fiber spars can be fitted into the neck under the fingerboard and pressed flat again with clamps and epoxy.
RE: hijos de vicente tatay (in reply to mecmachin)
These are learning curve guitars. Just make it playable to classical spec, otherwise you'll need to get your plane out if you want to replace the bridge.
1mm is quite a bit of relief.
And hey fatty - I'd rather be firenuts than grumpynuts.
RE: hijos de vicente tatay (in reply to mecmachin)
Good job. Now, before you go much further you could team up with sildxx and take a crash course in French polish touch up. That top is a prime candidate to learn on and would likely clean up nicely. But, practice on scrap wood first (important).*
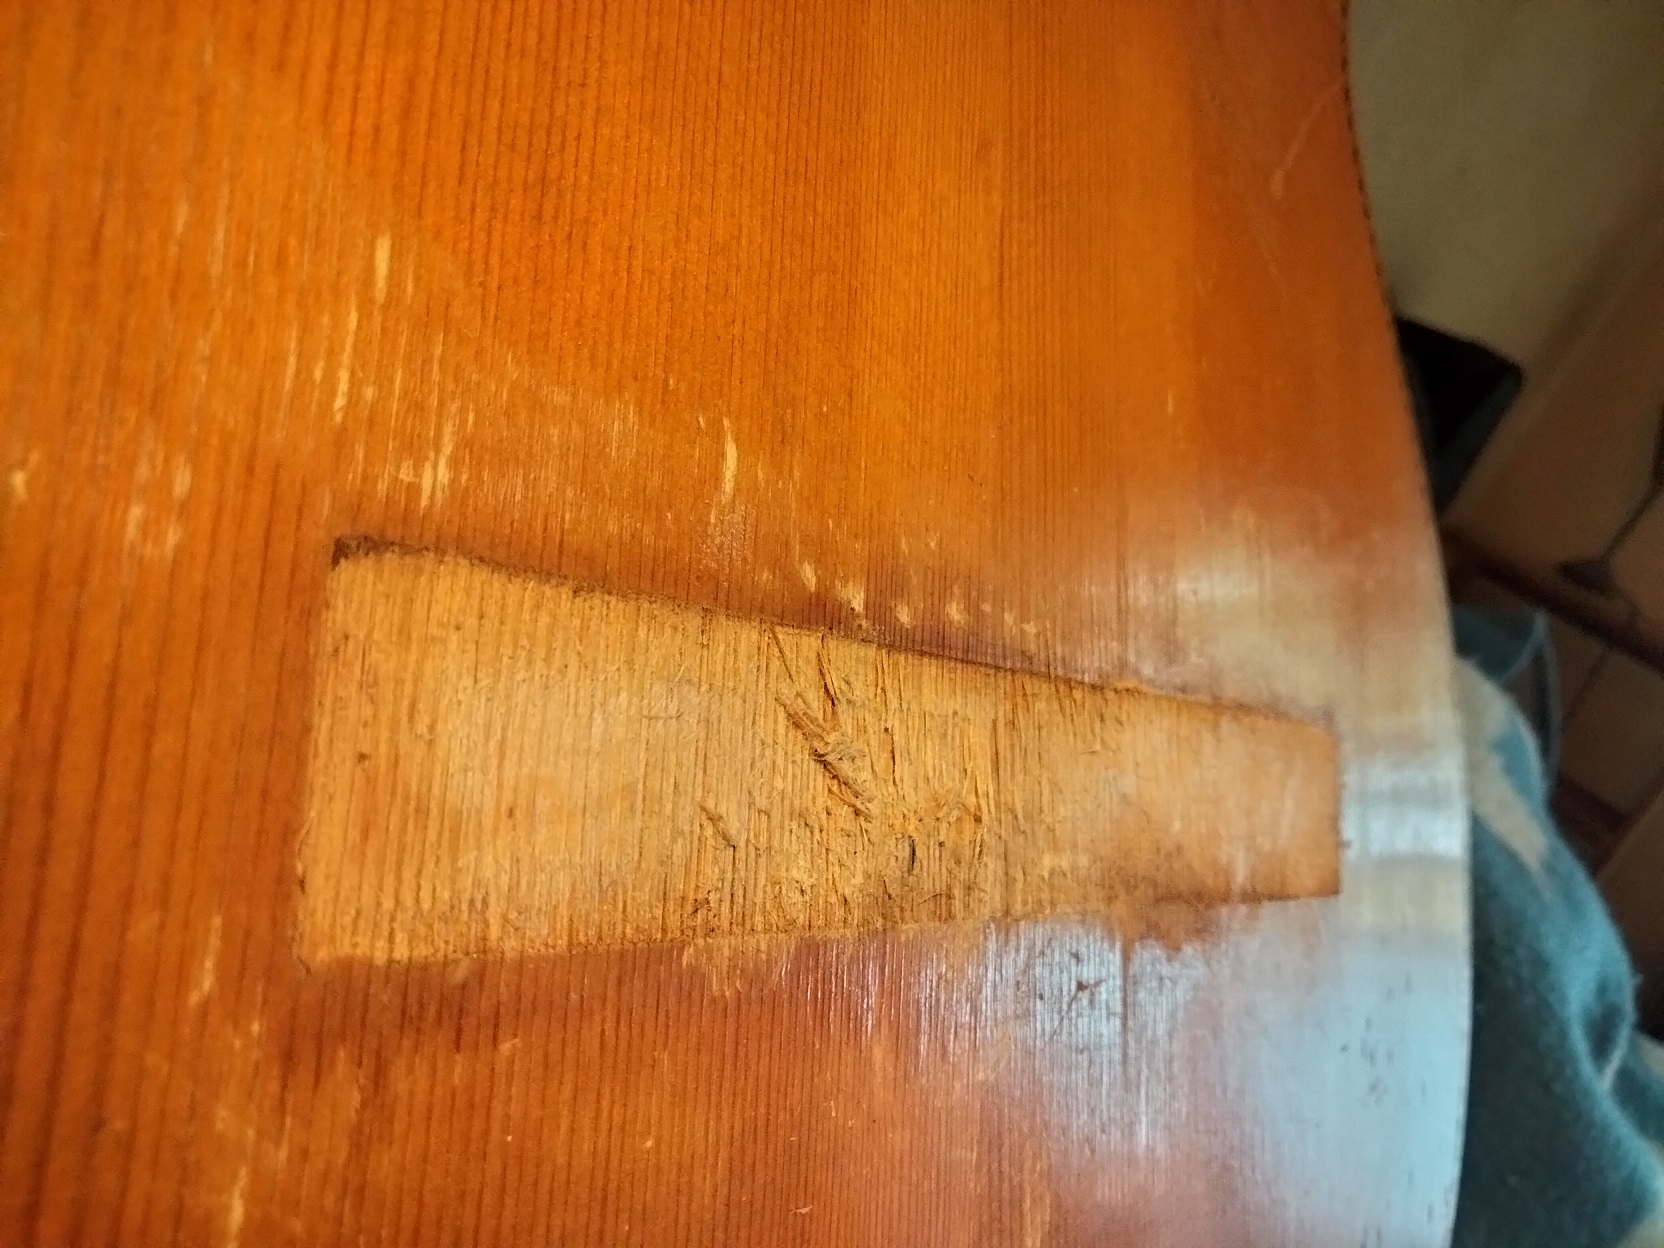
You did well with the bridge removal. Loose fibres can be reseated using some hot hide glue then the whole surface cleaned up. If you also use hot hide glue (recommended) to put the bridge back on then it'll meld with any HHG residue left on the top (although still clean up the area until it looks like bare wood). Don't forget to do a practice run with the clamping strategy as you'll need to work fast once the glue hits the wood. Also, gently heat both the bridge and top before applying the glue, clamp it overnight, and you'll be a happy camper, I'm sure. It's looking good!
* if it were me I'd just do what is called a stiffing style of application, where thinned shellac is brushed over the surface using a lightly charged fad moving along the direction of the grain. In other words, straight strokes, not circles. And just enough to even out the colour in the rough spots that happened from the spatula. You're not trying to resurface the top, the goal is mostly cosmetic and it's a case where a little bit can go a long way. Just use a light touch and remember to keep the fad moving. You'll be OK.
Oh...and if you do try it, you have to use broad strokes. Attempting to do localized FP touch up tends to end up looking splotchy.
thank you Rob for your support. I will definately try to follow your advice for reglueing the bridge. Regarding shellac touchup, hope it will work. The original paint a thin layer of something I don't know.
I should probably plane the fingerboard first and refret it, Is there a thread out there which shows minimum required tools and errors to avoid?
whow. I should have known it right from the start that this purchase would end up in lutherie.
RE: hijos de vicente tatay (in reply to mecmachin)
It's hard to say what the finish is...it's probably nitro, but that it seems to have bloomed a bit from the moisture when you removed the bridge does suggest it might be shellac. If you do put a skin of shellac over whatever it is, it's just to try to cover up the bare spots and hopefully refresh the look of it. The idea is just a touch-up not enough of an application to cause adhesion concerns or anything like that. But, for sure, it's a valid concern and I was actually having second thoughts about having posted that and then came on and saw you are also a little concerned.
Concerning planing before re-attaching the bridge...it's a judgement call based in what you're trying to achieve in the end. If it's to bring it to classical without doing much dimensional changes to the bridge it's probably better to put the bridge on first. Then take a piece of fret and file the nibs off the tang and you can use that in the 12th fret slot and take some real measurements as you plane. Or just account for the fret height, if not. You can get pretty darned accurate when planing with the bridge in place. Count on some pull from the strings when under tension, so if you want 4mm at the 12th, say, then aim for a little less. It's kind of hard to explain in words. If you do it before attaching the bridge it helps to make an elevation drawing of the whole system to clarify everything. It takes the guesswork out of it. Also, the drawing will really help if you want to take it further and aim for a flamenco set-up (which would likely require modifying the bridge).
At any rate, looks like you're on track with a fun project. I really enjoy these threads.
RE: hijos de vicente tatay (in reply to mecmachin)
As far as tools go, a good sharp plane or two (a high-angle block and something along the lines of a #4 or #5 are nice) and a straight-edge are pretty critical. A sanding block is good to have but those things never get anything truly flat and also can round the edges so planing is always better. Sanding is good for final clean-up however.
The straight edge is key because it tells you what's happening and where you're headed. And making a top protector out of some good stiff card stock is always prudent. 👍

 Printable Version


 New Messages
 No New Messages
 Hot Topic w/ New Messages
 Hot Topic w/o New Messages
 Locked w/ New Messages
 Locked w/o New Messages
 Post New Thread