Welcome to one of the most active flamenco sites on the Internet. Guests can read most posts but if you want to participate click here to register.
This site is dedicated to the memory of Paco de Lucía, Ron Mitchell, Guy Williams, Linda Elvira, Philip John Lee, Craig Eros, Ben Woods, David Serva, Tom Blackshear and Sean O'Brien who went ahead of us.
We receive 12,200 visitors a month from 200 countries and 1.7 million page impressions a year. To advertise on this site please contact us.
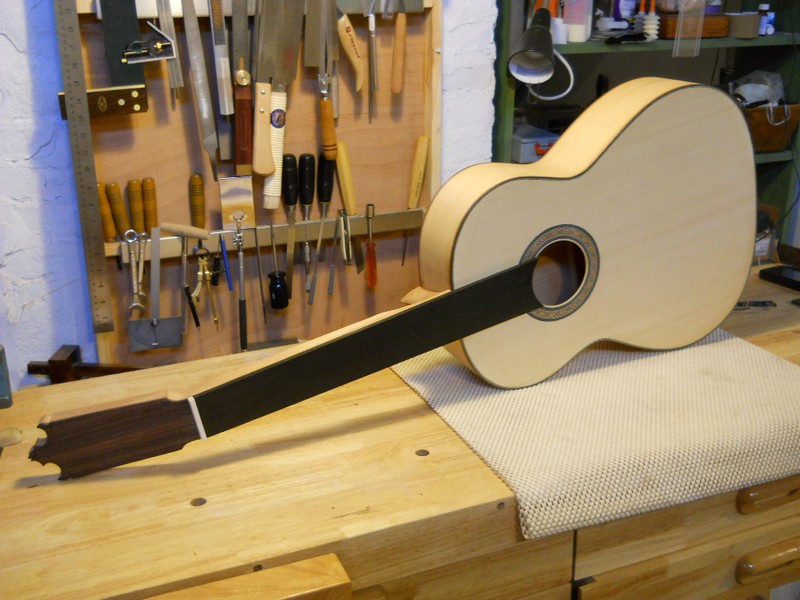
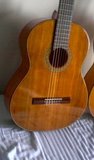
Its almost a guitar- finally! I have lots of photos but no internet at my workshop just yet so I will post them all soon when I finish.
Question:
What is the safest way to saw the fret slots? I am following Cournall's book for the most part and he cuts his slots with the fingergboard glued down and trimmed at the edges. I have done that but feel a little insecure about sawing along the edge of a combination square like he does. I have found that a nice brand new sharp saw can bounce and tear up the wood alongside the cut line. I don't want to mess up the nice new fretboard at this point - especially when it is attached!
Any help or advice on this please?
Do you guys epoxy the frets in or just hammer them in dry?
I want to finish this weekend so any final tips are really welcome... :)
Thank you again!
Images are resized automatically to a maximum width of 800px
I saw the fret slots on a table saw before attaching the fingerboard, but in your situation I would set a sliding bevel gauge to the correct angle and hold it in position so that the saw can jig against it (or even clamp it in position); also, use a depth stop on the saw, which could be a thin strip of wood clamped to the blade or even several layers of tape (and be sure of the desired relationship between the depth stop and the position or thickness of the bevel gauge).
Another way I have of accurately sawing to a line is to first knife the line, then deepen it slightly with the corner of a chisel, then use the edge of the chisel to cut a tiny strip of wood (of triangular cross section) out from a tiny distance away from the line to the bottom of the knife cut in the line. This way you can rest the saw blade against the shoulder created at the line. The kerf will be at one side of the line.
I never glue frets in unless I am replacing one where the slot may be enlarged from the barbs on the tang of the old one. I hammer them in with a plastic hammer to avoid denting them.
With regard to finishing--especially if you are using French polish: Sand thoroughly, preferably in daylight. It wouldn't hurt to dampen slightly, let dry, and then sand again with 220 and then 320 grit. There will very likely be things that you can't see before finishing that will show up during finishing, and you can fill them in with finish then, but it will be less work to sand thoroughly before hand.
Since day 1 I have always hammered the frets in dry, though i do put a few drops of water thin super glue in the fretslots after installing the fret, this is mainly to keep the fretends from popping in case the necks shrinks and expands over the seasons.
Thanks for the advice Ethan! Got the slots cut and frets in - put a strip of masking tape along the fret saw blade to watch the depth -worked great.
Question: 1, Finish with bridge on or off? I know it is probably easier with the bridge off. With a first build I want to know if it is even worth finishing so I am tempted to just glue it on and hear it. :)
Andy, you usually glue the bridge before polishing right?
2, dome the bottom of the bridge always? I have seen both flat and domed I think?
3, Filling small imperfections like a tiny router chip inside the purfling? Is that done with epoxy and top dust?
I'm anxious to wrap up this stuff and play the damned thing!!! Lol
ORIGINAL: El Polaco I'm anxious to wrap up this stuff and play the damned thing!!! Lol
I know exactly how you feel - when building my first (and only) blanca I often though I wouldn't bear another FP session :) 6 months later I'm very glad I persisted. I play the guitar almost every day and had I not finished her properly I think I wouldn't be so happy about her.
I finished the guitar without the bridge glued on. It was the easier way to FP the top, I think - it's easy to scrape the FP and glue the bridge later. If you domed the top on purpose (I did) then it makes sense to also dome the bottom of the bridge.
Try to to correct even small imperfections - they become VERY visible under finish. I still regret not filling small pores in rosette with CA glue.
Wow, great photos at your link! This is your first build (?) and you look professional already.
1. I have finished with and without the bridge and finally decided that it is easier, less hassle and danger, to glue the bridge on and then finish. However, I seal the bridge first to avoid color bleed onto the soundboard. If you are using a porous wood for the bridge, the grain should also be filled first, if you want it filled.
2. I never hollow the bottom of the bridge; it bends around the doming of the soundboard.
3. I would not fill small imperfections with dust or epoxy; I would use superglue, without dust.
I polish with the bridge off too. It makes the finish look better around the bridge especially if you have polished before! You can mask off the bridge area and polish over the tape. Then you can remove it when finished with no need to scrape! nice an easy.
Posts: 161
Joined: Feb. 16 2011
From: Danville, CA
RE: Jorge's First Build (in reply to Stephen Eden)
Hi Jorge,
Glad you decided to start a thread to post your progress - mine has been stalled for too long.
Guitar looks fantastic. Can't wait to hear it in the hands of a master such as yourself!
I finally picked up a bench vise, just yesterday, so I'll be starting on the binding soon. We have a bunch of activities scheduled over the next week, so it's not until next week that I'll take the binding plunge. I need to catch back up to you!
I never hollow the bottom of the bridge; it bends around the doming of the soundboard.
Really? this surprises me. Doesn't this build in tension to an area that will already have tension? If the bridge is left straight, you basically will be pulling the top into it when gluing on the bridge. When the bottom of the bridge matches the dome in the top, they fit together like hand in glove.
I'm not knocking what you do are questioning your logic. I'm just trying to figure this out as I have never done it this way. If my logic is wrong, perhaps I will try it your way.
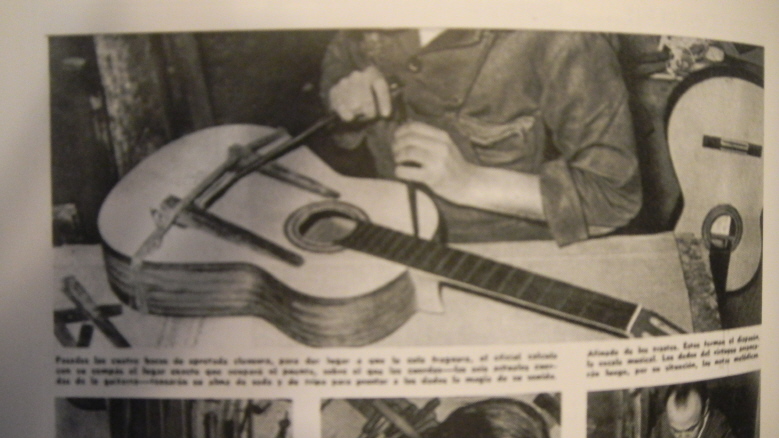
Yes, really. When I dome the soundboard, I don't round the fan braces to fit the doming, either. I think it is rare for anyone to do that, but a few people do. But anyone who has used bent lamination in furnituremaking knows that if you bend flexible pieces and glue them together at the same time you get a very strong result. Moreover, when I glue the bridge on I don't use clamps through the soundhole; I use clamps on the wings only, outside the box, and let the doming apply pressure in the middle--traditionally this was done with rope and wedges. From the early Ramirez III workshop (from "Things About The Guitar," by Jose R., III):
Images are resized automatically to a maximum width of 800px
Depends how you work I guess, for me I make my tie blocks low to save weight and have stiffer thicker wings. My bridge would never bend to the top its not flexible enough, my tops have to follow the bridge.
I had the exact same thought as I sat here trying to bend my bridges. My next thought was about Hauser, He would dome the bridges and not the top and make the top conform to the bridge. This made sense to me as I oftern thought that the top was more likely to conform to the bridge than the other way around.
So my question is. Do you purposely make a fairly fleixble bridge that will conform? because I'm certain mine will not and the top will cave in. What benefits do you notice from doing it this way over doming your bridges.
Looks great Jorge, real clean work! I do finish with the bridge on because I like to play my guitars before finishing. I seal the bridge when it's on the guitar and just tape off the top around it with the gentle masking tape that doesn't pull out wood fibers. French polishing with the bridge on is sort of a pain but I've gotten pretty good at sanding around it when I go to do my level sanding with a small rubber block. It's no worse than other areas like around the fingerboard or the heel/side area.
I dome my top just a little and I curve the bottom of my bridges slightly more. I expect the top to pull up an extra dome to comform to the bridge. Total doming of the top of about 3 mm or so. If you want to think this way, my top is arched at a 25' radius and the bridge is a 20' radius. (I know that because I made some radius blocks)
Thanks very much Andy! I really appreciate the compliment! Its nice to know that one is on the right track. I think I will glue my bridge today. Do I need to do the final scraping and sanding of the top before I glue it down!
Is a scraper blade or fine sand paper be the last thing that touches the top before finishing? To my eye it looks like a scraper blade almost burnishes the wood and leaves it almost shiny. Is that desirable or should it be left more porous as with sand paper?
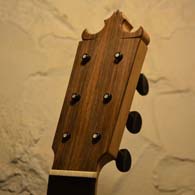
My Pegheds are arriving today. Chuck Herin is a really nice guy and did MOP inlays for free! They are 9 mm pegs so what diameter drillbit should I use to start out with before reaming? If you noticed I didn't drill my head yet. Are there any tips for doing this after the fact?
Ethan, My top is a 25 foot radius dome and my bridge wings are quite flexible. I did dome the bridge a hair but I will let it flex the rest of the way I think.
I do final sand the top in the bridge area to the thickness I want... I know there are people that say a scraped surface is best for gluing with HHG or PVA glue but it always looks and feels best after fine sanding and thorough cleaning with a dry paper towel.
As for pre-drilling the peg holes I always use a 1/4" drill but it depends on the end of your reamer.. I use a little plywood template for drilling the holes. Get the holes as square as possible to the head but you can correct with the reamer as long as you end up square.
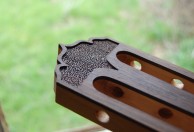
Thanks for the info Andy. The head template sounds like a good idea. I really like your rosettes by the way!
What cut of shellac do you use to seal the bridge? Do you just brush it on?
I have another Schallac / french polishing question... I was doing some tests with 2 pound cut amber shellac. The Monterey cypress is very red compared to the engleman top. Is there a way to balance out the colors? Maybe applying a different color on the top than the sides?
I dont understand cuts but mix Spanish way. But I can tell you that coloring with shellack is very complicated and on a first build I wouldnt advice you to do so. And also... What is wrong with nature and its colors? I know that old school purists are used to have the back and sides in the same color as the soundboard. I think you can find beauty in all guitars which are well made.
On the other hand, I strongly prefer dark violins over pale ones... I guess we all have our little contradictions.
Thanks Jorge, I mix up a big jar of 2 pound cut and then cut it with alcohol down to about 1 1/3 pound for pretty much everything except the final polishing. When the guitar is read to finish I tape off the bridge and go around and seal everything that bleeds (bridge, headplate, bindings, sometimes rosette) with a piece of t-shirt, then start shellacking the whole guitar.
I also like the super blond shellac finish that shows all the beautiful tones of the various woods.
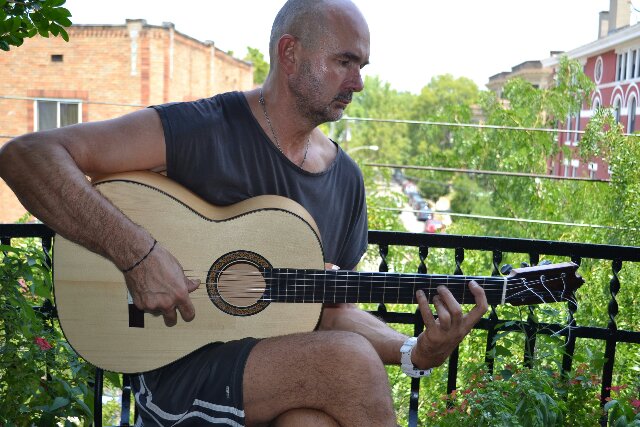
Well I couldn't wait any longer... stopped french polishing to glue on the bri;dge and string the thing up. Was having nightmares about the top caving in and the bridge pulling off. Lol. I have quite a few sessions of french polish on already so I just of the glazing to do etc. I glued the bridge on last nigh with HHG then read all your guys posts about how to use it etc after the fact. Well this morning it was on so I put strings on, put the planetary pegs in temporarily and I'm trying it out as we speak. The peg shafts are slipping a little bit because they are not glued in yet but it is sounding pretty strong already. I'll record something when I can keep it in tune and it stabilizes a little.
The nightmare is over. So to speak.
I loved every minute of it really.
Images are resized automatically to a maximum width of 800px
Jorge- Looking really good. Yeah, it's always hard to decide when they're done. Robert Ruck said that a really good French polish finish takes a year. Looking forward to hearing your guitar. It looks alive.

 Printable Version


 New Messages
 No New Messages
 Hot Topic w/ New Messages
 Hot Topic w/o New Messages
 Locked w/ New Messages
 Locked w/o New Messages
 Post New Thread