Welcome to one of the most active flamenco sites on the Internet. Guests can read most posts but if you want to participate click here to register.
This site is dedicated to the memory of Paco de Lucía, Ron Mitchell, Guy Williams, Linda Elvira, Philip John Lee, Craig Eros, Ben Woods, David Serva, Tom Blackshear and Sean O'Brien who went ahead of us.
We receive 12,200 visitors a month from 200 countries and 1.7 million page impressions a year. To advertise on this site please contact us.
Posts: 161
Joined: Feb. 16 2011
From: Danville, CA
First Build - Troutie's Photo Journal
I've finally put my foot down and told my wife "no more furniture - it's time to finish my guitar - please". So after a 6 month hiatus I'm back full time (few hours a week) to the blanca.
Made some good progress over the last couple of weeks: finished the front bracing, built up the back, completed the bending iron, and did a couple of trial runs bending scrap sides (not as bad as I thought).
Thought it would be fun to document the process so he's a bunch of photos to catch up to where I am now.
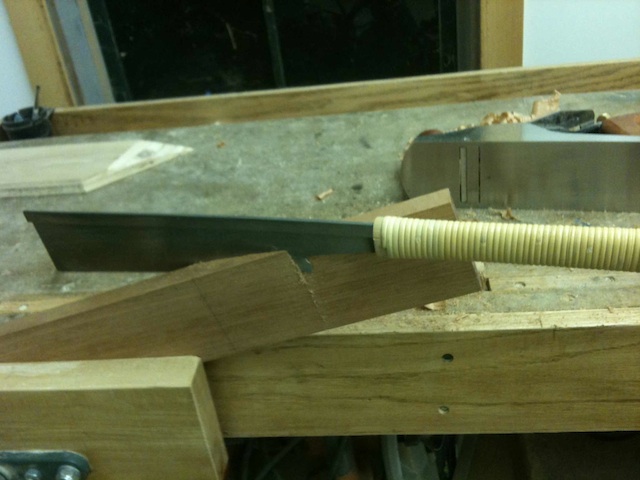
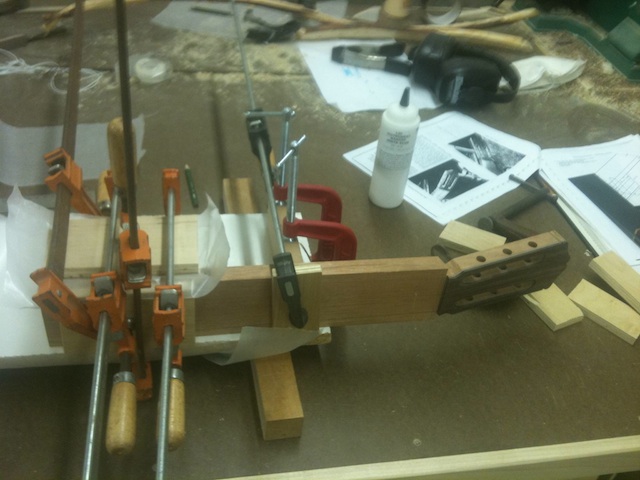
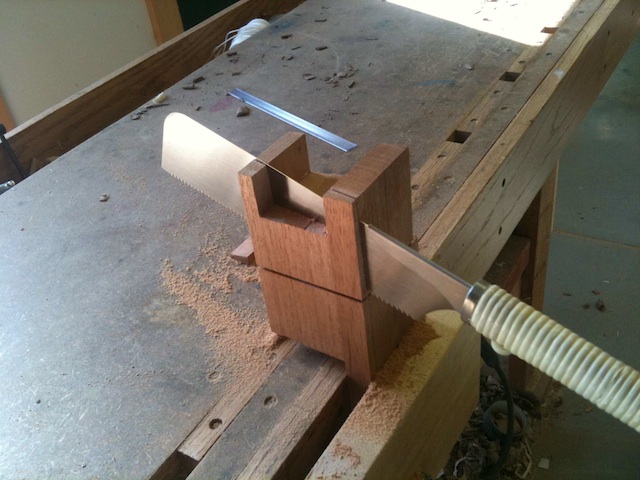
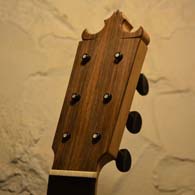
These first four are from months ago when I worked on the neck and head.
Images are resized automatically to a maximum width of 800px
Posts: 161
Joined: Feb. 16 2011
From: Danville, CA
RE: First Build - Troutie's Photo Jo... (in reply to paul.troutfisher)
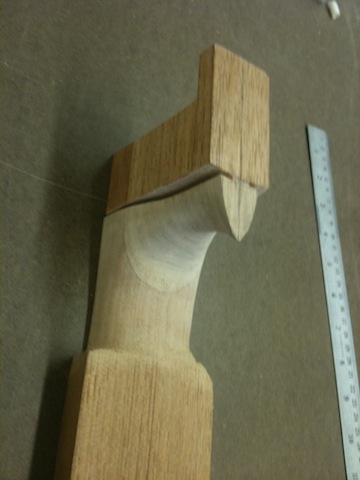
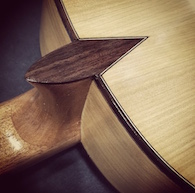
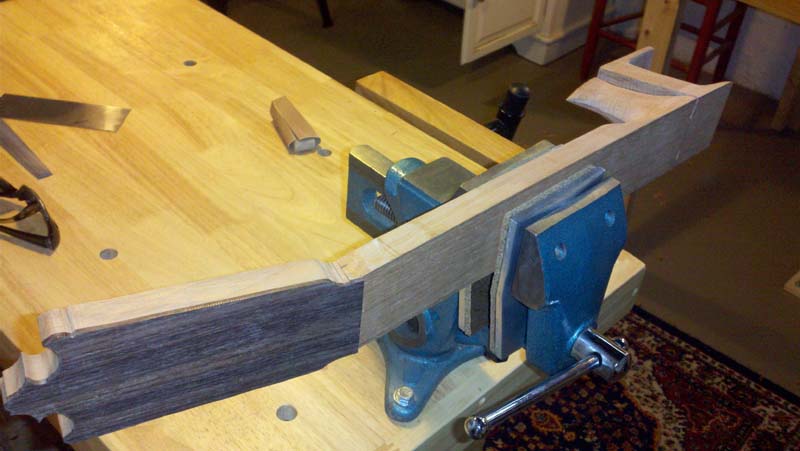
Here's the next group of photos which shows more progress on the neck and the carved foot. Boy, carving that foot really intimidated me, but wasn't as bad as I thought. I do worry about the final shaping of the neck, but guess as long as I take it slow ......
Images are resized automatically to a maximum width of 800px
Posts: 161
Joined: Feb. 16 2011
From: Danville, CA
RE: First Build - Troutie's Photo Jo... (in reply to paul.troutfisher)
Keeping them coming.
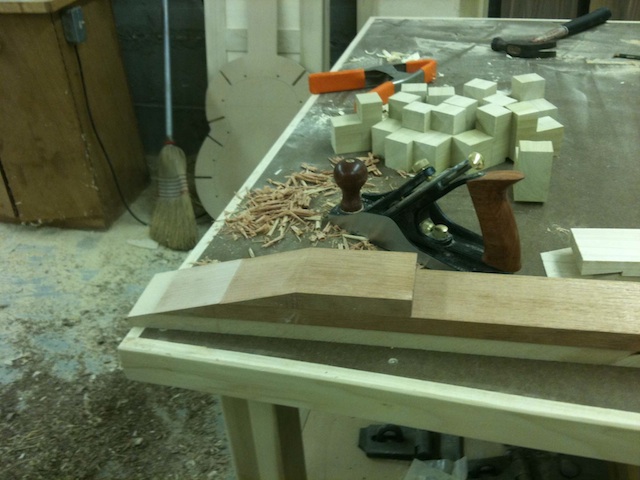
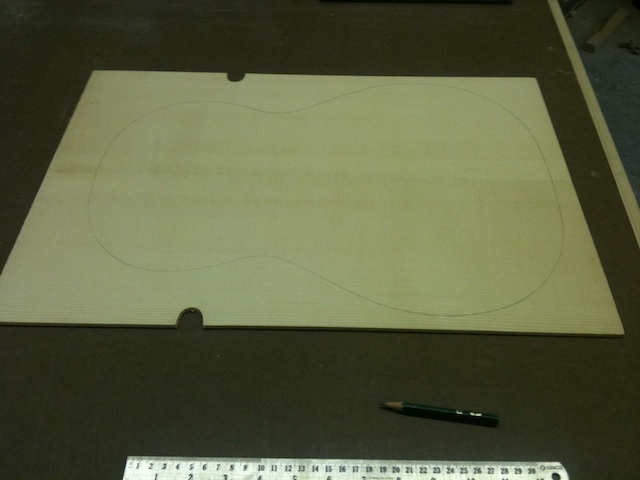
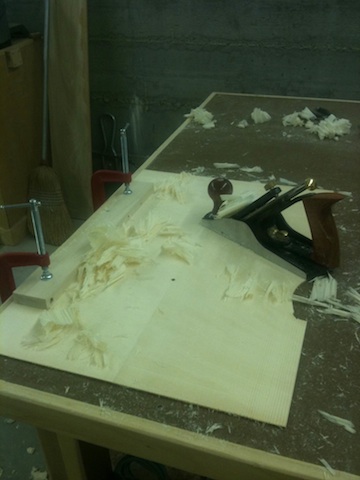
Next group of photos is the front glue up and thicknessing. Boy, I sure spent a lot of time with the random orbital sander here. Wish I had one of those open ended belt sanders - would have save hours.
Speaking of belt sanders. My youngest son Aidan seems to have it figured out :)
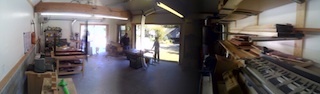
Last photo is a pic of the shop on a warm sunny morning. Love California weather and my barn doors (built them myself), but doors are hard to seal and make for difficulty controlling humidity (we'll get to that later).
Images are resized automatically to a maximum width of 800px
Posts: 161
Joined: Feb. 16 2011
From: Danville, CA
RE: First Build - Troutie's Photo Jo... (in reply to paul.troutfisher)
Finally, we're getting caught up.
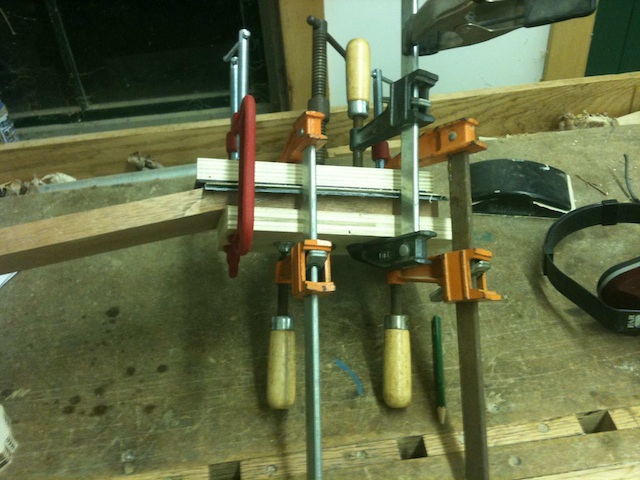
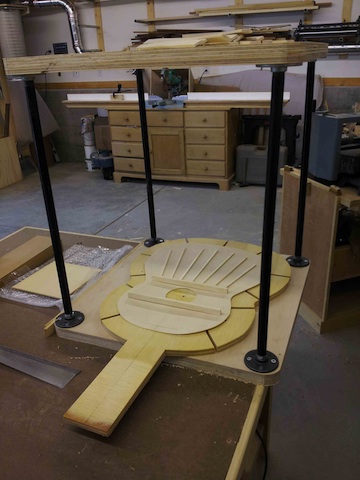
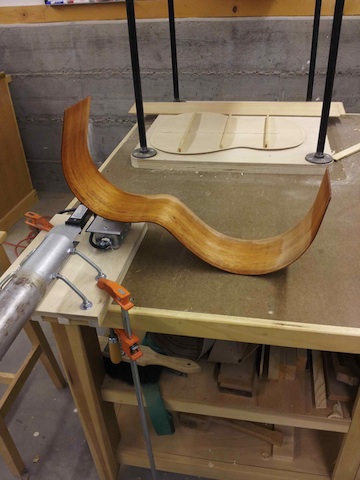
This last group of photos is from the last week or so. Here I'm bracing the front and back. Again, spent tons of time (really like 2 hours) sanding down the back to thickness. I didn't want to do too much planing as the figure was causing some tear out, so stopped planing and starting sanding at around 150 mils. So went from 150 mils to 95ish mils with the sander - it literarily took me 3 hours (over several days) :( Sound have bought courser sand paper - like 80 grit.
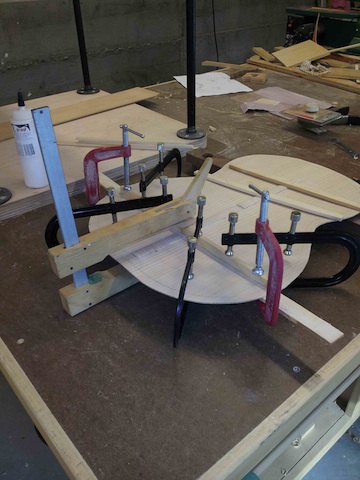
Final shot shows the bending iron and a trial run on some scrape wood. This process looks a lot harder than it turned out. Key was getting a spray bottle of water and just spray/bend - spray/bend - repeat. You can see the real sides sitting next to the back on the go bar deck - let's see if I can get these right. Think I go thru a few more scraps first :)
Ok, that's it for now. All caught up, so pics/status will slow down a lot now, but I'll keep them coming.....
along with a lot of questions!
Images are resized automatically to a maximum width of 800px
Posts: 2697
Joined: Jun. 7 2010
From: The South Ireland
RE: First Build - Troutie's Photo Jo... (in reply to paul.troutfisher)
quote:
I've finally put my foot down and told my wife............. "
Anything at all ,,,, I can tell you are not married to latina ... if I put my foot down , the food would be bland , the nights cold , and I would be washing my own underpants ............ Anyway Is this your first guitar ? if it is then these must be exciting times , all the choices you have to make and the whole thing of choosing wood and trying not to make mistakes and all that...... I am interested in how you get along ,,,but could you please make your photos fit the page a bit better so we dont have to scroll around to see what it is a pic of .... It looks like a nice big workshop to get things done there ,, lots of space for lots of guitars ...........
Posts: 161
Joined: Feb. 16 2011
From: Danville, CA
RE: First Build - Troutie's Photo Jo... (in reply to paul.troutfisher)
Thanks Rico,
Yes, it is exciting. Reminds me of when I build balsa strut models as a kids. Things are just so delicate. Plus, mistakes are darn costly as the tone wood isn't cheap.
Sorry about the pics sizes. Not sure how to make them smaller, but I'll work on that moving forward.
BTW, when I put my foot down - I usually ask for permission first:)
Posts: 161
Joined: Feb. 16 2011
From: Danville, CA
RE: First Build - Troutie's Photo Jo... (in reply to TANúñez)
Thanks Tom,
This is was just a scrap side trial run. I just made the bending iron and had never bend anything before. The owner at Allied Lutherie was nice enough to throw in (for free) 10 scrap sides for me to learn on - real nice guy (forgot his name).
The real sides are Spanish Cypress and should be around 2mm thick.
RE: First Build - Troutie's Photo Jo... (in reply to paul.troutfisher)
It looks great to me. But I dont like scroll threads. The rest of this thread will be like this if you dont change the resolution of the photus you´ve already uploaded
RE: First Build - Troutie's Photo Jo... (in reply to paul.troutfisher)
great stuff I wish I had a nice big workshop!
Easy way to change the size of your pics on Windows is to use ms paint. open the pic in paint the resize the image (Ctrl-W) From a pic taken on my camera I usually resize them to 25% if that helps
RE: First Build - Troutie's Photo Jo... (in reply to paul.troutfisher)
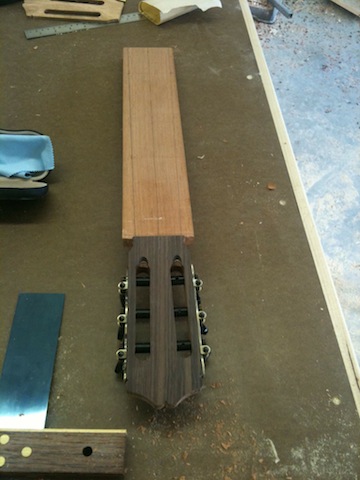
Paul,
Got back today. Cut the headstock and all the heel cuts and side slots etc.- I really asked for it with my fancy design didn't I? :) Came out pretty good for the first time - with the neck and heel attached its a bit tricky spinning it all around in the band saw. Will carve the rest of the heel tomorrow. Braces all cut will probably glue them on tomorrow too.
Have to reinforce the top of my brace gluing rig as the force of all the rods pushes it up in the middle!
Got the LMI bending iron and was messing with it a bit to get the feel...
I'll keep you posted and try to post some pics tomorrow.
Posts: 161
Joined: Feb. 16 2011
From: Danville, CA
RE: First Build - Troutie's Photo Jo... (in reply to El Polaco)
Jorge, great to hear your back at it.
Heads up on glueing the sound board braces. Don't use too much force (very little is too much). I read this warning somewhere prior to gluing in my bracing, but still felt I didn't use too much - that was until I was done and flipped it over. I can actually see, when looking across the top surface into a light, slight deformation of the sound board in the shape of the braces. It's real subtle - so I'm going to live with it - but I expect it will be worse once I get to french polishing the top.
Note, I also made my top as thin as possible, as i heard this has the greatest impact on response and sound, so mine may have been extra susceptible to this problem.
RE: First Build - Troutie's Photo Jo... (in reply to paul.troutfisher)
Telegraphing the braces through the top happens. Most people use WAY too much clamping for fan braces. Myself I just press them in by hand and do a rubbed joint, then set a few thin laths over them and light weight them to hold the top down. You would have to carve them off to remove them.
RE: First Build - Troutie's Photo Jo... (in reply to paul.troutfisher)
Thanks for the advice just in time! I did get much thinner rods as I felt there was way too much force with the first ones I played with.
Paul, Did you use englemann or european? I have engleman and am down to about 2.1 on the bass and 2.3 on the treble as it stands and a bit thicker up top... I domed the solera about 2mm with the bridge as the center tapering down to nothing at the sound hole center approx.
Any more tips before gluing braces anyone? :)
I am going to follow the bracing pattern of a '73 Faustino I have that has an amazing top. 5 parallel center with 2 more outside splayed some with closing braces.
Posts: 161
Joined: Feb. 16 2011
From: Danville, CA
RE: First Build - Troutie's Photo Jo... (in reply to paul.troutfisher)
Thanks Stephen, that makes me feel better.
Jorge,
My top is 2mm max. A very accomplished luthier, Eric Monrad, suggested I work by weight and bring the rough cut top (with NO sound hole) down to 115-125 grams.
This is very thin, I hope it holds up:)
I got my top from Bachman tonewoods in Italy. It's from the northern alps bordering Germany, so I guess it would be German Spruce.
Note: I was told (by Eric) that the top wood needs to age at least 3 years before used in building. So, I bought 10 year old tops from Bachman - had to pay at 15% premium.
RE: First Build - Troutie's Photo Jo... (in reply to paul.troutfisher)
It would be easier to see your posts if you resize your pictures. Load them onto this pic resizer and make them about 600 pixels wide. The thread will work much better.
Load them and then crop if you like. Then choose custom resize and choose pixels. Then set them about 550 or 600 and you'll make it easier to follow.
Posts: 161
Joined: Feb. 16 2011
From: Danville, CA
RE: First Build - Troutie's Photo Jo... (in reply to estebanana)
I plan on doing that moving forward, or even just having links.
But how do I fix what's already posted? Seems like that which is done is causing the problem and the problem will persist even if I make the future pics smaller.
I'm actually considering to restart the thread over again, but this time with picture links.
RE: First Build - Troutie's Photo Jo... (in reply to paul.troutfisher)
quote:
But how do I fix what's already posted?
Just fix the all pictures first and store them on your desktop. Then go post by post and select edit. Then delete the picture attachment. Then re load the new smaller picture in it's place. Not too hard. It will save all your text that way.
If you do that the whole thread will be normal width on the screen and won't waggle around when it gets loaded.
RE: First Build - Troutie's Photo Jo... (in reply to paul.troutfisher)
Thanks! yes I am going to do pegs first time. I got the peg reamer and shaver from LMI. I want to go more traditional for the first build.
I may even get some of those geared pegs before I am finished. Sounds like they are a good option especially as I plan to play this guitar a lot out and straight pegs can be tricky for tuning on the fly...
RE: First Build - Troutie's Photo Jo... (in reply to paul.troutfisher)
Aaaaaahhhhhhh. That was nice. We can see the pictures.
Eric Monrads suggestion is a good one. I always weigh my rops. BUT remember that its just a meassurement and that its just like with thickness, that it has to work with flexibility. 120 grams can be to stiff and it can be to sloppy. But its a good starting point.
Posts: 161
Joined: Feb. 16 2011
From: Danville, CA
RE: First Build - Troutie's Photo Jo... (in reply to Anders Eliasson)
Yes, now here's where the art comes in......
So, I tap tap tap on my top all day and it sounds great, but what am I really looking for? Is this something one can teach/instruct, or must it be learned over time and many builds?
I'm an engineer, with artist parents, so I can see both sides of these things. Seems clear that a very light firm top is the best case point. Or I guess that would be best if your looking for quick explosive response (like a blanca) while a softer slower responding top is more in keeping with cedar and classical/warmth.
Anders, do different builders tend to have a certain signature in the sound which is somewhat rooted in the tops the choose?
Final question. Eric also told me to make everything as light as possible - for example the bracing - he said to reduce it beyond what's called out. Is this also true for the harmonic bars? Do they really play much of a role and would reducing their profile lend to a quicker reponse too? I'm looking for the explosive blanca sound (not that my playing supports the need :( ).

 Printable Version


 New Messages
 No New Messages
 Hot Topic w/ New Messages
 Hot Topic w/o New Messages
 Locked w/ New Messages
 Locked w/o New Messages
 Post New Thread