RE: Building Guitar Number 100. (Full Version)

Foro Flamenco: http://www.foroflamenco.com/
- Discussions: http://www.foroflamenco.com/default.asp?catApp=0
- - Lutherie: http://www.foroflamenco.com/in_forum.asp?forumid=22
- - - RE: Building Guitar Number 100.: http://www.foroflamenco.com/fb.asp?m=209908


Message


Anders Eliasson -> RE: Building Guitar Number 100. (Sep. 9 2012 15:55:54)

Yeah, all kinds of homemade sanding sticks, square or round are great.


Dave K -> RE: Building Guitar Number 100. (Sep. 9 2012 19:18:53)

Nice photos Anders, you are obviously a master craftsman. Congratulations on #100. I hope this thread goes 4 or 5 pages or more with lots of construction photos.
It is very interesting, thank you very much for sharing.

Cheers,
Dave


Anders Eliasson -> RE: Building Guitar Number 100. (Sep. 10 2012 17:18:34)

Preparing the pegs and the headstock.

There are basically 3 important things to work when making a headstock with wooden pegs:

1) To shave the pegs and make them thinner. No pegs are straight and they will all need to be shaved. Never mind the price you paid for them. The reason for making them thinner is to have a lower gear. The thinner the peg, the less string you move during one turn. I shave them down to about 6,5mm at the tip. if they are thinner than that, it starts looking to thin and flimsy.

2) To ream the headstock with a steady hand. This is in order to have the best fit of the pegs. While shaving the pegs is a easy task, reaming the headstock is a bit more complicated and you need to go slow and really feel the reemer in the wood.

3) Using a good pegdope. More on that when the guitar is ready to be stringed.


Images are resized automatically to a maximum width of 800px


Anders Eliasson -> RE: Building Guitar Number 100. (Sep. 11 2012 10:40:47)

And here you have the headstock and neck as it looks before assembly.


Images are resized automatically to a maximum width of 800px


Ruphus -> RE: Building Guitar Number 100. (Sep. 11 2012 11:00:13)

Anders,

Why do pegs have to be that long / couldn´t they be a couple cm shorter? ( With just enough headroom to pull, tweak and push back in.)

Ruphus


Flamingrae -> RE: Building Guitar Number 100. (Sep. 11 2012 12:26:44)

quote:

The reason for making them thinner is to have a lower gear.


Yup, that's the one. I do about the same OD as you for these, but then flute or put a waist on the peg where the string holes are so that it's slightly thinner still, but visually it keeps the diameter you shave to. I'm sure there are a few ways to get pegs working easily......and no, I dont want another pegs v machine heads arguement.[8D]


Blair Russell -> RE: Building Guitar Number 100. (Sep. 11 2012 22:23:47)

Anyone have a recommendation for peghead shavers? I'm in the UK and recently started building a guitar with pegs.


Andy Culpepper -> RE: Building Guitar Number 100. (Sep. 12 2012 1:06:59)

Looks amazing Anders. Closeup of rosette and bridge inlay please [:)]


tele -> RE: Building Guitar Number 100. (Sep. 14 2012 15:46:55)

Awesome guitar.

And these project pics are great


Anders Eliasson -> RE: Building Guitar Number 100. (Sep. 15 2012 19:11:13)

Ruphus

pegs have the length they have for 2 reasons.
* esthetics
* Then you can wear them and when worn, shave and shorten.

These pegs will be 5mm shorter when the guitar has been finished, You could make shorter pegs if you think it looks better. There´s no problems. You can always change the pegs later on.

The pegshaver that I use is Juzek from the us. Its adjustable, but remember to sharpen the blade once in a while. Another famous pegshaver is Herdim.

Rosette and bridge closeups will be there when I reach that point.


Ruphus -> RE: Building Guitar Number 100. (Sep. 16 2012 9:59:34)

Thank you, Anders, for explaining.
Shaving reserve makes sense.

For my part esthetics would improve if pegs were to be shorter than commonly. Shorter ones should support centered rotating ( = also reduction of awkward treatment / lateral levering / uneven wear ) and possibly allow fitting into average cases peghead compartment. Finally, smaller proportions should reduce chances of bumping into surroundings.
Just saying.

Ruphus


Anders Eliasson -> RE: Building Guitar Number 100. (Sep. 16 2012 16:37:35)

Ruphus, there´s no problem in making smaller pegs. So if you one day should want a peghead with shorter pegs, ask your luthier to do so. I mean, its so easy and relatively fast (cheap) to install a new set of "normal" sized pegs, just as its not a big deal to shorten, shave and fit the pegs on an existing guitar.


Anders Eliasson -> RE: Building Guitar Number 100. (Sep. 16 2012 16:47:37)

So here we go with the plates.

I´ve only taken photos of the top. The work with the back is basically the same. The main difference in my case is that I brace the back on a dished plate in order to give it a more rounded shape. The top I brace flat.

The first thing to do is to joint the the bookmached set of wood. This I do on a very simple setup. It works very well for me and therefor I´ve never wanted a more complex setup. The most important things are:
* Smooth base. This I actually give a drop of oil before laying down the plane on it.
* A very sharp and finely adjusted blade.
* Steady movements and use your ear. When you can to do a shave, with the same tone all the way through, its pretty sure that You´ve made a straight cut.


Next is to join the plates. Here I use another homemade jig that I´ve used since guitar number 1. Its all recycled things that I´ve found here and there. I had very little money and it was faster to go down to the local container and pick up what I needed, than to drive to town, waste half a day and buy the same things.


Images are resized automatically to a maximum width of 800px


Ruphus -> RE: Building Guitar Number 100. (Sep. 17 2012 9:30:48)

quote:

ORIGINAL: Anders Eliasson

Ruphus, there´s no problem in making smaller pegs. So if you one day should want a peghead with shorter pegs, ask your luthier to do so. I mean, its so easy and relatively fast (cheap) to install a new set of "normal" sized pegs, just as its not a big deal to shorten, shave and fit the pegs on an existing guitar.

Don´t want to spoil your thread too much, but you just triggered a thought with me. My neighbour had his cracked guitar neck well repaired for little cash by a local luthier. I shall visit that person and ask him about refitting the worn out pegs of one of my guitars. - And possibly shorten them at that.

Thank you for the input!

Ruphus


Ruphus -> RE: Building Guitar Number 100. (Sep. 17 2012 9:37:45)

I like the intelligent way of producing pressure for glueing with the wedges in that jig.

Ruphus


Anders Eliasson -> RE: Building Guitar Number 100. (Sep. 17 2012 19:01:37)

Rosette

My rosettes are all hand inlayed in a routed slot. I build them up one piece a time.
There are no pictures of the building of the rosette itself. Thats my little secret[sm=kiss.gif]

The top picture shows the routing of the slot using a homemade routing jig and the second photo shows the finished rosette. The picture is actually from after assembly. The rosette center is made with heart of olive wood and the red rings are blood wood.


Images are resized automatically to a maximum width of 800px


Escribano -> RE: Building Guitar Number 100. (Sep. 17 2012 19:04:57)

One of your signatures and I remember when you got the idea. Was my blanca the first to wear your leña?


Anders Eliasson -> RE: Building Guitar Number 100. (Sep. 17 2012 20:37:01)

quote:

Was my blanca the first to wear your leña?


yes, firewood rosette number 1 is yours.


keith -> RE: Building Guitar Number 100. (Sep. 17 2012 21:32:18)

ruphus, if your local luthier has never done pegs then take the guitar to a violin repair shop. they know pegs. let them know the length you want and where to drill the hole for the strings. several years ago i had a 66 ramirez that needed new pegs/the holes reamed. it cost me $125 for everything at a violin repair shop and they did a great job.


Ruphus -> RE: Building Guitar Number 100. (Sep. 18 2012 10:35:41)

Hello Keith,

Thank you of reminding me to specify where the string holes should be!
Gotta see which Luthier my neighbour consulted. If it is the one in town that I know, the man should have some routine with pegs, as he builds oriental instruments with pegs.
Actually I wasn´t very fond of the works / eyeing them rather critically. ( No angle between headstocks and necks, glue excess, sloppy fretwork and setup, etc. - Which seems how it´s done traditionally; at least for mediocre shelf, though. - However, as the repair job with the guitar was done pretty clean and cheap, I shall sniff out the situation once again.

Thank you,

Ruphus


Anders Eliasson -> RE: Building Guitar Number 100. (Sep. 19 2012 7:40:18)

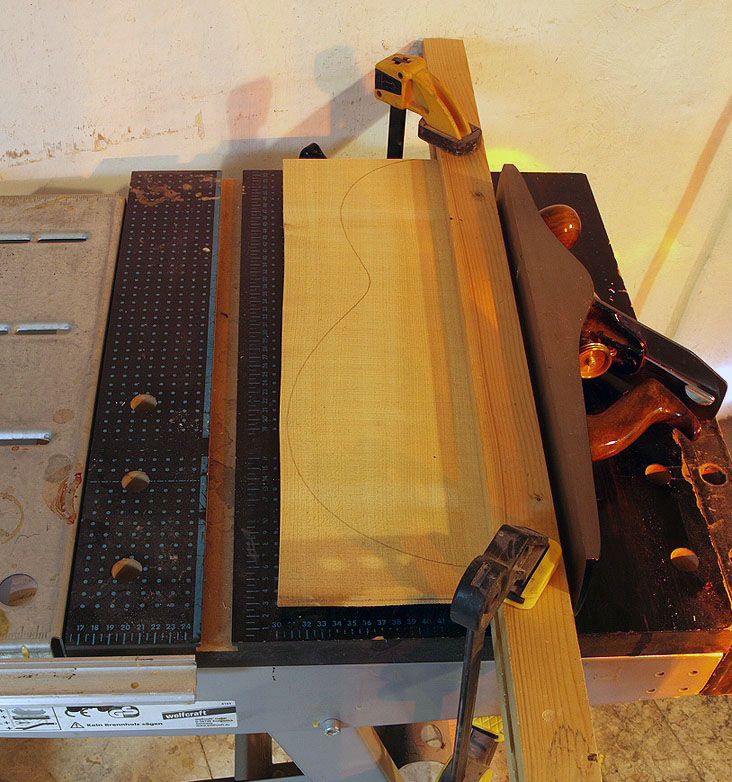
Taking the soundboard down to its (almost) final thickness

Soundwise, this is one of the most important steps in making a good guitar and I only do it when I feel good. I have to be tuned in myself in order to tune the soundboard.
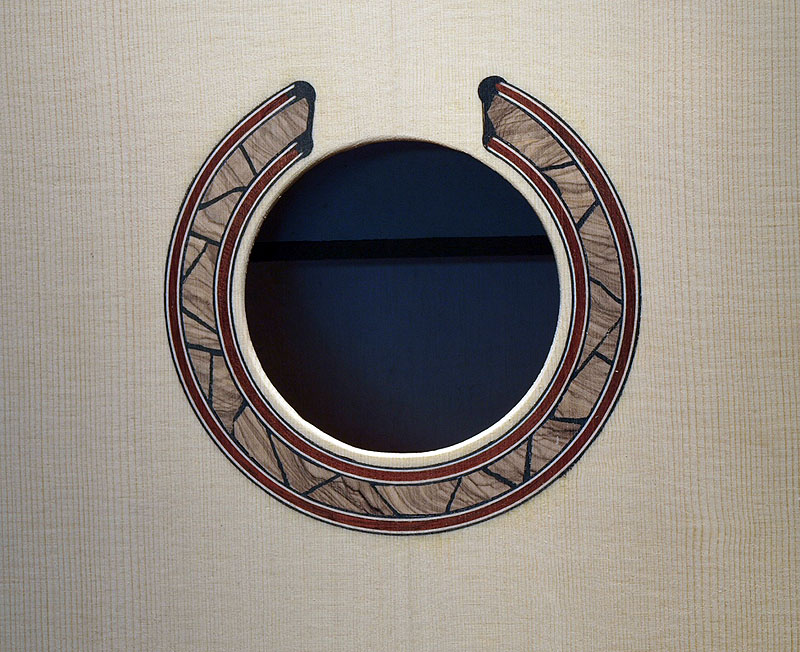
two of my most important tools are a weight, to weigh the thing and a reference soundboard, which is a soundboard that I know, with a rosette inlayed. That I flex together with the soundboards that I´m working on. Then comparing and weighing I reach the point where I say thats it.
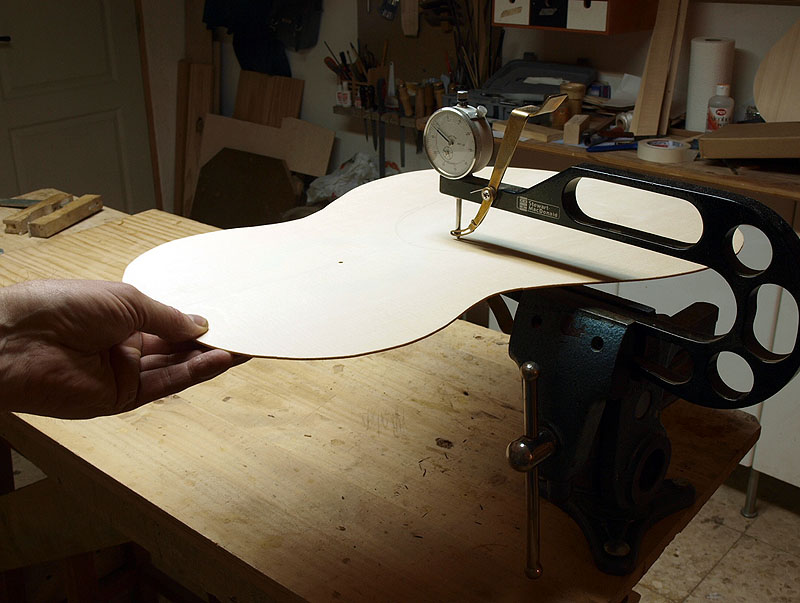
The thickness caliper is, of course, also important, but over the years, I´ve learnt not to use it to much, because each piece of wood is different and one piece of spruce ends up with 2,1mm while another ends up with 2,3mm and important... The thin one doesnt have to be the best. Not at all. What is important is to get it right. The thickness caliper I use mostly to make sure the soundboard has and even thickness.

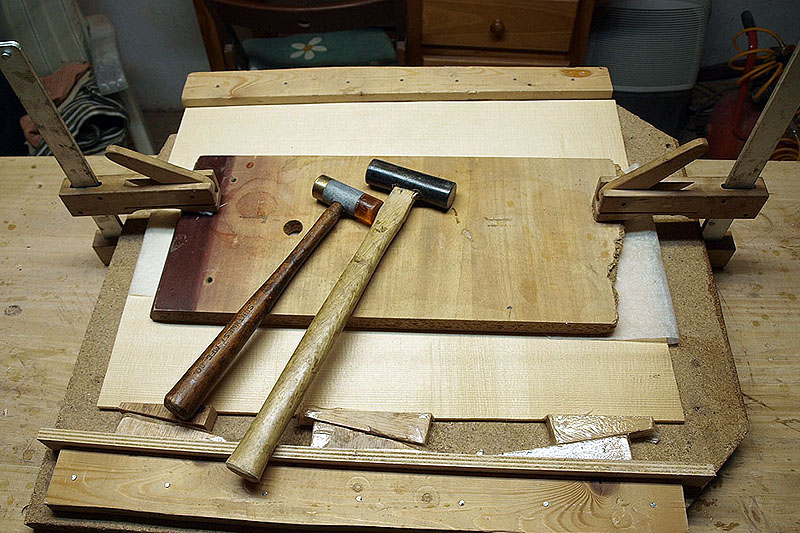
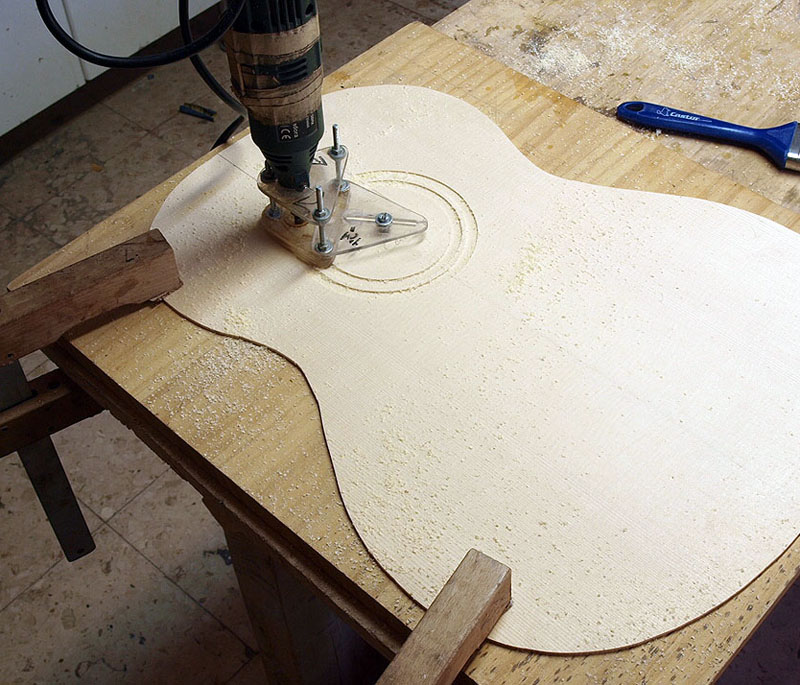
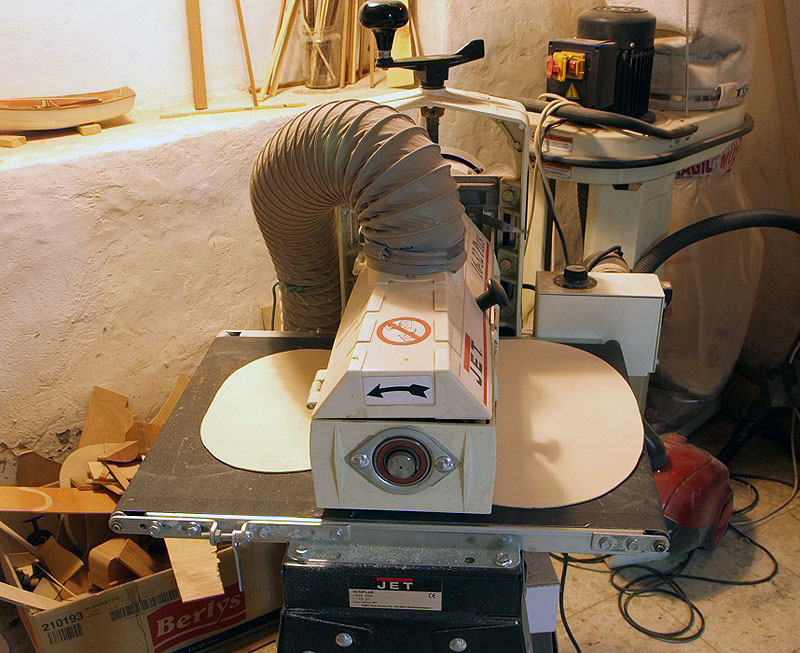
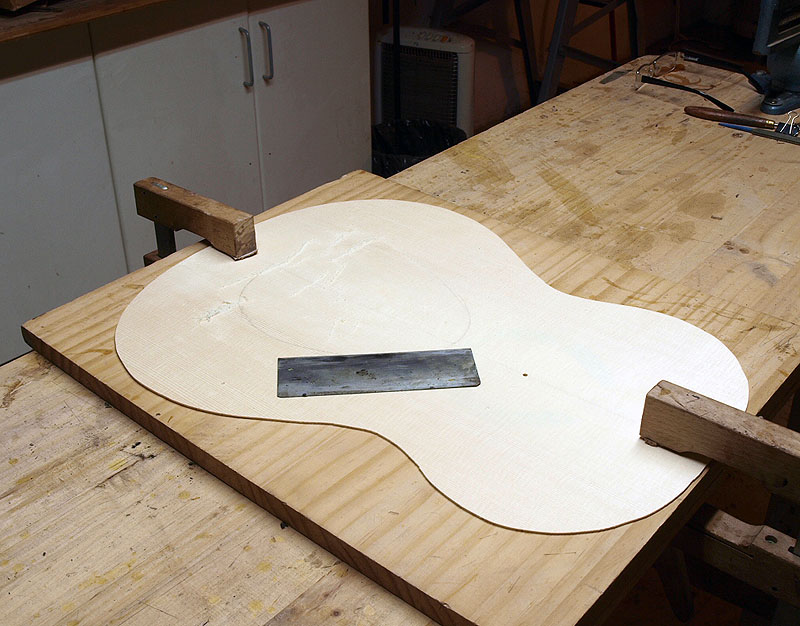
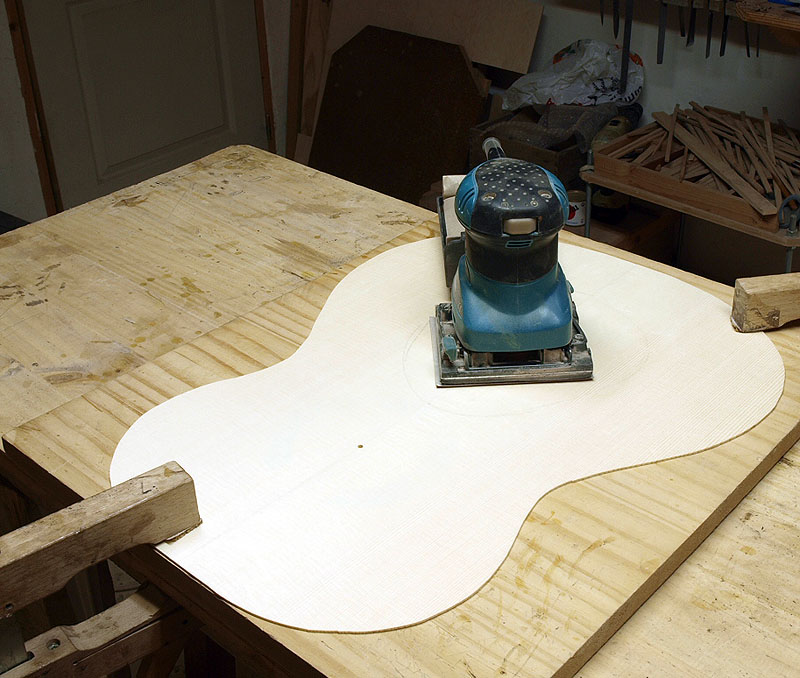
First I use a drum sander, then a scraper and a palm sander with a 120 and later 240 grit paper.
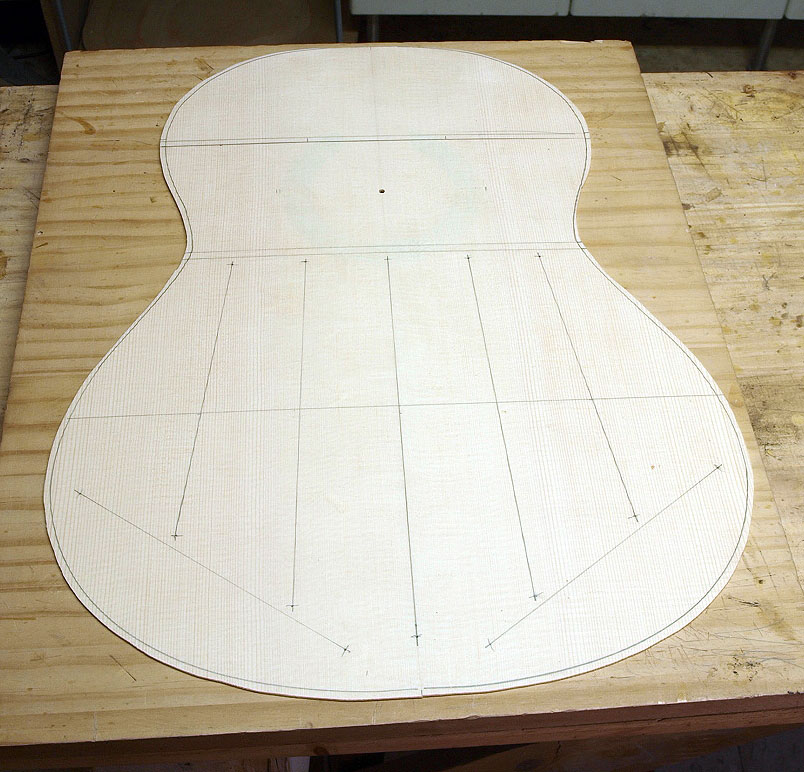
Its important to leave the soundboard a bit thicker than you want it to be when the guitar has been finished. You have to scrape the bindings and final sand the whole guitar. This you´ll see later on in the process, but its where you devide the good builders and the not so good ones. Its very easy to take to much away especially close the the edges and then.... thats it. You cannot give it back.


Images are resized automatically to a maximum width of 800px


mrMagenta -> RE: Building Guitar Number 100. (Sep. 20 2012 10:59:44)

Very elegant pictures.

This guitar will be special, whatever the number. If you choose not to keep it, I hope it will end up with someone who appreciates what has gone into it.

During the last year and a half I've been touring with this kids show. Sound engineers and musicians have come up to me countless times asking about my guitar, nr. 73. Its an eye and ear catcher. It feels like I'm getting more compliments for my sound than my playing, which reflects some truth I think. The local luthier (also named Anders), liked it a lot. I will be playing on it for some kids tomorrow, and on sunday. Always makes me feel lucky. I play so little between shows because of the stubborn tendonosis I've got, and my repertoir is deteriorating, but the guitar cheers me up and injects me with new hope everytime. I've said all this before, I'm sure, just needed to voice my appreciation once more.

Remember you have a friend in the north.


Anders Eliasson -> RE: Building Guitar Number 100. (Sep. 20 2012 12:39:55)

Thanks a lot Zoran. Its very apreciated. And I m very happy that your guitar is giving your pleasure.
Its been a long time now with this tendonitis.... I really hope for you that you find a solution for that.


Anders Eliasson -> RE: Building Guitar Number 100. (Sep. 20 2012 14:48:50)

Laying out the bracing system and bracing the soundboard.

After thicknessing the soundboard, I draw the bracing layout. This is my own bracing system. Not that its very special, but its not a copy, but something I´ve reached changing little things over the years.
I will make a describtion of the bracing system and my thoughts about it when I´ve posted the photos of the bracing and you can see the soundboard ready for assembly.


Images are resized automatically to a maximum width of 800px


Anders Eliasson -> RE: Building Guitar Number 100. (Sep. 20 2012 18:46:59)

Next is to glue in the bridge strap and the soundhole "donut" After that, the soundhole is cut out.


Images are resized automatically to a maximum width of 800px


Anders Eliasson -> RE: Building Guitar Number 100. (Sep. 20 2012 18:51:12)

After that, I fit and glue the 5 central braces and when the soundboard comes out of the press, it looks like this:
Its very important not to use a lot of pressure at this point If you do so, the braces will pop out on the soundboard surface and when you final sand, you´ll sand the soundboard to thin where the braces are resulting in a week soundboard.


Images are resized automatically to a maximum width of 800px


FlamencoD -> RE: Building Guitar Number 100. (Sep. 24 2012 1:48:01)

I'm really digging this play by play of your #100, I hope they keep coming!


Anders Eliasson -> RE: Building Guitar Number 100. (Sep. 24 2012 16:00:22)

In the last session of the bracing, I brace the harmonic bars, the under fingerboard reinforcement and the closing struts.


Images are resized automatically to a maximum width of 800px


Anders Eliasson -> RE: Building Guitar Number 100. (Sep. 24 2012 16:22:26)

On the above below, you can se my current bracing system which I´ve used exclusively on all my flamencos for the last couple of years.
I have tried many different bracing systems. Some with 5 , others with 7 main braces. Asymetrical and I´ve also made copies...
The bridgestrap is very light. 1 mm thick and 10 mm wide. It gives me control of what I do and in the end balance and control is the most important factors in a good bracing system. A lot more important than the system itself. When bracing flat, this strap raises the soundboard some 2mm on the finished guitar and it does that the outer edge of the soundboard does not sink, which can be seen on many lightly braced flamenco guitars. Its tapered from the outer braces toward the edge of the soundboard.
The 5 main braces are almost parallel. This gives a soundboard with very little crossgrain stiffness and it works with the bridge strap that adds a bit of crossgrain stiffness. The closing struts also adds crossgrain stiffness in the lower bout.
On flamenco guitars I like that the soundboard is not to controlled, that there are parts without much tension. It gives a fast response and a tonal quality which I find to be extremely important on a good flamenco guitar. And its where the building of a flamenco guitar is very different from that of a classical guitar.


Images are resized automatically to a maximum width of 800px


Don Dionisio -> RE: Building Guitar Number 100. (Sep. 24 2012 17:01:08)

Anders,
Thanks for doing this informative thread. I am trying to understand lutherie (I know very little).
Would you mind repeating something? What is the reason for the placement of the five braces in an almost parallel fashion?
You said something about cross-grain and I got lost. I'm especially interested in how it differs from classical guitar making.
Please don't be angry, I really want to understand.
Thanks.


Page: <<   <   1 [2] 3 4 5    >   >>

Valid CSS!


Forum Software powered by ASP Playground Advanced Edition 2.0.5
Copyright © 2000 - 2003 ASPPlayground.NET