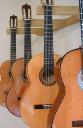
Welcome to one of the most active flamenco sites on the Internet. Guests can read most posts but if you want to participate click here to register.
This site is dedicated to the memory of Paco de Lucía, Ron Mitchell, Guy Williams, Linda Elvira, Philip John Lee, Craig Eros, Ben Woods, David Serva, Tom Blackshear and Sean O'Brien who went ahead of us.
We receive 12,200 visitors a month from 200 countries and 1.7 million page impressions a year. To advertise on this site please contact us.
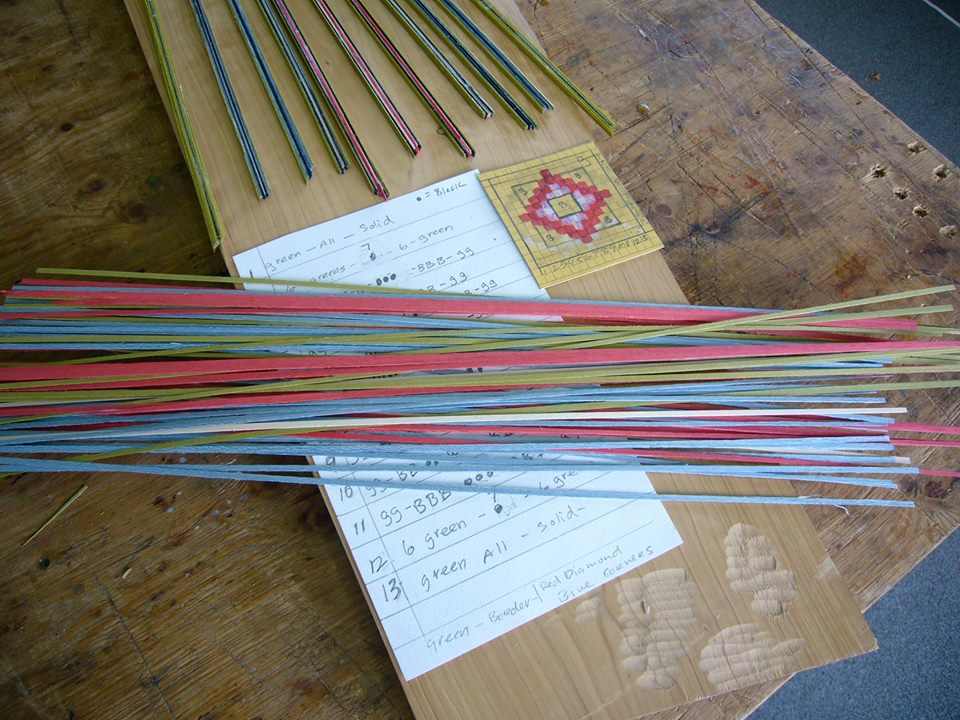
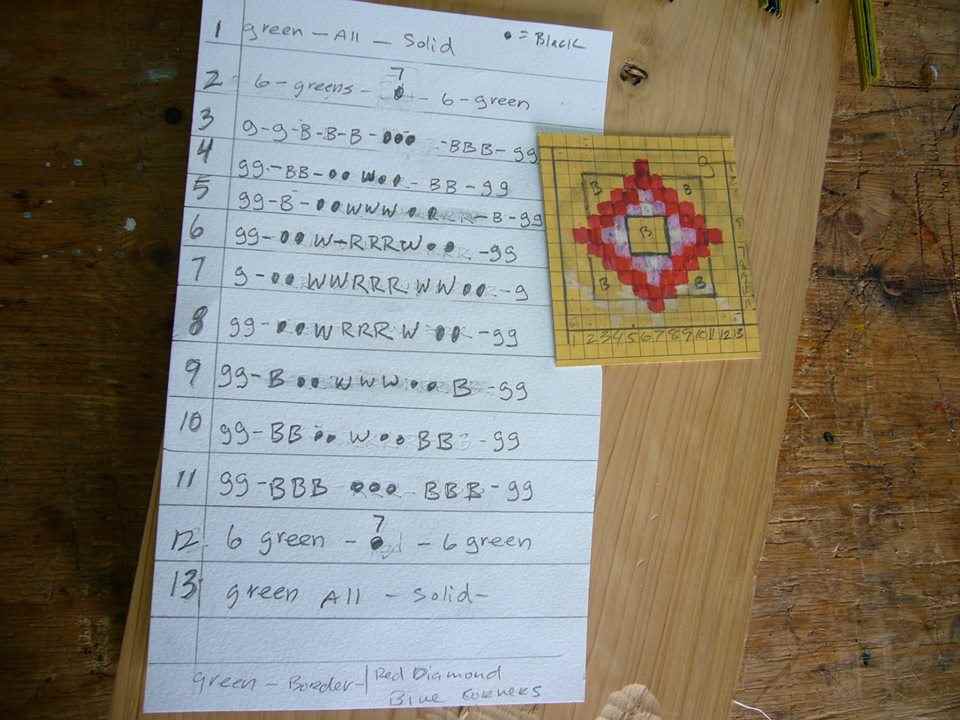
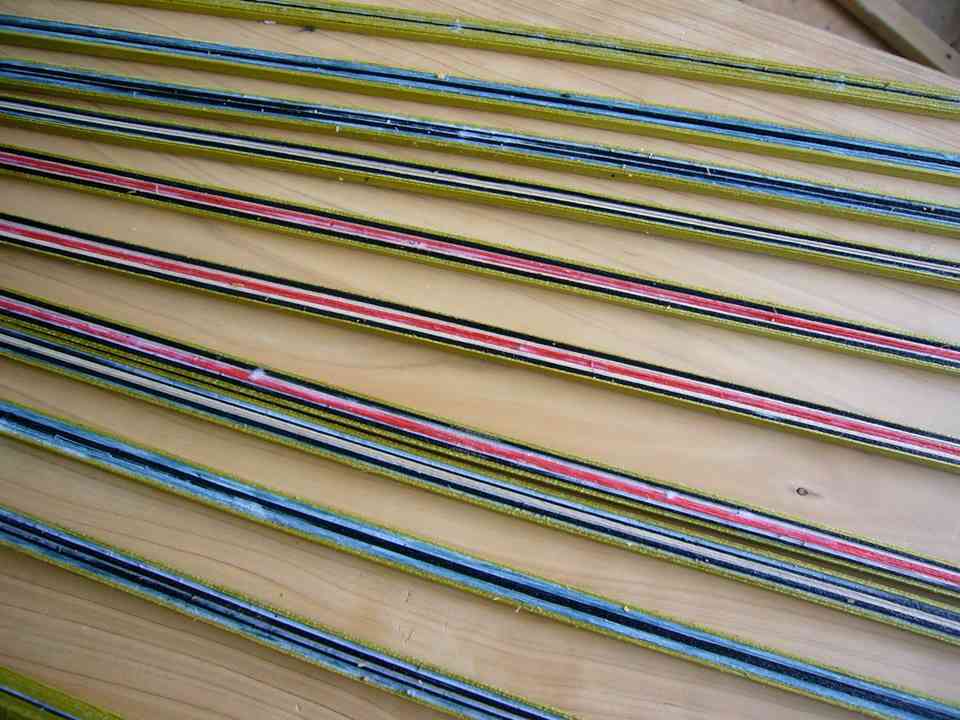
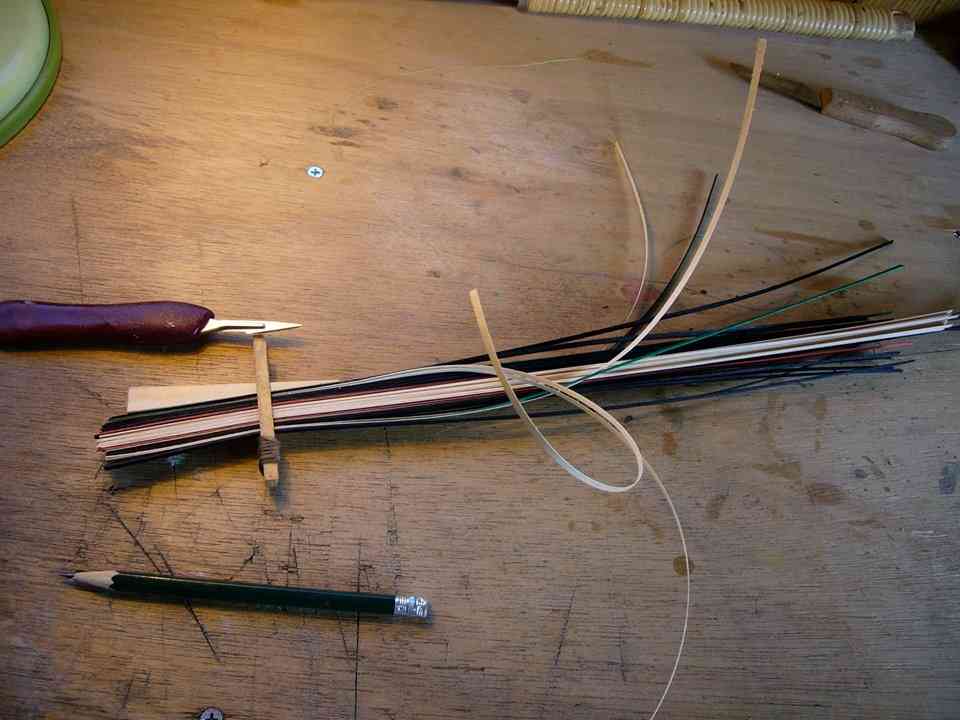
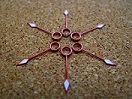
I'm reposting this from another source because it worked out well. I hope you enjoy it. I know some readers here like to see process and this is especially for them. There are several ways to make rosettes, I will not debate them in terms of which is better or worse, as I've made them using almost every method and technique that is commonly known. I happen to have used this technique this time:
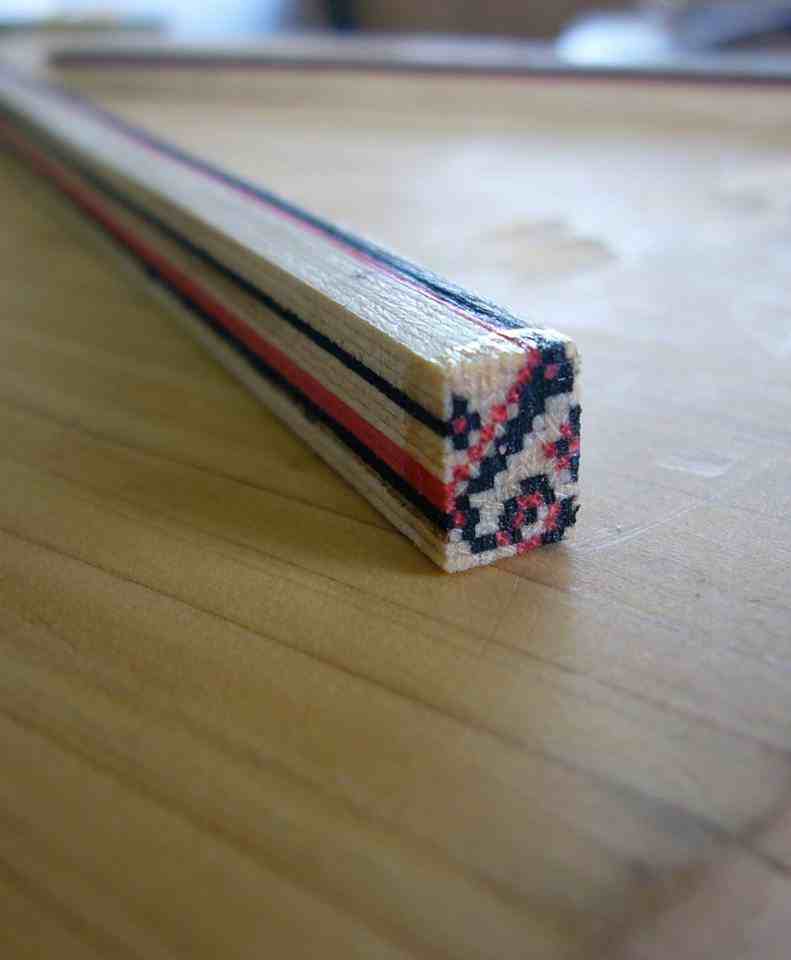
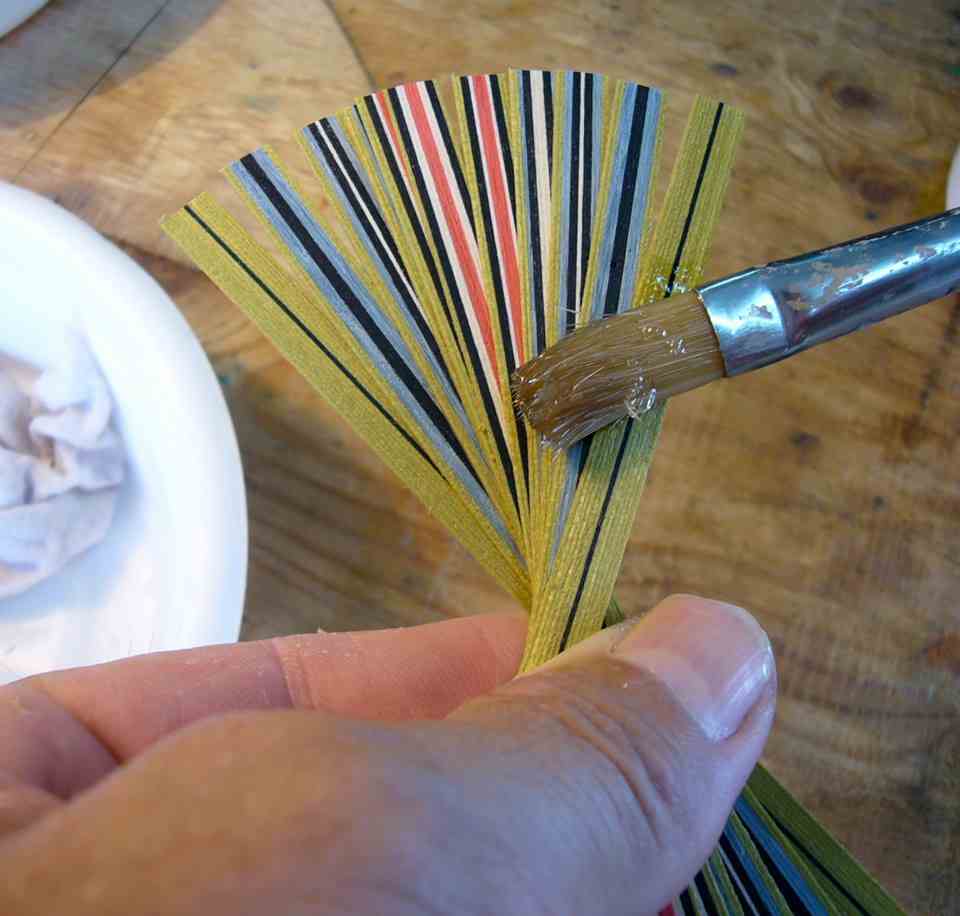
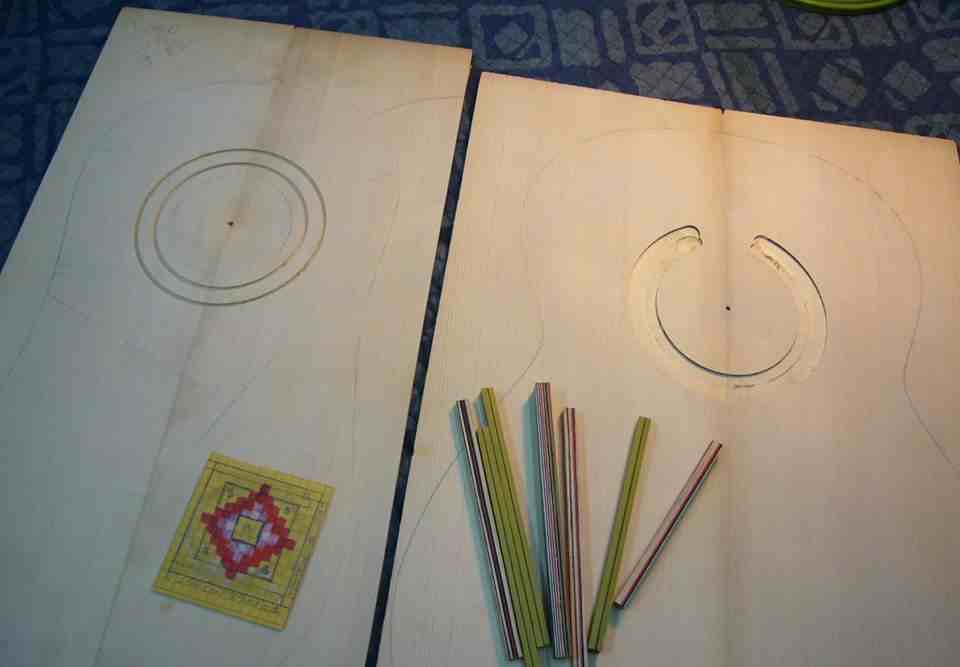
I'm making a few new rosette tile designs, since someone will inevitably ask how it's done, I took photos. It begins with hand sliced strips of colored veneer- they are sorted and glued together in long groups. There is a chart which maps out a design drawn on a grid. The chart indicates the sequence of veneers to be glued together. The 'tile log' on the end is the objective/ still don't see the method? Watch tomorrow and the next day and it will be clear to figure it out; like a puzzle and you like puzzles, right? I actually don't know precisely how the rosette will look, because I like to be surprised. Why do anything creative if you yourself are not surprised by the work?
Images are resized automatically to a maximum width of 800px
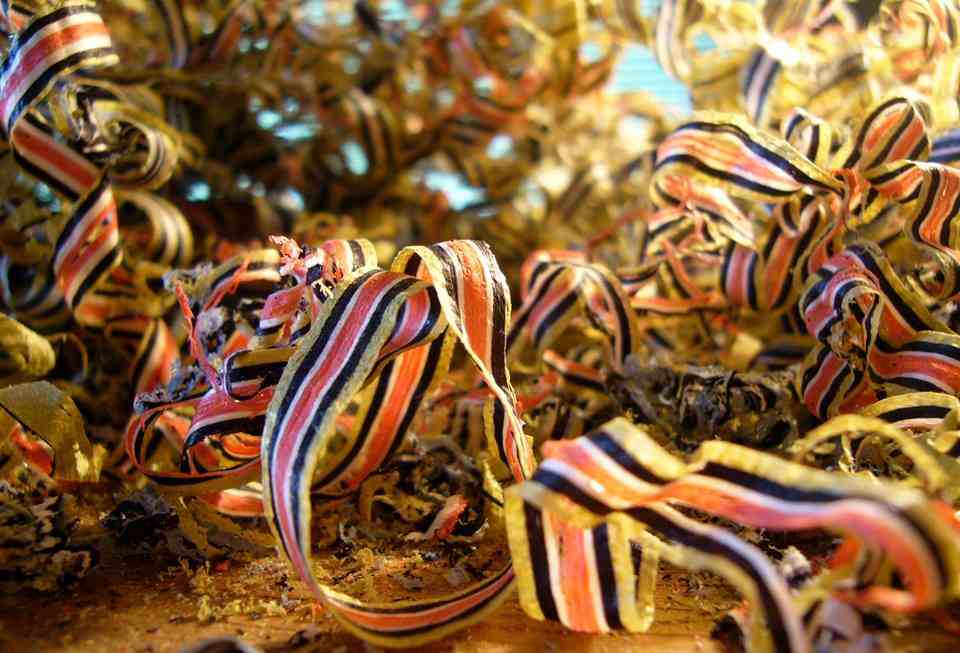
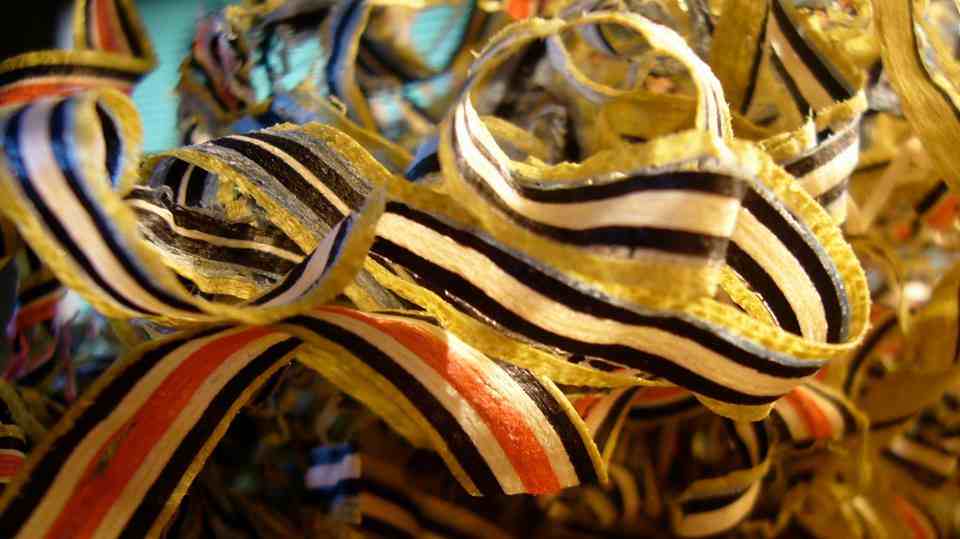
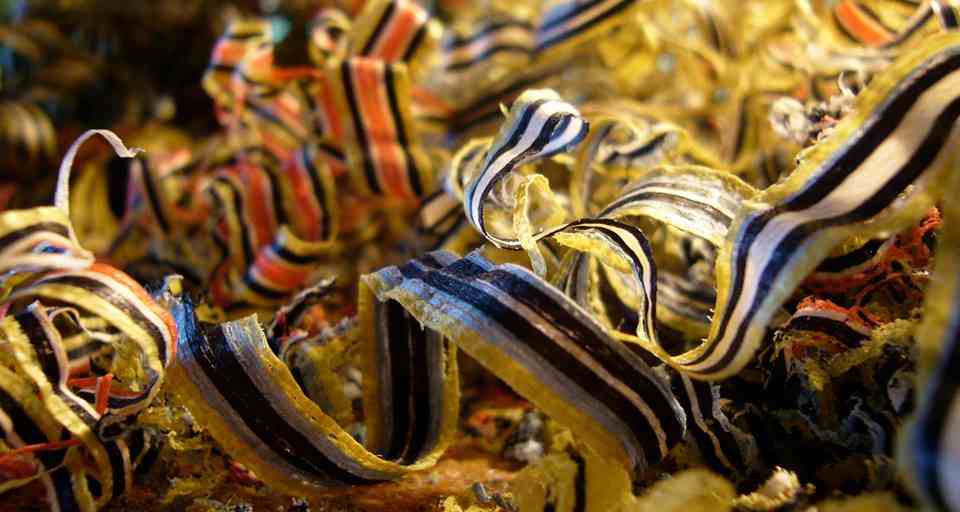
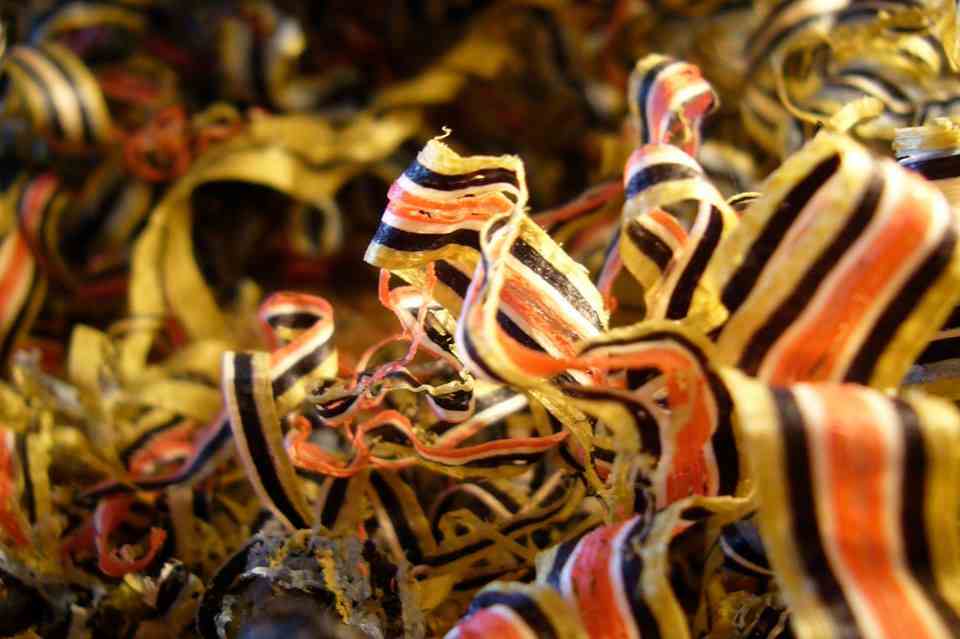
RE: Creating a Rosette- Photo Essay (in reply to estebanana)
After drawing the glued up veneer sticks through the purfling sizer I had some nice shavings. I pushed the camera up into them and edited them into fun compositions.
Always the wishful painter.
Images are resized automatically to a maximum width of 800px
RE: Creating a Rosette- Photo Essay (in reply to estebanana)
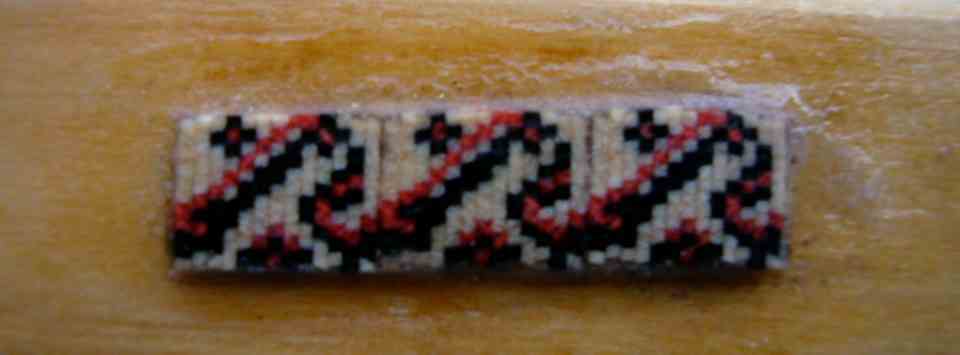
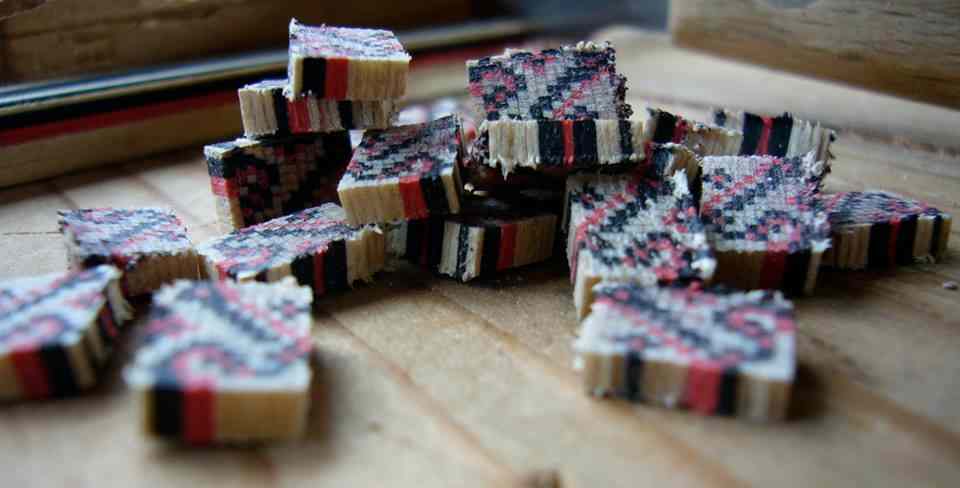
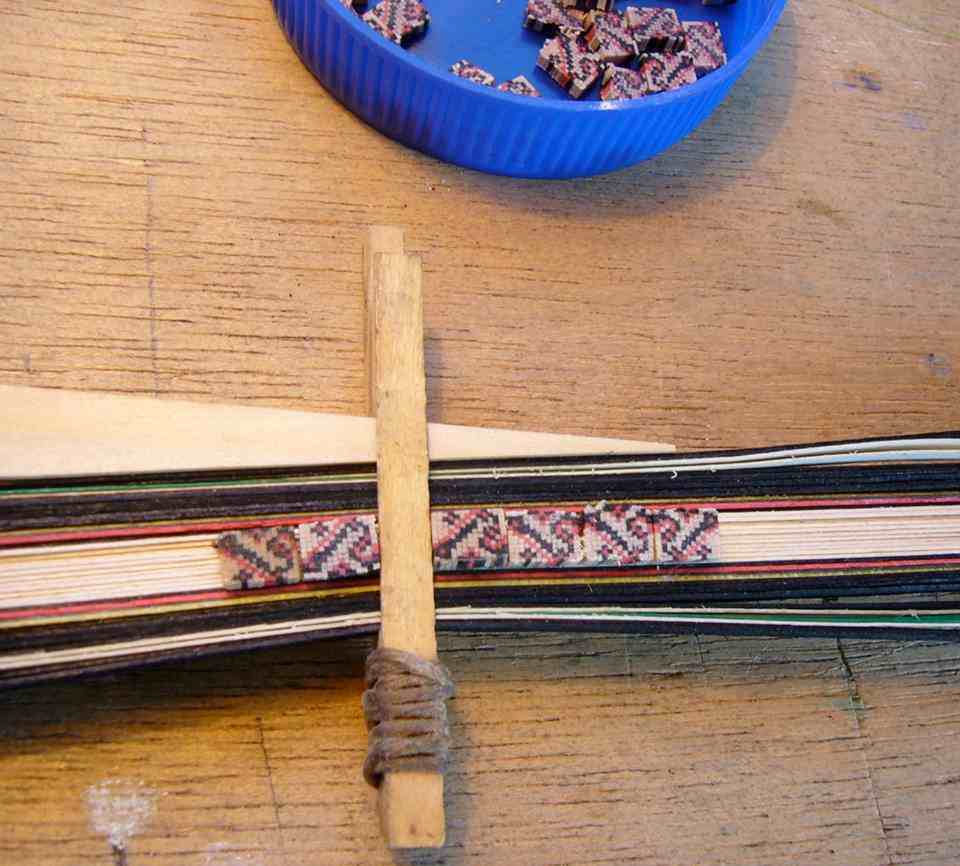
I'm showing how I made a rosette tile, but after I show that I will use a different tile to make the actual rosette. I'm saving the tile sI show in this presentation for a cedar top classical next. When I make batch of tile loaves I usually make enough for half dozen rosettes or more at a time.
Here is the mosaic tile I'll use to make the rosette.
Images are resized automatically to a maximum width of 800px
RE: Creating a Rosette- Photo Essay (in reply to estebanana)
The grid plan drawing for the mosaic does not match the colors of the final tile. I changed it on the fly. The tiles turned out nice. These will be part of a more complex rosette in a cedar top in which a rosette will inlayed next.
Images are resized automatically to a maximum width of 800px
RE: Creating a Rosette- Photo Essay (in reply to estebanana)
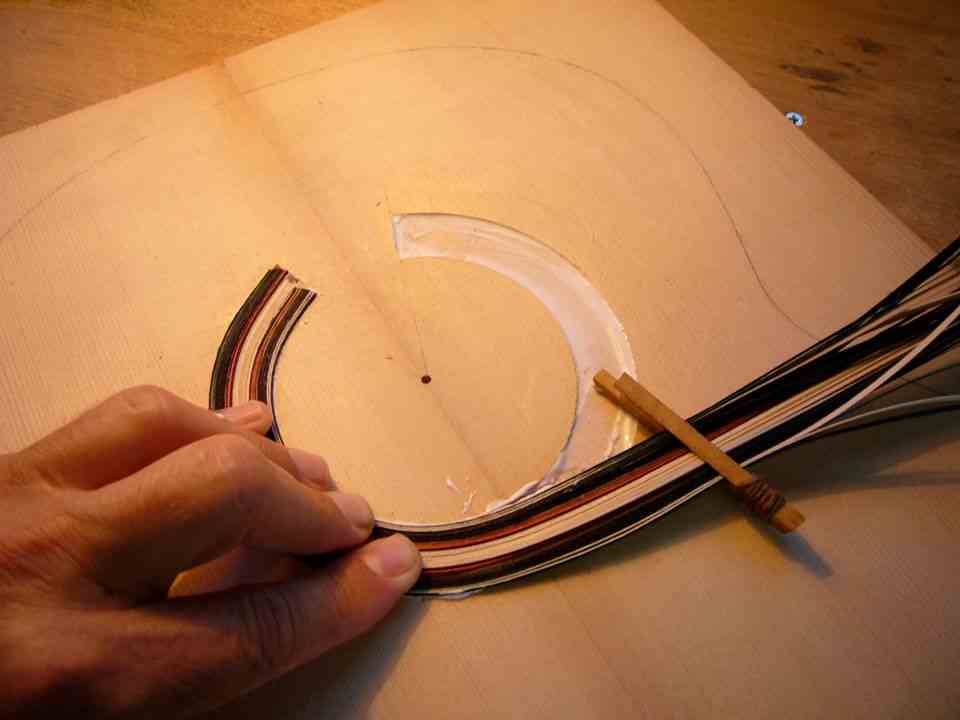
Back to the rosette. This is how it begins. Remember the mosaic tiles, this is where they end up finding a permanent home. LOL. Inlay begins. Yes I know you guitar makers have seen this a gagillionillion times, but bear with it for the ones who are new to seeing the vast cosmic mysteries of rosette marquetry.
The channel is cut with a router on a base which rotates like a compass on a pin.
Images are resized automatically to a maximum width of 800px
RE: Creating a Rosette- Photo Essay (in reply to estebanana)
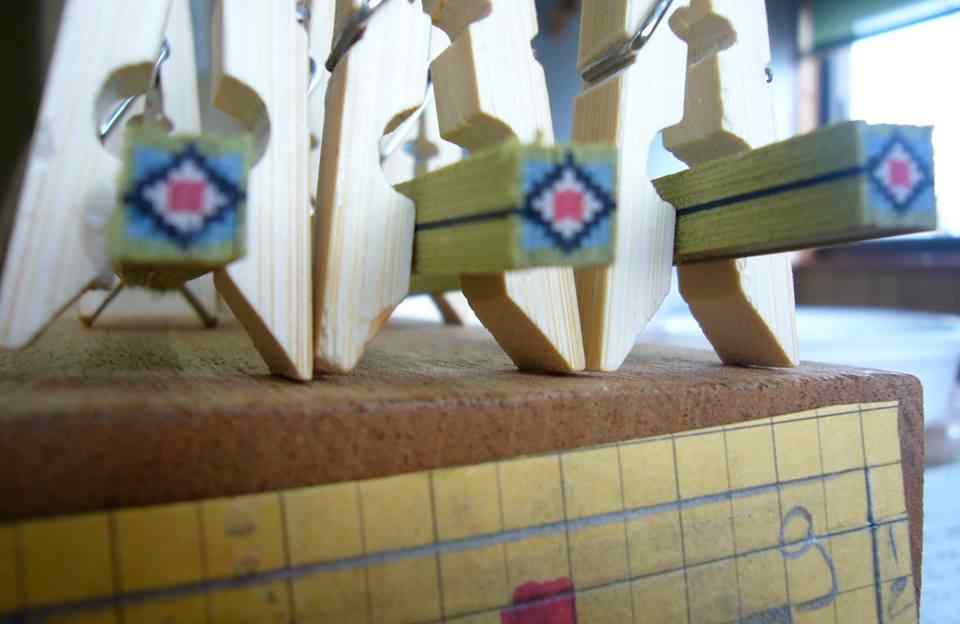
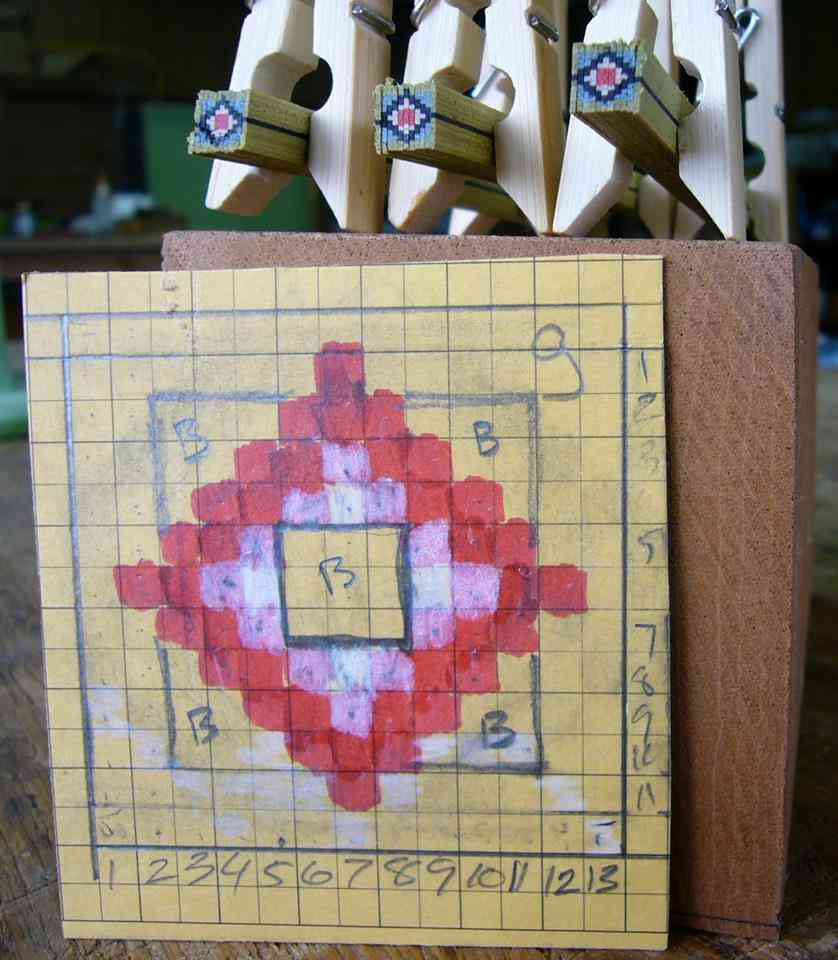
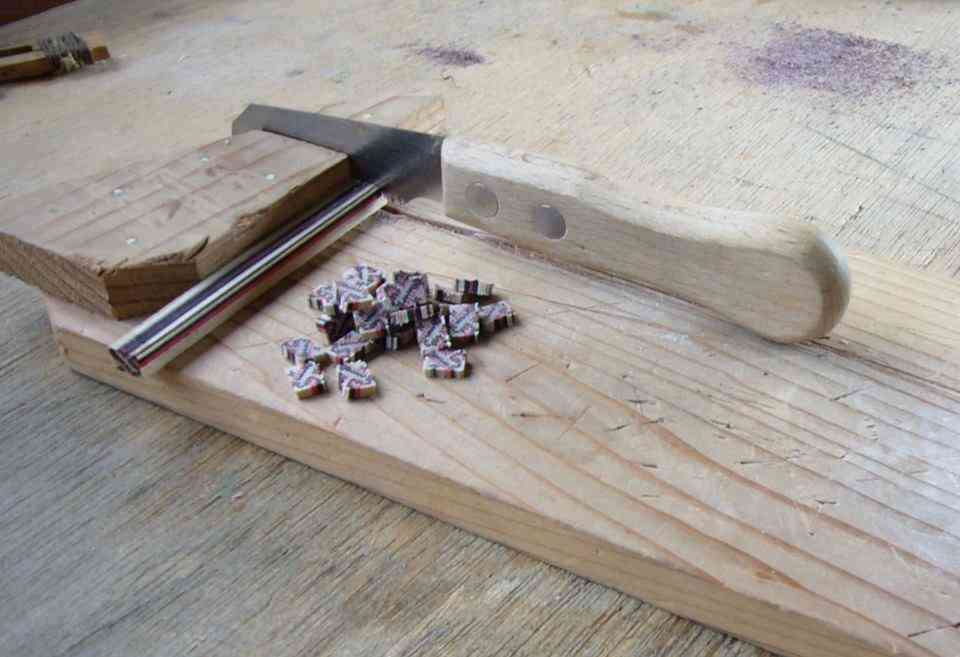
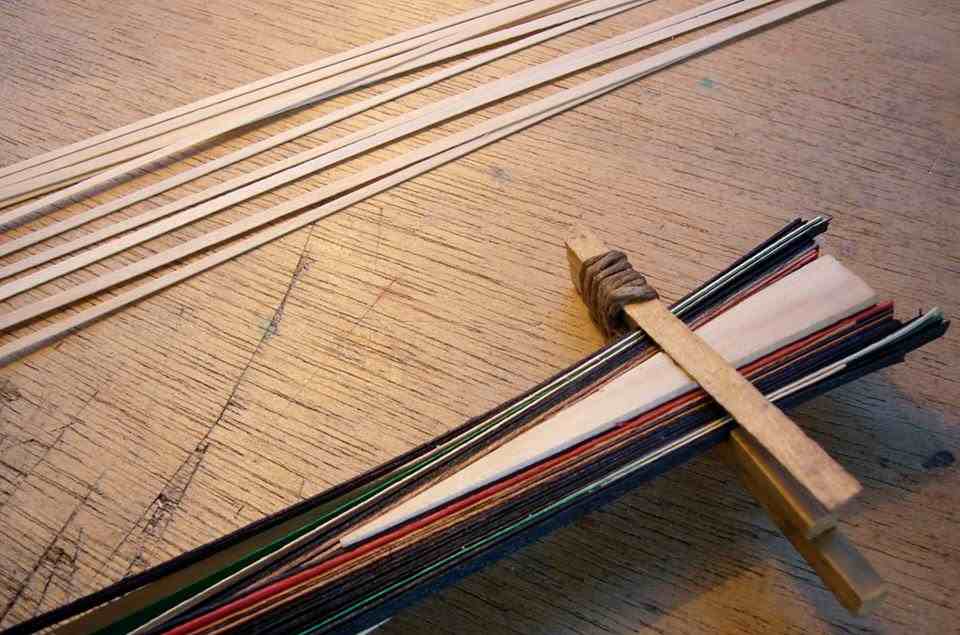
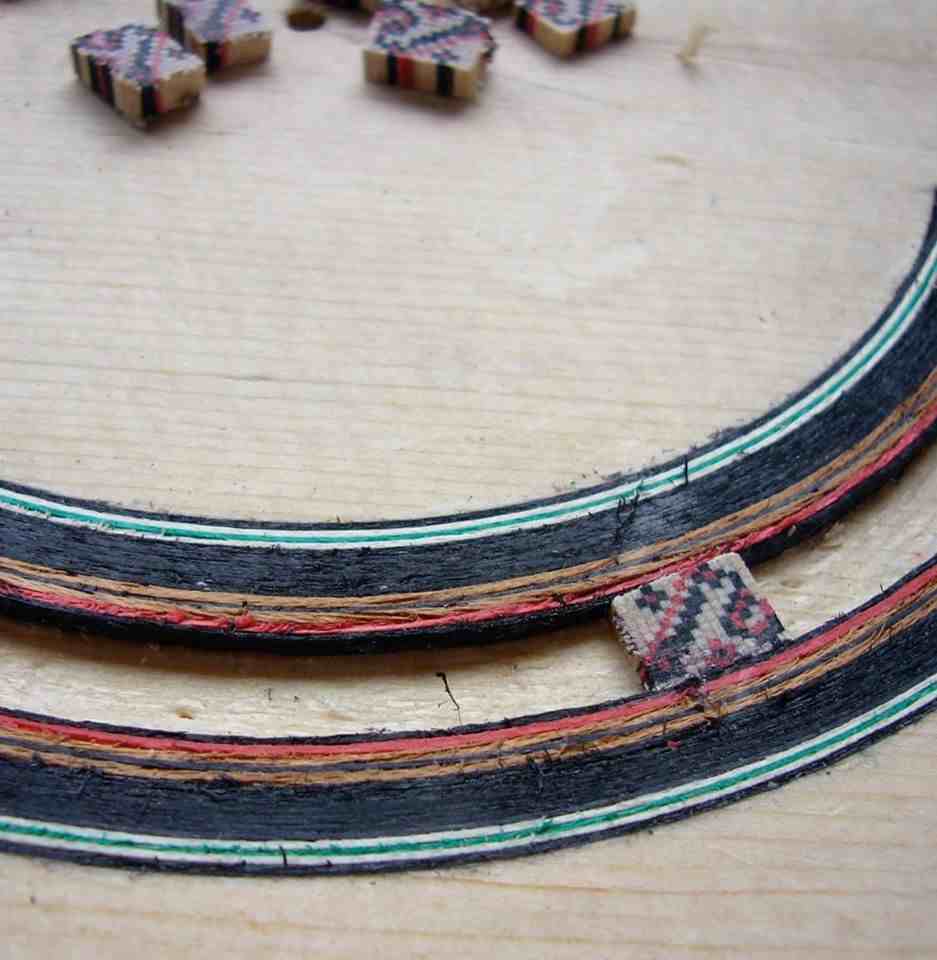
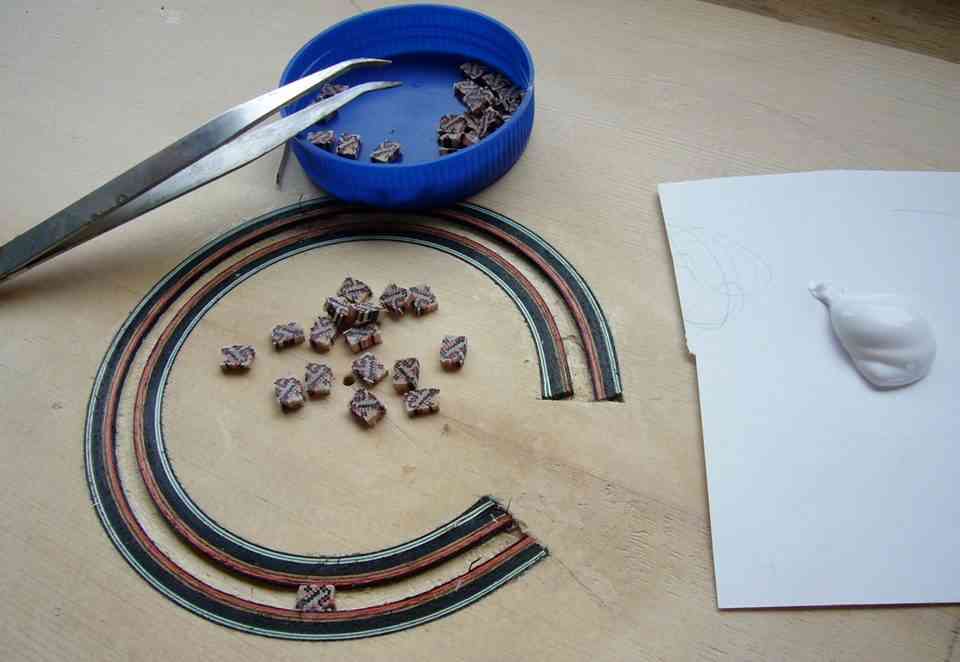
The next step in making a rosette, cut the tiles from the "loaf" I made last - heh heh I said loaf.
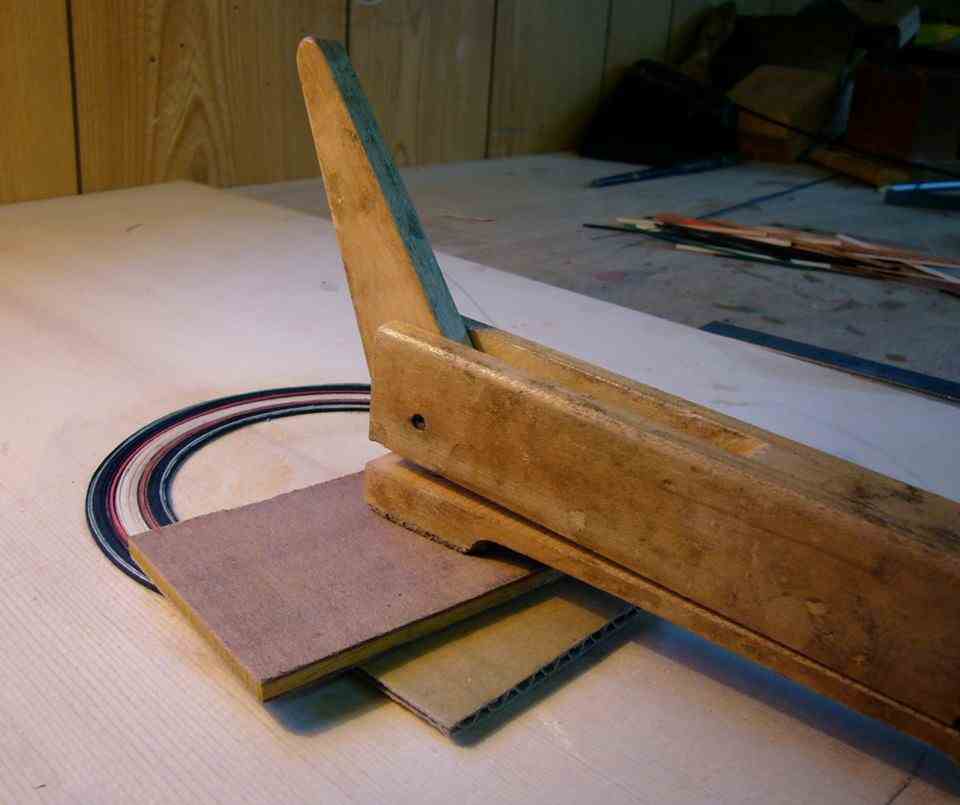
Using a small kerf-less saw I slice off tiles. Then stack them for tile pile photo. The line them up on a test arrangement of veneer lines to see how the composition looks. The wood gathering device is called a buckle, made up of some scrap wood and string. it helps keep the veneer lines tamed and in order while I mess with the composition. I'm figuring out how wide to make the group of lines to inlay it snuggly in the routed rosette channel in the spruce top and at the same make a final decision on the the design.
Images are resized automatically to a maximum width of 800px
RE: Creating a Rosette- Photo Essay (in reply to estebanana)
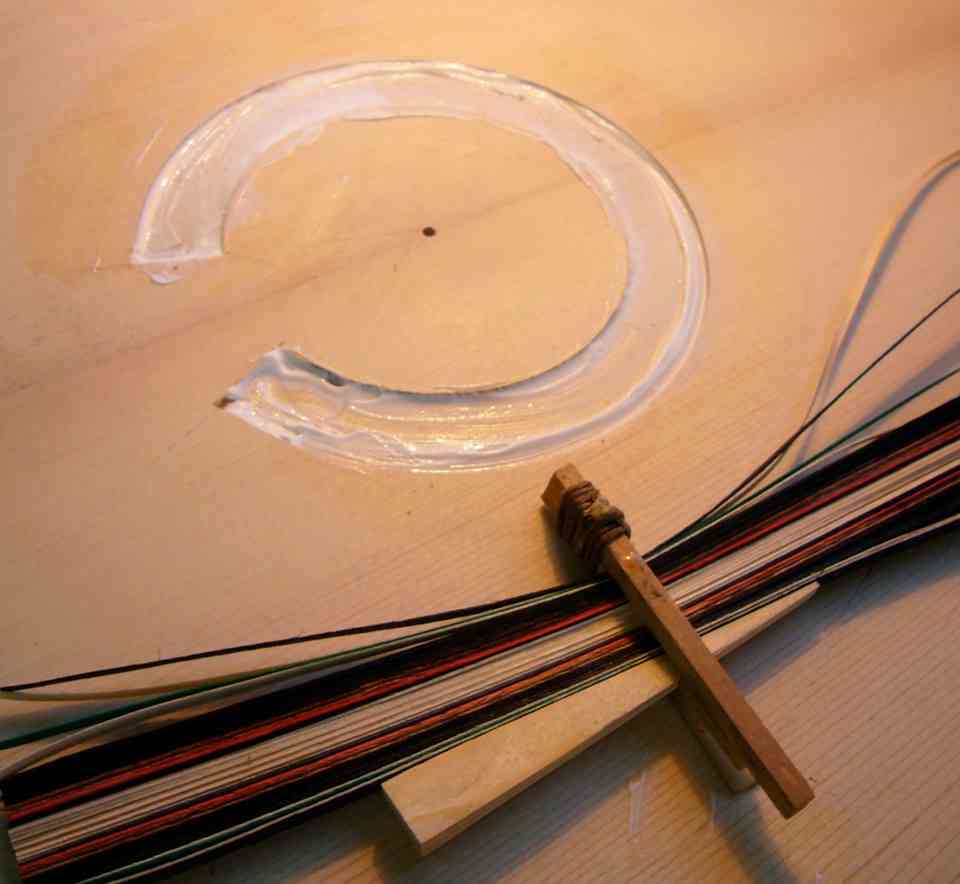
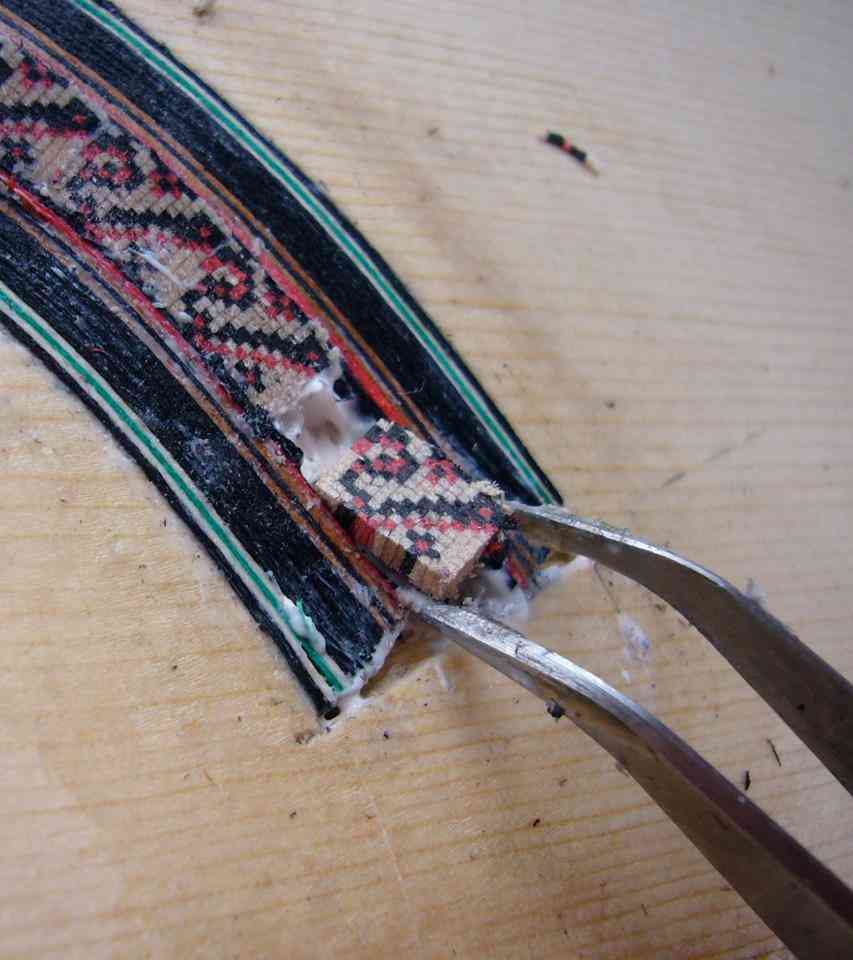
Next I take the buckle and remove the white lines from the center of the group and rub them with candle wax to make them resist the white glue I'm going to use. The middle veneer lines are nice and slippery with cheap wax, I press them back together and reinsert them into the buckle.
Now the fun part, take the bundle of veneer lines and massage them into the channel which is now coated with white glue. The unwaxed lines will glue into the channel while the waxed 'spacer lines' will not. I leave a safey clamp on the lines over night while they dry to prevent them from popping out, which would really piss me off after all this work. Half of guitar making is waiting for glue to dry and the other half is making sure things don't fly apart until they are glued.
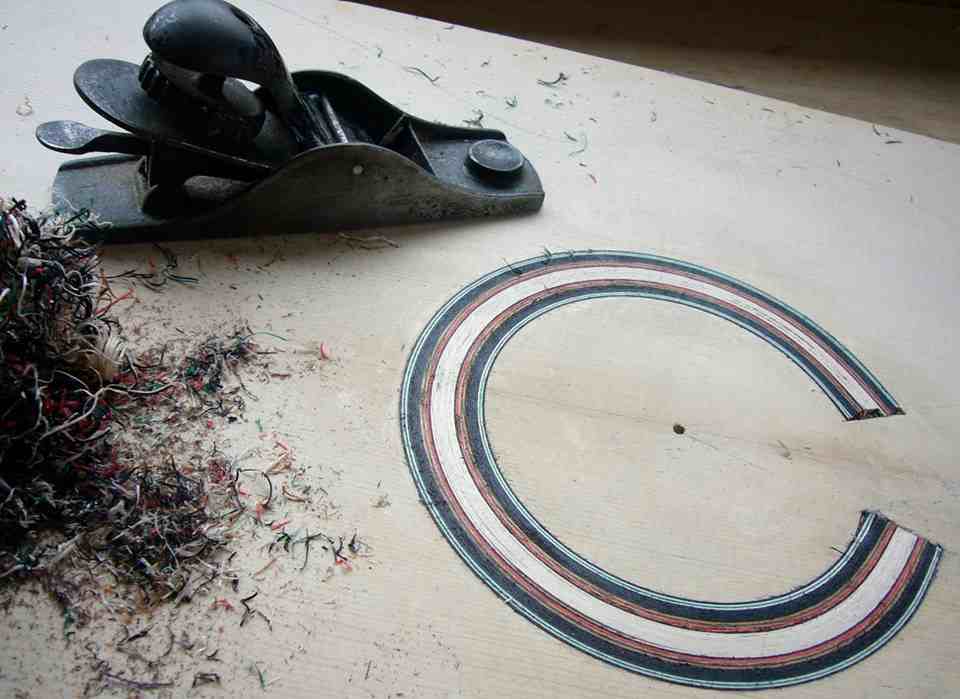
Tomorrow I will remove the waxed white lines in the middle of the circle and this will leave a secondary channel- the tile slices will get inlayed in that channel.
The trick is to calmly get all the lines in the channel, but if they pop out while you work you just take a deep breath, pull it all apart,wash your hands, wash the tools, wash the veneer lines and begin over. This time I did it in one go! Most of the time I nail it, but sometimes not. That's how it is
Images are resized automatically to a maximum width of 800px
RE: Creating a Rosette- Photo Essay (in reply to estebanana)
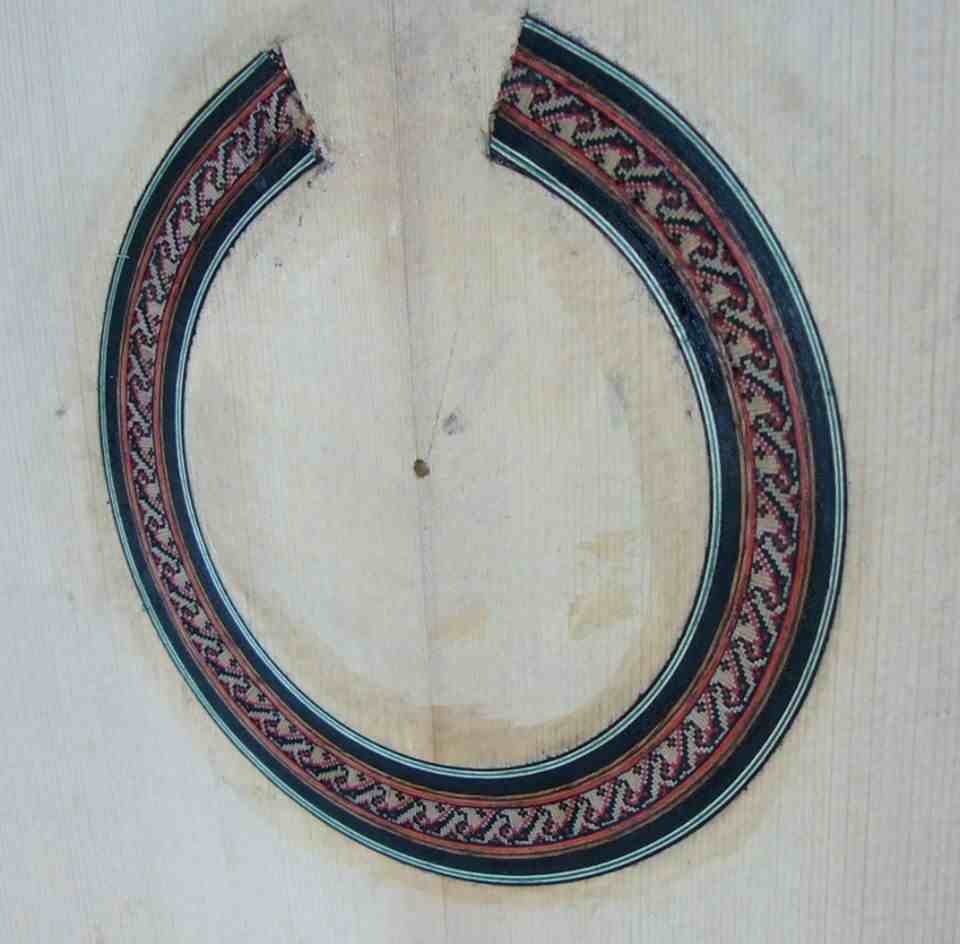
The conclusion, rosette tiles inlayed in the design.
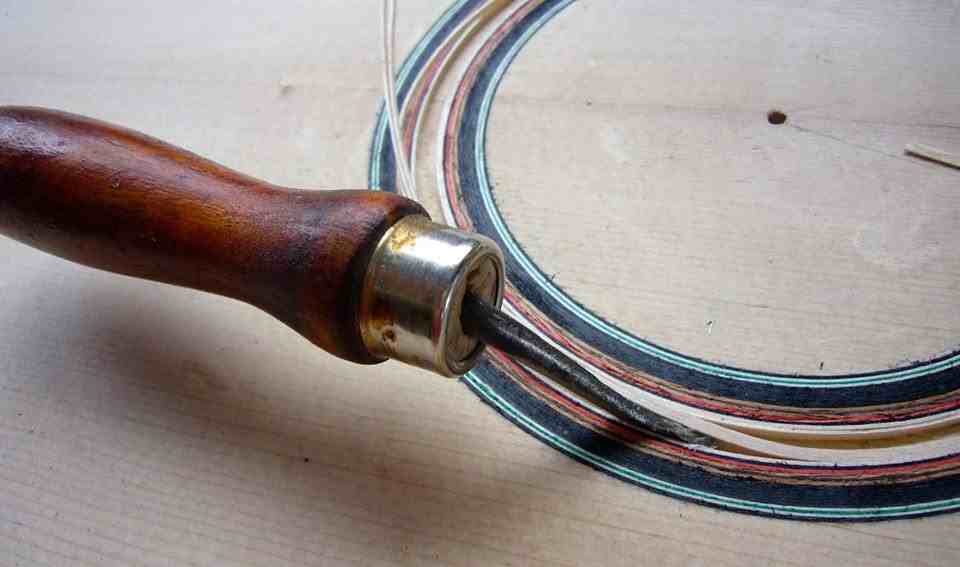
In sequence picking up from yesterday: Plane the veneer lines to the level of the top. Use a purfling pick tool to remove the waxed spacer lines from the center. The new channel left by excision of the spacer lines; set inlay with white glue, tweezers and some other tricks.
Images are resized automatically to a maximum width of 800px
RE: Creating a Rosette- Photo Essay (in reply to estebanana)
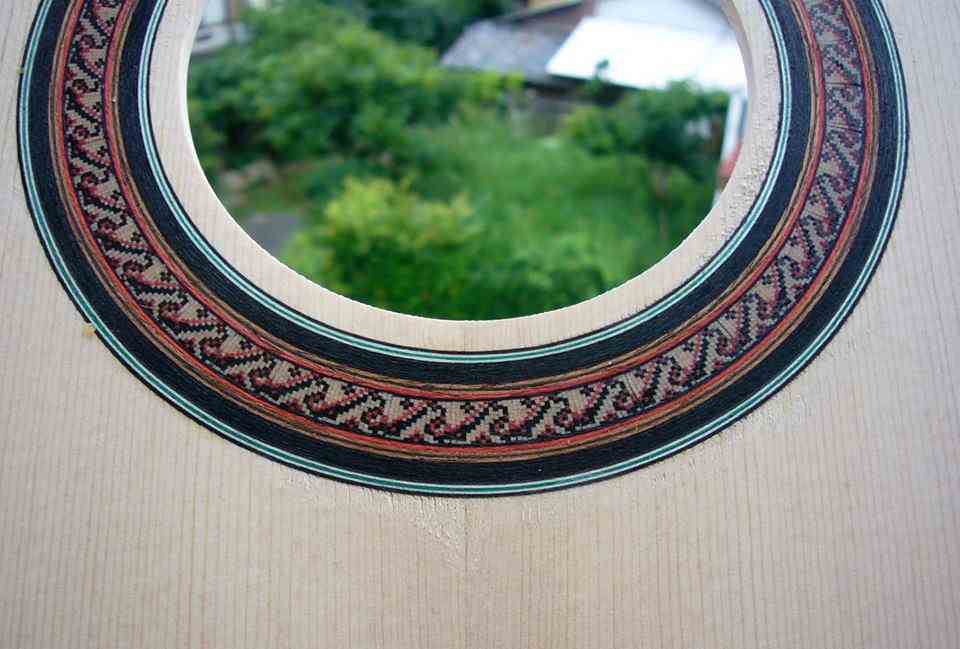
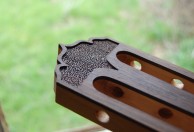
Rout out the sound hole, clean up the rosette with scrapers a sandpaper.
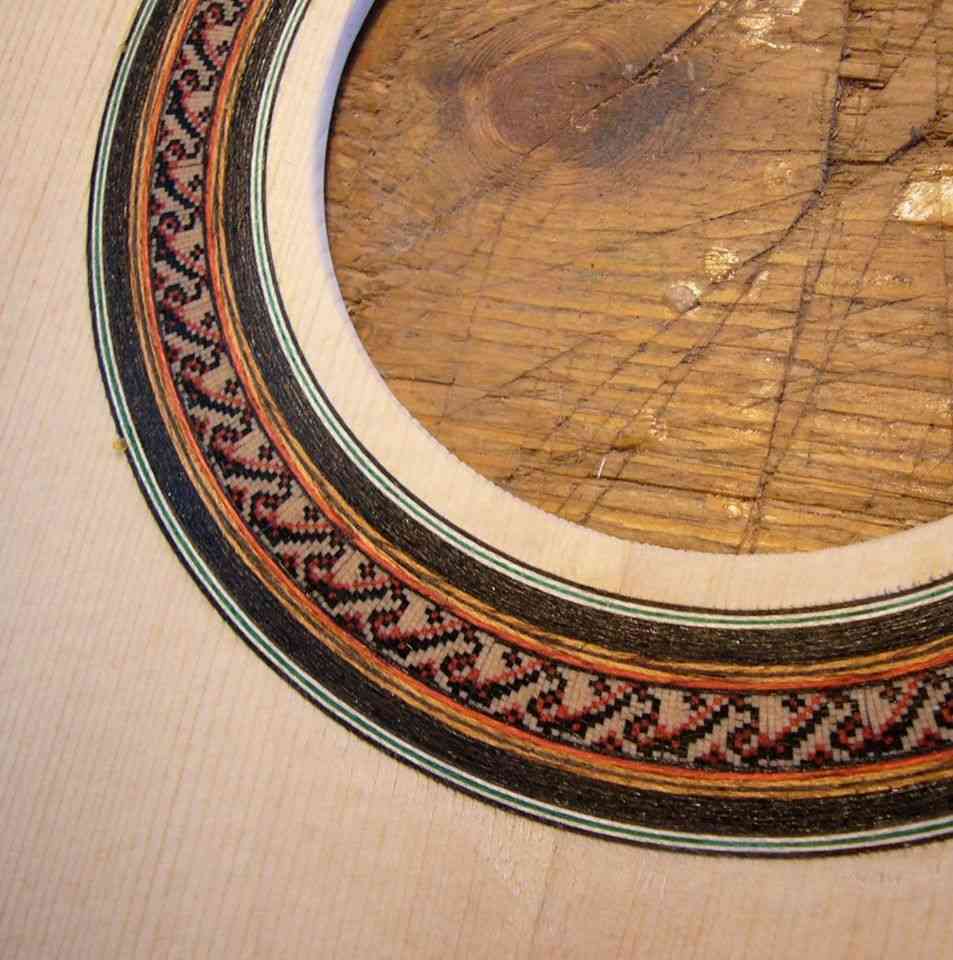
The design is a basic pattern of thin trim lines on the outer borders, a black field and then brown and red line make a close border to the tile ring. The mosaic tiles make a repeating meander pattern. It's red, black, brown, and white, with two fine dark green lines in the outside border. Strong and elegant, not fussy. Now to thickness and brace the top and this guitar will be moving along.
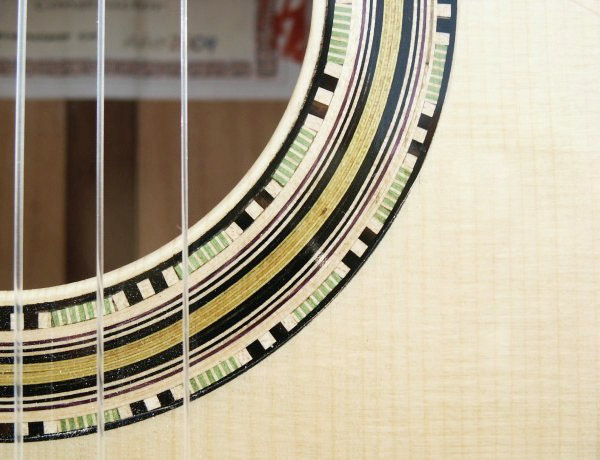
Thank you for looking at this photo essay. I hope you enjoyed it! I will show the other tile with green/red in situ in a rosette when it is finished.
( Not naming any names of known rosette fiends. )
Images are resized automatically to a maximum width of 800px
RE: Creating a Rosette- Photo Essay (in reply to estebanana)
Stephen, How do you deal with the annoying tear out below the rosette? I have the same problem and hate to sand it since it gets the tint of the rosette into the spruce.
RE: Creating a Rosette- Photo Essay (in reply to estebanana)
John,
That was scraper tear out....since I was taking photos I had to hurry so I did not put good edge on the scraper.
There area few tricks. One is to use the soldering iron and a damp cloth to spot areas with steam heat. If there is compression tear out or compressed wood where the router hits end grain you can wet it with a piece of damp cloth and leave the cloth in place a touch it with the hot soldering iron for up to 10 seconds. Will swill steam pop the compressed wood.
I also use a sanding block with fresh 220 paper and move from spruce towards the rosette then lift the block instead of moving it back over the spruce. Use one direction sanding, lift block, clean it with vacuum cleaner fine attachment then do another one direction pass. It's time consuming, but it cleans everything up.
And super sharp hand scraping followed by a bit of one direction sanding.
I also sharpen the router bit on a stone, but at some point they need to be trued on a fine grinder wheel, as the shape of the blade rounds over and then does not cut as well. I think router bit just have a usage life and then they spook me because they get slightly off balance from hand honing touch up.
This top has 4.5 mm of meat left after the rosette is inlayed so there can be sanding and planing on both inside and out side surfaces to get through any little bugaboos.
RE: Creating a Rosette- Photo Essay (in reply to estebanana)
quote:
ORIGINAL: estebanana
I also use a sanding block with fresh 220 paper and move from spruce towards the rosette then lift the block instead of moving it back over the spruce. Use one direction sanding, lift block, clean it with vacuum cleaner fine attachment then do another one direction pass. It's time consuming, but it cleans everything up.
I think router bit just have a usage life and then they spook me because they get slightly off balance from hand honing touch up.
That's the same method I use when the tear out happens. I think I'm going to go back to running the top through the thickness sander to level the rosette. I stopped doing it since the glue in the rosette pretty much ruins the sandpaper but it eliminates the occasional tear out.
I just wait for a sale on router bits and buy a bunch of them so I always have a sharp edge. A router bit is only good for 3-4 rosette channels but that's a lot of guitars for a small expense.
RE: Creating a Rosette- Photo Essay (in reply to estebanana)
Yesterday my girlfriend asked me if I could buy "new stickers for around the hole part". This thread came in super handy, her mind was blown, true artistry, thanks for this Stephensan! She wanted me to change rosettes to match her dresses, lolololol
RE: Creating a Rosette- Photo Essay (in reply to Leñador)
She might be on to something, rosettes that snap in and out depending on style and type of dress she is wearing to your gigs! Yes, true artistry for sure...
RE: Creating a Rosette- Photo Essay (in reply to estebanana)
Nice work! I like the idea of fanning the strips and brushing glue on all at once.
Personally I find a circle cutter like this one helpful. You can get nice precise outer edges and you don't have to worry about needing a super sharp router bit to prevent tearout.
RE: Creating a Rosette- Photo Essay (in reply to estebanana)
I was able to play one of your (very excellent) guitars for the first time a few days ago. The rosette looked great. Thanks for taking the time to go the extra step. It really pays off.
RE: Creating a Rosette- Photo Essay (in reply to estebanana)
Thank you I read your review. That one began with a lot of power and it was a bit brash honestly, but it was played in and that edge was polished a bit. I am very curious to play that guitar myself to see how it developed. One thing that guitar makers can't always know is how a guitar they made several years ago is playing today. That information is valuable. I can make a good guess, but I would like to have Ryan's guitar in my hands again to see how it opened up. I think all guitar makers have this curiosity.
Rosettes...yes I think many today are over bearing, over planned over done. I've found people respond with a lot of positive comments to very spare almost restrained rosettes. It goes against the notion that busier is good, but busy for it's own sake does not always speak clearly. I just try to keep it clear and use my personal sense for color.
If you can get that guitar it would be good, I simply cannot make them for that price any longer. And frankly I should not have to. Good luck, and thank you.
RE: Creating a Rosette- Photo Essay (in reply to estebanana)
quote:
If you can get that guitar it would be good, I simply cannot make them for that price any longer. And frankly I should not have to.
Yeah, it was partially out of respect for the quality of the instrument that I refrained from negotiating for a lower price. I appreciate what you guys do.
Posts: 797
Joined: Jun. 1 2010
From: Halifax, Nova Scotia
RE: Creating a Rosette- Photo Essay (in reply to machopicasso)
quote:
Thanks for taking the time to go the extra step. It really pays off.
Agreed. The one on the guitar that Stephen built for me is definitely a lot nicer in person. He incorporated a bit of green at my request, and I really love how it turned out with the other colors he selected. He has a real artist's eye for these things.

 Printable Version


 )
) 


 New Messages
 No New Messages
 Hot Topic w/ New Messages
 Hot Topic w/o New Messages
 Locked w/ New Messages
 Locked w/o New Messages
 Post New Thread