Welcome to one of the most active flamenco sites on the Internet. Guests can read most posts but if you want to participate click here to register.
This site is dedicated to the memory of Paco de Lucía, Ron Mitchell, Guy Williams, Linda Elvira, Philip John Lee, Craig Eros, Ben Woods, David Serva, Tom Blackshear and Sean O'Brien who went ahead of us.
We receive 12,200 visitors a month from 200 countries and 1.7 million page impressions a year. To advertise on this site please contact us.
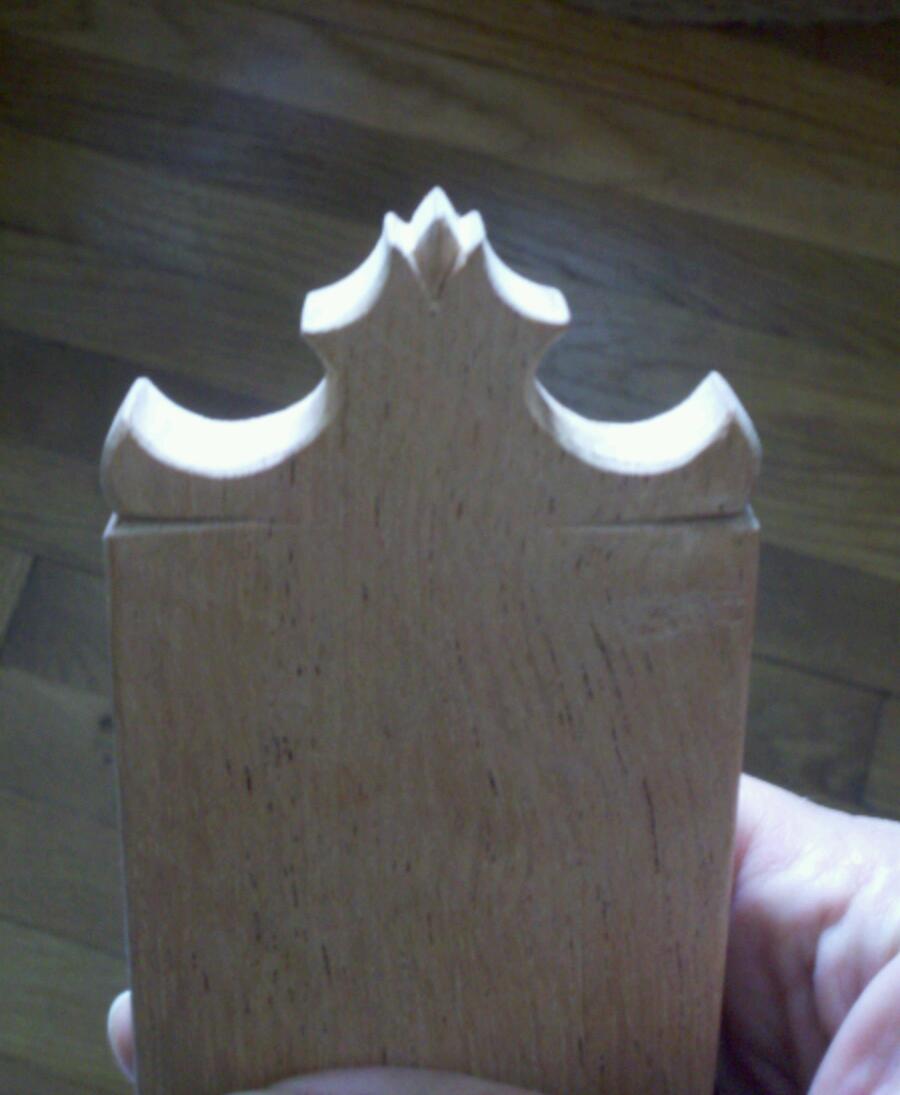
I like it too. Thumbs up! I like how the little tip is kind of recessed (unless I'm seeing it wrong). It occurred to me it might be pretty cool if that tip were rounded, kind of like a spike, a stubby spike, or like a dragon's tooth. Just sayin'...
It doesn´t remind on a dickhead,.... which is good. I think I like it but would make the central structure a little bit wider. Than it would look stronger imo. Good work.
Wow! you are right, there are similarities but I swear I have never seen his guitars before! :)
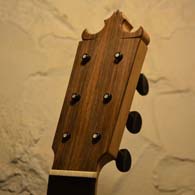
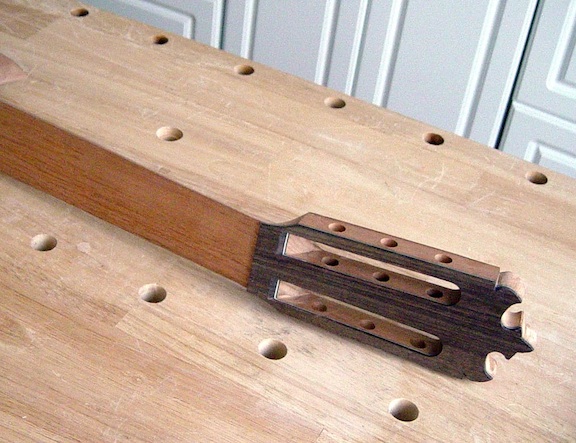
His has a single curve on each side while mine has two and mine will have horizontal cuts instead of diagonal. His is very nice indeed though.
Great minds think alike! lol.
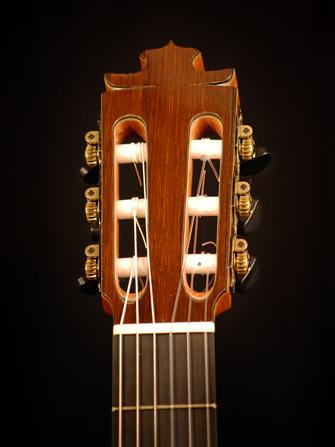
i think i also saw someone else who has something similar to yours somewhere else. have a look at La Sonanta's guitar page maybe somewhere there (they have Castillo there too)
I was asking myself that as I drew it out originally... You mean the points will get blunt when it bangs against a wall the first time?
I have Condes that have the newer style sharpened points. They seem to do ok if they hit a chair or something unless of course they are dropped on their head ouch! But then, I would be worried more about structural issues.
I suppose I could round the points a little...? I'll try that today and see how I looks.
You should leave it if you like it. Just about every design has been used. A lot of builders take something from others. Your center design looks like Castillo's. However, that was taken from a Barbero. Who knows where Barbero got it. I think it's different enough to say it's not a copy of Castillo's.
It could get damaged if it bangs into something but so can any design. If your not careful with your intrument then you deserved to get it messed up if you bang it
What I hate are all the Torres copies, all the Romanillos copies, all the Reyes copies. Be original if you can.
After studying your photo some more, I remember coming up with something similar about 6 or 7 years ago so I was searching through photos upon photos until I found it. I didn't end up keeping it because I remember thinking that it would be one good hit from being damaged lol.
Images are resized automatically to a maximum width of 800px
Scary! very similar I must say! I guess there are only so many things you can come up with for a headstock design without ending up very much like someone else's. Thanks for sharing the photo. I like yours and mine and I might take the chance and make mine anyway.
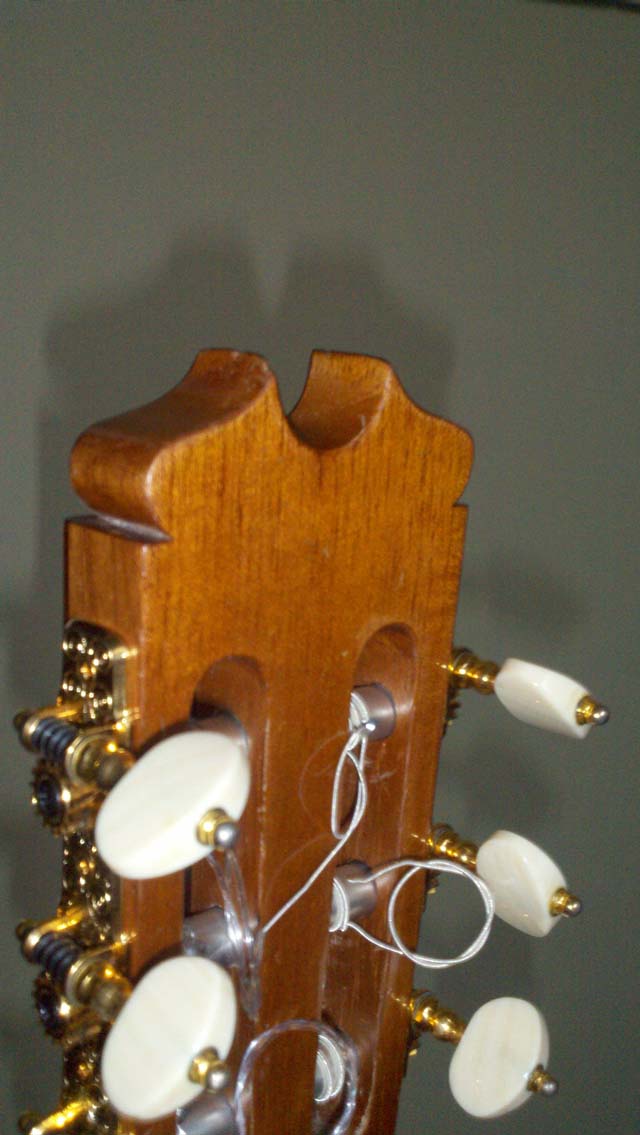
I smashed one of my Conde heads really hard right on one of the sharp points and it didn't really do that much damage so the details seem pretty hardy.
I play them all and don't just keep them hidden away in a display case. They stay alive but sometimes bear some scars. :)
J.
Images are resized automatically to a maximum width of 800px
I like it too. Keep it! I think I may have gotten the idea for that one I did from Barba. I've drawn up many designs and always see similarities to other makers work.
remember to shave your pegs before drilling and reaming. Thats important if you want them to work well. You cant expect the pegs you buy to be even. When you shave them, I find that its the best to shave them down to some 6,5mm at the tip. This pegs have a better "gear" (Less string is moved in one turn) Then you drill a 6mm hole and ream. Another advance is that you get a smaller hole so they wont wear out to fast and replugging will be something way out in the future.
RE: Headstock Prototype Good advice! I didn't think about shaving them first. I accidentally got a shaver instead of a reamer first time so luckily I have both now. I'll look at my pegs when I get to the shop today and see what the tips measure now. Do you route or drill the center of the peg for the MOP inlay dot? I assume it is a very shallow cut? Do you use a plug cutter to cut out the dot? Don't want to weaken the tip.
Do you route or drill the center of the peg for the MOP inlay dot?
Drill them with very sharp wood bit with a point for centering. I turn little cylinders of in lay material on the lathe and then slice them off with a razor saw. They only need to be 1 m thick if you are careful. But if you give yourself 2mm or so you can have some extra to file and finish off on top of the peg.
Some pegs come with a residual center point left on the peg from being turned and some are finished smooth. the ones with the center left on are easy to do a ready to drill. You tale piece of scrap and drill a hole in it and then use your reamer to make it wide enough for the peg to snug in. Then seat the peg in teh scrap with moderate pressure and then put the scrap piece with peg in a drill vise and square it up with the drill bit. The scrap just serves as a peg holder, if you drill gently it will all hang together.
That is really great information Stephen! I was wondering how I was going to hold the peg completely vertical without buggering it all up overtightening it in a drill press vise. Lol I don't have a lathe so I will have to get creative with the MOP turning.... Can I use bone instead? Might be easier to shape without a lathe? Was busy making a hand circle cutter today like the one in Courtnalls book. Turned out great! Think I need more control the first time around - pardon the pun. Also made the little purfling cutter.

 Printable Version


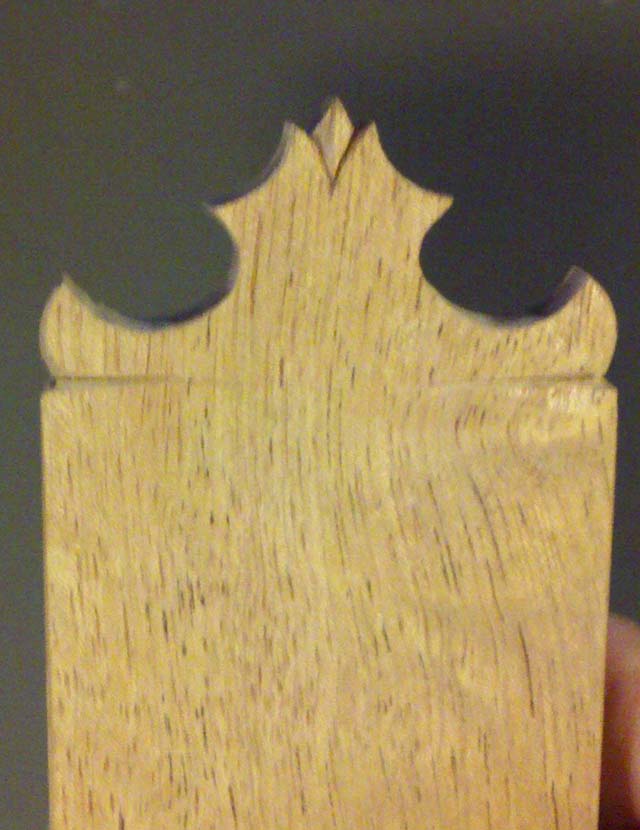


 I like how the little tip is kind of recessed (unless I'm seeing it wrong). It occurred to me it might be pretty cool if that tip were rounded, kind of like a spike, a stubby spike, or like a dragon's tooth. Just sayin'...

 i think i also saw someone else who has something similar to yours somewhere else. have a look at La Sonanta's guitar page


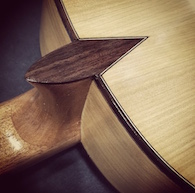
 . Its a matter of taste, but I prefer the plain look of black ebony. Plain, simple and pretty.
  New Messages
 No New Messages
 Hot Topic w/ New Messages
 Hot Topic w/o New Messages
 Locked w/ New Messages
 Locked w/o New Messages
 Post New Thread