Foro Flamenco


Posts Since Last Visit | Advanced Search | Home | Register | Login

Today's Posts | Inbox | Profile | Our Rules | Contact Admin | Log Out


Welcome to one of the most active flamenco sites on the Internet. Guests can read most posts but if you want to participate click here to register.

This site is dedicated to the memory of Paco de Lucía, Ron Mitchell, Guy Williams, Linda Elvira, Philip John Lee, Craig Eros, Ben Woods, David Serva and Tom Blackshear who went ahead of us.

We receive 12,200 visitors a month from 200 countries and 1.7 million page impressions a year. To advertise on this site please contact us.


RE: First Build - Troutie's Photo Journal   You are logged in as Guest
Users viewing this topic: none
  Printable Version
All Forums >>Discussions >>Lutherie >> Page: <<   <   1 [2] 3 4 5    >   >>
Login
Message<< Newer Topic  Older Topic >>
 
estebanana

Posts: 9351
Joined: Oct. 16 2009
 

RE: First Build - Troutie's Photo Jo... (in reply to paul.troutfisher

quote:

make everything as light as possible - for example the bracing - he said to reduce it beyond what's called out. Is this also true for the harmonic bars? Do they really play much of a role and would reducing their profile lend to a quicker reponse too? I'm looking for the explosive blanca sound (not that my playing supports the need :( ).


With respect to Monrad, he was a friends teacher who makes fabulous guitars. I have a slightly different take on the as light as possible school of thought.

For back braces I've been making them slightly beefier and cutting the ends down more. Reason is I'm using a lot of Port Orford and find it is already a very light wood, not very dense and the little extra mass in the back braces has been helpful to getting the back to sound and respond like I want. Different kinds of materials may call for a little extra here or there.

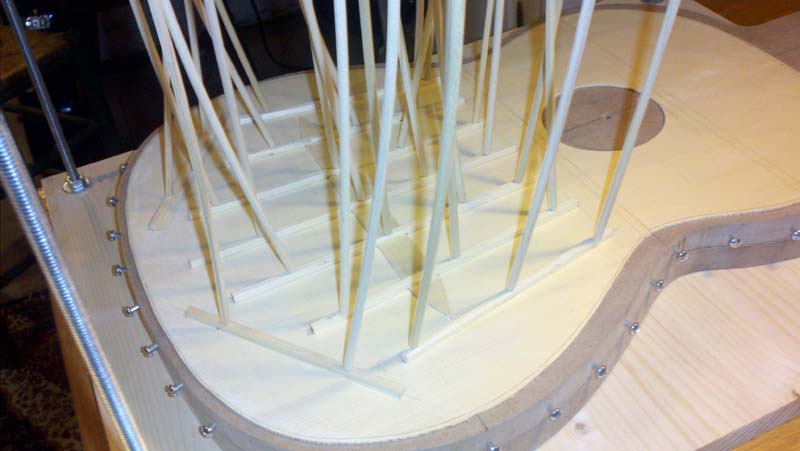
Harmonic bars, Hmm. well there are different ways of doing them. You can not scallop the ends, or you can deeply scallop the ends. You may also want to put some arching in the lower harmonic bar. You may want to think about how you pillar them up from the ribs. Tall fitted triangular pillars, beefy wide pillars or simply a glue block on top of the brace. All this in conjunction with how you scallop the brace.

A deeply scalloped harmonic bar can make the top really lively, and to some extent have an effect on sustain. You are dividing the top in half basically at the lower harmonic bar and that division can be strong and inflexible or slightly flexible with a scalloped bar. It also has to do with how high and wide the bar is. Generally the lower wider harmonic bar gives the top lower pitch which on flamencos is helpful. Look at Santos' harmonic bars they are kind of squat and hacked out.

I would say the higher the bar the more you can scallop it the lower the bar the more you may want to let it run across straight. Scalloping lowers the pitch, making the bar high and thin raises it. If you arch it think about how that arching adds stiffness the area and scallop accordingly. If you want a lively guitar think about scalloping the ends very low. But remember lively does not always equal profound. Many lively guitars are just so so, with no internal juice. No forcing power.

The way you pillar the ends of the harmonic bar, heavy pillars lots of coupling with the sides helps sustain, heavy also can be too tight. Most flamenco guitars use moderate pillars.

Light fan braces with light top structure, heavy scalloped harmonic bar can be a recipe for a snappy guitar. But the bridge and how it is put on is very important. The bridge should be light something like 17 or 18 grams as light as 16 as heavy as 22 has been a good range for me. A nice rosewood, ideally Brazilian, or something with those qualities. A light bridge with light top structure will usually give a fast acting guitar, and you can slightly spring in the bridge or fit it perfectly. There's a way of building where you make the top more or less flat and then make an arch under the bridge and suck the top up into the arch when you glue it on. You can also make the arc in the top quite pronounced and then fit the bridge on perfectly- you can also do something half away in between where the bridge gives the top some lift, but the top has some arch.

You really have to experiment with all those ways of how the bridge and top work together to find your own sound.

When Gene Clark helped me with my first guitars he said it backwards. Make them substantial like the Santos interior he showed me. His idea was make the guitar meatier and shoot for making it profound, then over successive guitars remove weight and mass until you arrive at your own guitar sound and feeling. I think I matured much, much slower than my colleagues who were more specifically coached, but I am happy with where I ended up and where it's going. Chris Berkov was also the one who gave me a little talk about how the bridge and the top work together. I worked on that for a long time after what he took about ten minutes to explain.

With respect to tapping on the top, you know there are all kinds of things to say that would be very accurate in terms of pitches to aim for how many intervals to separate the back tone for the top. None of them are a cover all formula, here is what Gene said to me: Think of the back like the sound of the tabla in Indian music, think of the top like a snare drum in a marching band.

Higher pitched back, lower pitched top. Follow the way the top and back pitches lower and rise when you cut the binding channels. Sometimes they change after the binding goes in, they don't go back exactly where they were before you cut the channels. Just be aware of that stuff as you tap when you build. He also said listen for music in the box. Does the guitar sound musical while you make it? Perhaps that is superstitious or not logical, but it is fun and you want to have fun.

So there are lots of things to think about. Some things to consider: Do you want to willfully direct your building into a certain sound or do you want to push it in a direction, but be open to what happens and react to that? Do you want to make a sound you hear in your head or do you want to hear what you make? These question seem obvious, but they are important to never lose sight of. The other thing Gene talked about was the difference between what he called the "instant gratification" guitar and the guitar which will take time to open. He also talked a lot about the breathiness of the fundamental sound and the support of overtones through the fundamental. But that is for another day.

You're a person who is technically proficient, making these things will not be your issue. Figuring out who you are as maker will be your thing. There are no easy formulas you just have to risk it and build them. Have strong players crit your work and then think carefully about what they say. Don't do everything they say, just use it as part of your awareness of your practice. What Gene did for me is tell me to discover who I am while I made the guitars, rather than try to will them to be this way or that way. Maybe not the best business advice, but as I said I'm happy where it took me.

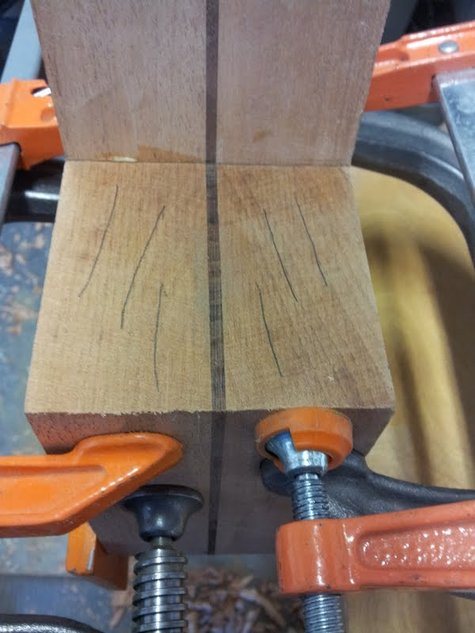
P. S. Mind which direction the grain runs in your heel blocks.

_____________________________

https://www.stephenfaulkguitars.com
  REPORT THIS POST AS INAPPROPRIATE |  Date May 23 2012 17:17:30
 
paul.troutfisher

Posts: 161
Joined: Feb. 16 2011
From: Danville, CA

RE: First Build - Troutie's Photo Jo... (in reply to estebanana

Priceless advice Stephen, thanks so much. Gosh darn, it does create more questions then it answers :)

p.s. did i mess up my heel block?

_____________________________

troutie
  REPORT THIS POST AS INAPPROPRIATE |  Date May 23 2012 17:55:50
 
estebanana

Posts: 9351
Joined: Oct. 16 2009
 

RE: First Build - Troutie's Photo Jo... (in reply to paul.troutfisher

quote:

p.s. did i mess up my heel block?


From the picture it looks like it's flat grain against the neck instead of vertical. I like them vertical. I could be wrong, but it looks like the grain is parallel to the neck. No big deal now, but I prefer them to be at least at an oblique angle to the neck if not vertical like the neck itself.

_____________________________

https://www.stephenfaulkguitars.com
  REPORT THIS POST AS INAPPROPRIATE |  Date May 23 2012 18:17:46
 
estebanana

Posts: 9351
Joined: Oct. 16 2009
 

RE: First Build - Troutie's Photo Jo... (in reply to paul.troutfisher

quote:

Priceless advice Stephen, thanks so much.


de nada, just weigh out what every one says and go with the right teacher. Sometimes doing a set program gets you there, sometimes putting it together from different sources works.

_____________________________

https://www.stephenfaulkguitars.com
  REPORT THIS POST AS INAPPROPRIATE |  Date May 23 2012 18:20:12
 
paul.troutfisher

Posts: 161
Joined: Feb. 16 2011
From: Danville, CA

RE: First Build - Troutie's Photo Jo... (in reply to estebanana

quote:

From the picture it looks like it's flat grain against the neck instead of vertical. I like them vertical. I could be wrong, but it looks like the grain is parallel to the neck. No big deal now, but I prefer them to be at least at an oblique angle to the neck if not vertical like the neck itself.


Darn, right you are. I assume the vertical grain helps provide more support to the neck from deflecting?

_____________________________

troutie
  REPORT THIS POST AS INAPPROPRIATE |  Date May 23 2012 19:41:04
 
estebanana

Posts: 9351
Joined: Oct. 16 2009
 

RE: First Build - Troutie's Photo Jo... (in reply to paul.troutfisher

quote:

Darn, right you are. I assume the vertical grain helps provide more support to the neck from deflecting?


I want to protect the heel from splitting across the flat grain side to side. Heels fail that way on occasion from the neck pulling forward. A flat grain orientation to the neck make that more of a risk. Vertical grain to the neck can still split, but it does not have the built in potential to peel apart. Same with the headstock, it it were flat it would have more chances to peel off a layer do to string tension or impacts.

Thankfully usually gluing it back together fixes it. You'll probably be ok on that one.

_____________________________

https://www.stephenfaulkguitars.com
  REPORT THIS POST AS INAPPROPRIATE |  Date May 23 2012 19:57:27
 
El Polaco

Posts: 155
Joined: Sep. 29 2005
From: Singer Island - Florida

RE: First Build - Troutie's Photo Jo... (in reply to paul.troutfisher

Well, I did exactly the same thing with my heel!!! I guess we are just newbie goofs! :)

I got the solid heel block from LMI and it is actually oriented with the grain parallel to the neck. I guess we just didn't think about the grain.... Troutie?

Ended up using pretty skinny wood dowels for the brace gluing rig which seem to apply gentle pressure. I did the under bridge reinforcement that was recommended by Andy and Anders so I notched the braces and glued them all down.

I made the assumption that the notches in the braces are glued onto the bridge reinforcement strip... hope I was correct... ugh.

Few snaps:


Images are resized automatically to a maximum width of 800px

Attachment (2)

_____________________________

Jorge

Guitarras Artesanas Españolas
www.jorgedezofia.com
  REPORT THIS POST AS INAPPROPRIATE |  Date May 23 2012 23:11:48
 
estebanana

Posts: 9351
Joined: Oct. 16 2009
 

RE: First Build - Troutie's Photo Jo... (in reply to El Polaco

quote:

I made the assumption that the notches in the braces are glued onto the bridge reinforcement strip... hope I was correct... ugh.


Works both ways but I think most builders are now fitting the braces between the straps. I've seen it both ways in nice guitars.

The bridge strap is funny because some swear by it others don't use it at all. Some first rate guitars have been made with or without it.

_____________________________

https://www.stephenfaulkguitars.com
  REPORT THIS POST AS INAPPROPRIATE |  Date May 24 2012 1:46:19
 
estebanana

Posts: 9351
Joined: Oct. 16 2009
 

RE: First Build - Troutie's Photo Jo... (in reply to El Polaco

quote:

I got the solid heel block from LMI and it is actually oriented with the grain parallel to the neck


Really? Wow I would have sent it back. That is why I have such a snit fit about buying necks via internet sales. I want to punch my thumb in the fracking wood and look at the end grain before I buy it.

When I do a stacked heel I always use stock from vertical grain or near vertical as possible.

Here's a little teaser of what is upcoming on June's seven string menu. The heel block w/ strip through the neck are all lined up. It will line up from tip of the head stock, through the block, down the back strip and then wrap around the tail.

There was talk a few months back that Faulk could not get his lines straight; and karma is a bitch because they will not like to see this or the taste of those words.

Anyway those pencil lines are indicating grain direction. All hand joined mind you no thickness sander or power jointers.


Images are resized automatically to a maximum width of 800px

Attachment (1)

_____________________________

https://www.stephenfaulkguitars.com
  REPORT THIS POST AS INAPPROPRIATE |  Date May 24 2012 1:50:35
 
Jeff Highland


Posts: 401
Joined: Mar. 5 2010
From: Caves Beach Australia

RE: First Build - Troutie's Photo Jo... (in reply to estebanana

If you want some meaty technical explanations on how guitars work, the Trevor Gore books are a must
Not specifically oriented towards Flamenco, but it does have suggestions for frequencies to tune to.

Here is an example of the concepts presented
http://www.goreguitars.com.au/attachments/POMA_paper.pdf
  REPORT THIS POST AS INAPPROPRIATE |  Date May 24 2012 2:24:36
 
paul.troutfisher

Posts: 161
Joined: Feb. 16 2011
From: Danville, CA

RE: First Build - Troutie's Photo Jo... (in reply to El Polaco

quote:

I got the solid heel block from LMI and it is actually oriented with the grain parallel to the neck. I guess we just didn't think about the grain.... Troutie?


I built up a stacked heel from extra neck stock. I followed the Building Master Guitar instructions - I think, but what Stephen says makes a lot of sense.

Your top looks great. How did the circle cutter work? I used a small trim router and a home made circle cutting jig, but routers scare the crap out of me - as things go wrong fast and go wrong badly.

_____________________________

troutie
  REPORT THIS POST AS INAPPROPRIATE |  Date May 24 2012 3:27:36
 
El Polaco

Posts: 155
Joined: Sep. 29 2005
From: Singer Island - Florida

RE: First Build - Troutie's Photo Jo... (in reply to paul.troutfisher

Thanks Troutie!

The hole/circle cutter I made worked perfectly. I saw a picture of it in Courtnall's book and just kinda drew it out and made it up. Works with 2 wedges basically, one holding the blade and the other holding the radius. The bottom sits nice and flat against the guitar top and you can feel it cutting in your hand which gives you the feeling of having control. It actually felt better turning the top and holding the cutter still. It takes only a few turns to cut through so I will not use a router for sound holes I don' t think. I used it to cut the rosette channel circles too.

I guess we could put a skinny bolt through the heel under the fingerboard with a nut under a removable heel cap? That would stop it splitting for sure? LOL! Kinda like the popup thingy that covers the bolt where the toilet seat is attached. :) - Hey, Einstein was crazy too!

Do you have one of those tiny finger planes for the braces? I have a small rosewood/brass set about 2" long. Lets see if it works today...

_____________________________

Jorge

Guitarras Artesanas Españolas
www.jorgedezofia.com
  REPORT THIS POST AS INAPPROPRIATE |  Date May 24 2012 11:18:55
 
paul.troutfisher

Posts: 161
Joined: Feb. 16 2011
From: Danville, CA

RE: First Build - Troutie's Photo Jo... (in reply to estebanana

quote:

Anyway those pencil lines are indicating grain direction. All hand joined mind you no thickness sander or power jointers.


Nice Stephen,

I love using hand tools - especially plans. That being said - still impressive workman ship you got there. It's sometimes hard to keep things square and flat with the hand tools.

Good luck with the "straight line" look forward to seeing it complete.

_____________________________

troutie
  REPORT THIS POST AS INAPPROPRIATE |  Date May 24 2012 15:42:31
 
paul.troutfisher

Posts: 161
Joined: Feb. 16 2011
From: Danville, CA

RE: First Build - Troutie's Photo Jo... (in reply to estebanana

Made a bit more progress over the last week. Bent the Cypress ribs and cut to length. Again, bending wasn't that bad.

Did learn a good trick off youtube. When bending the waist, put wet piece of paper towel between the iron and the rib. This extra water/steam really helps with that sharper bend.
Also, when doing the big curves - you really want to work across a larger area, rather than one spot at a time, so you don't get any sharp "kinks" in the bend. You can see one of these kinks in the pic which has the two ribs cramped together. I went back and re-did this section. Again, unless you break the wood (unlikely) bending is pretty fun/easy and forgiving of mistakes (can re-bend).


These two pics show the two ribs ready to bend, and the finished product.


Images are resized automatically to a maximum width of 800px

Attachment (2)

_____________________________

troutie
  REPORT THIS POST AS INAPPROPRIATE |  Date May 24 2012 15:58:13
 
paul.troutfisher

Posts: 161
Joined: Feb. 16 2011
From: Danville, CA

RE: First Build - Troutie's Photo Jo... (in reply to estebanana

Here's three more rib bending pics.

This is where the ribs are rough cut (prior to final cut for neck).

Boy, those two side-by-side ribs almost look like a guitar. Heck, this might really happen after all:)


Images are resized automatically to a maximum width of 800px

Attachment (3)

_____________________________

troutie
  REPORT THIS POST AS INAPPROPRIATE |  Date May 24 2012 16:01:48
 
El Polaco

Posts: 155
Joined: Sep. 29 2005
From: Singer Island - Florida

RE: First Build - Troutie's Photo Jo... (in reply to paul.troutfisher

Looks awesome Paul!!!

I have to play a gig tonight or I would be in my shop til late!

Shaped, and finished braces today, glued harmonic bars, sound hole reinforcement etc...

Later,

_____________________________

Jorge

Guitarras Artesanas Españolas
www.jorgedezofia.com
  REPORT THIS POST AS INAPPROPRIATE |  Date May 24 2012 20:43:01
 
paul.troutfisher

Posts: 161
Joined: Feb. 16 2011
From: Danville, CA

RE: First Build - Troutie's Photo Jo... (in reply to El Polaco

Need Advice,

I'm now on my linings. I plan on doing a continuous kerfed approach, but have a few questions:

I have some cedar and some spruce scraps that are about 2' long. I could make linings out of these but they would have a break at some point along the rib (not long enough).
So, does this break really matter? If not, which should I use - cedar or spruce?

Or, I could buy some basswood that's long enough for a continuous run. Would this be better?


Stehen, you mentioned the importance of a light bridge. I understand completely. You also suggested Brazilian Rosewood. Question, where can I get some Brazilian Rosewood these days?

_____________________________

troutie
  REPORT THIS POST AS INAPPROPRIATE |  Date May 24 2012 21:47:04
 
estebanana

Posts: 9351
Joined: Oct. 16 2009
 

RE: First Build - Troutie's Photo Jo... (in reply to estebanana

Bass wood has high damping compared to the other choices, I would go with anything but basswood. It's soft and pithy. Honestly I've never even seen basswood in an older Spanish guitar, maybe someone used it, but none that I have seen.

I dislike basswood with passion, just me.

Traditionally in early twentieth century shops the lining was done with several different kinds of wood, probably what they had on hand. Some of the wood I have seen used as lining in old guitars are Beech, Oak, Spanish Cedar, Spruce, Mahogany, stuff like that. I used Ash once.

You could probably go to a lumber yard that planes its own hardwoods and grab a long thin piece of something from the mill ends bin. You just need two thin strips 30" long to work with. Grab a handful and have enough for several guitars. Some kerfed liners from LMI work too, but quicker to make your own flat strip.

I don't know about the Brazilian bridge wood off hand. But if yo know what Brazilian is like I think it's the best bridge wood, just pick some thing like it. Some Indian Rose can be nice and quite fine. Just be careful to check if it bleeds when applying finish. I found some Goncalo Alves that was very much like Brazilian in workability and weight, I used it on three bridges and it worked great.

_____________________________

https://www.stephenfaulkguitars.com
  REPORT THIS POST AS INAPPROPRIATE |  Date May 24 2012 23:08:33
 
brianbrogan


Posts: 2
Joined: Mar. 10 2012
 

RE: First Build - Troutie's Photo Jo... (in reply to estebanana

Hi Troutie - Your first build is looking good. Nice attention to detail and I can tell you are spending the time making the neck and top look good. I'm also on my first build and it looks very similar to yours. Your sides look better than mine. I tried to build a side bender right away and ended up having to re-bend sections over a hot pipe. Your's look good. Anyway, good luck and look forward to seeing the finished product. My next guitar will be a flamenco, so I show some pictures at a later date. Cheers, Brian
  REPORT THIS POST AS INAPPROPRIATE |  Date May 25 2012 0:23:12
 
paul.troutfisher

Posts: 161
Joined: Feb. 16 2011
From: Danville, CA

RE: First Build - Troutie's Photo Jo... (in reply to brianbrogan

Hi Brian,

Don't be shy, share you photos. Doesn't have to be flamenco, I assume it's classical.

_____________________________

troutie
  REPORT THIS POST AS INAPPROPRIATE |  Date May 25 2012 3:38:08
 
paul.troutfisher

Posts: 161
Joined: Feb. 16 2011
From: Danville, CA

RE: First Build - Troutie's Photo Jo... (in reply to Jeff Highland

quote:


If you want some meaty technical explanations on how guitars work, the Trevor Gore books are a must
Not specifically oriented towards Flamenco, but it does have suggestions for frequencies to tune to.

Here is an example of the concepts presented
http://www.goreguitars.com.au/attachments/POMA_paper.pdf


Wow, heady stuff Jeff. Thanks for the link, a lot of great info here.

_____________________________

troutie
  REPORT THIS POST AS INAPPROPRIATE |  Date May 25 2012 3:39:53
 
Anders Eliasson

Posts: 5780
Joined: Oct. 18 2006
 

RE: First Build - Troutie's Photo Jo... (in reply to estebanana

Be carefull with bracing to light.
It gives you a very direct response and a lively output, but it sacrifices on projection, separation and punch. Very few players doing chord progressions will want a guitar like that.
Super light guitars work well when playing simple flamenco with mainly rasgueados, thumb and picado.
For other things they tend to be "empty cans"

In the end its all a compromise. You get something and you sacrifice other things. The final quest is to find the sweet spot, and here IMHO, tons of theory doesnt help much. In the end well used experience, trying different approaches, with just subtlle changes is the way that gives the best results

_____________________________

Blog: http://news-from-the-workshop.blogspot.com/
  REPORT THIS POST AS INAPPROPRIATE |  Date May 25 2012 6:57:22
 
paul.troutfisher

Posts: 161
Joined: Feb. 16 2011
From: Danville, CA

RE: First Build - Troutie's Photo Jo... (in reply to Anders Eliasson

Thanks Anders.

I guess it pays to keep track of the details of each guitar one builds so that you can evaluate this against the sound achieved.

_____________________________

troutie
  REPORT THIS POST AS INAPPROPRIATE |  Date May 25 2012 19:28:10
 
estebanana

Posts: 9351
Joined: Oct. 16 2009
 

RE: First Build - Troutie's Photo Jo... (in reply to estebanana

I think Anders and I have similar views on the data collection and formula methods. They put you in the right zone, so to speak, for the kind of guitar you want to make, but then you have to refine your understanding of that zone. There are those, some pretty famous builders in fact, who have said you can engineer everything into the guitar and get predictable performance. Maybe and maybe not. Personally I don't think you can predict it all.

Flamenco guitars seem to be able to be constructed on an intuitive basis once you grasp a few practical mechanical things about your "zone". You sort of chart out which kind guitar you want to make and then learn to build it. Then you spend a lot of time making similar ones over and over until you learn things about the process like how much wood to leave in and how much to take out according your area of research and materials at hand. You can integrate all the engineering and data collection as a tool for remembering or getting there faster or material selection, but there's something about gaining and retaining _tactile experience_ you just can't deny, or fail to pay attention to.

Dude.

_____________________________

https://www.stephenfaulkguitars.com
  REPORT THIS POST AS INAPPROPRIATE |  Date May 25 2012 19:52:28
 
Jeff Highland


Posts: 401
Joined: Mar. 5 2010
From: Caves Beach Australia

RE: First Build - Troutie's Photo Jo... (in reply to estebanana

In some ways I agree with you about theory and engineering.
There has been a lot of bs written, and the lack of success of methods like Kasha shows the limitations of a pure theory approach.

What I am finding to be good about Trevor Gore's approach is that it provides

-an objective and quick method for material selection and initial plate thickness
-A rationale for chosing air, top, and back frequencies, methods of testing, and methods of adjusting

The criteria presented are based on testing of a lot of different guitars, considered to be good examples of their type.

Not for everyone, but to me a lot better than working off a plan with generic thicknesses for spruce or cedar.
  REPORT THIS POST AS INAPPROPRIATE |  Date May 26 2012 1:01:59
 
estebanana

Posts: 9351
Joined: Oct. 16 2009
 

RE: First Build - Troutie's Photo Jo... (in reply to estebanana

Troutie, if you are interested in the Trevor Gore stuff, Brian Burns in Fort Bragg teaches that information. Gore did a seminar in No.Cal. a few years ago a Brian hosted it. The information is out there in several places however. Not to sound like a nag, but you can still learn all that stuff and still make fairly crappy guitars.

_____________________________

https://www.stephenfaulkguitars.com
  REPORT THIS POST AS INAPPROPRIATE |  Date May 26 2012 15:26:26
 
Anders Eliasson

Posts: 5780
Joined: Oct. 18 2006
 

RE: First Build - Troutie's Photo Jo... (in reply to estebanana

quote:

I think Anders and I have similar views on the data collection and formula methods. They put you in the right zone, so to speak, for the kind of guitar you want to make, but then you have to refine your understanding of that zone.


I totally agree and those who´ve enetered zone, normally walk around in that zone testing very small things, might be a few grams on the bridge, a slightly stiffer soundboard, shaping the braces a little bit different etc. Thats what I do myself. Others are more extreme and try a lot of very different aproaches. An example is M. Bellido. I tested quite a few guitars of his also a lot of new ones and I cant even remember the amount of different bracing systems he used during a relatively short period. The output was very variated as well.

In the end, IMO its all about balancing out all the factors. Its all a compromise and there´s no one good or correct way, just like there´s no best sounding and playing flamenco guitar.

I think that the most important thing when you start building instruments is to know that your first instrument will be a starting point. It might end up being super good, but maybe you dont know how you achieved that and maybe number 2 or 8 sound very bad. Never mind the amount of theory and input you get, you wont understand it until you´built quite a few or many instuments. The realy difficult thing is to have a consistant output.

I´m going to start building violins very soon and I know that its to start all over again. I know ood a lot better, I work wood a lot better and my intuitional understanding of wooden, stringed instruments is a LOT better, BUT I also know that I know very little or close to nothing about building violins and therefor my first goal will be to be Happy Hoppy Donny and make myself a violin that works and that I´m proud of. Then later on, Hopefully I might learn a tiny little bit more about building violins. But I also know that the way to go is knowing that I know ver little.

To first time builders of flamenco guitars, I´ll say:
Build yourself that guitar, using standard meassurements and concentrate on getting the box and neck angle correct. Thats what is REALLY important. If you stay inside "normal" meassurement and you control the shape of the box, the guitar will sound a lot better than even an expensive factory guitar. Later on you can concentrate on refining what you´ve learnt.
The fact is that you might produce a wonderfully sounding guitar, but if the setup is bad, it wont be a flamenco guitar. It´ll just be a wonderfully sounding Spanish guitar worthless for flamenco. But if you get the box and the angles right, it´ll be usefull for flamenco even though the sound is not top notch.

_____________________________

Blog: http://news-from-the-workshop.blogspot.com/
  REPORT THIS POST AS INAPPROPRIATE |  Date May 27 2012 7:28:31
 
paul.troutfisher

Posts: 161
Joined: Feb. 16 2011
From: Danville, CA

RE: First Build - Troutie's Photo Jo... (in reply to estebanana

You're preaching to the choir here:) I do believe science gets you to a solid predictable starting point, and it's only the art that can take you beyond that.


Back to simpler matters. Here's another set of photos. I'm now glueing the neck and ribs to the top. Boy - I really hate making kerfing. I can guess how you accomplished luthiers would make use of an apprentice - "go over there and make 20+ feet of continuous kerfing" ;-).

Glueing on the neck it pretty easy and straight forward - just keep it straight. The sides are just dry fitted here to check aligments.

Making the kerfing, as I said, is a pain. I made a small miter box for this purpose. Found that the saw would tear out a bit - didn't look so good - so I put tape on the kerfing to help with this. This worked pretty well. Also, did I say I hate making kerfing... I started to do two at a time in order to speed things up a bit.

Next I glued the kerfing to the ribs and sanded flat.


Images are resized automatically to a maximum width of 800px

Attachment (4)

_____________________________

troutie
  REPORT THIS POST AS INAPPROPRIATE |  Date May 28 2012 16:09:55
 
paul.troutfisher

Posts: 161
Joined: Feb. 16 2011
From: Danville, CA

RE: First Build - Troutie's Photo Jo... (in reply to estebanana

Ok, a long weekend - plus I took Friday off - makes for good progress!!

Next photo is a pretty big jump. I missed a couple of stages as my smart phone flash was full and i didn't notice the warning as i shot pics.

Anyway - here you can see the ribs are now glued to the top (on the bottom) and the linings for the back getting glued to the ribs.

I did make my first mistake - likely first of many. When glueing the ribs into the neck slots one side didn't get slid in all the way. The darn glue sets up so fast that by the time I noticed it (like 5 minutes) it was too late, I couldn't use any amount of force to slide it in more. I'm sure it will be fine, but it's something I'll always know is there.\

Hope to put the back on tonight, and then it will be a stable box that should resemble a guitar. These last stages went pretty fast with a lot of visible progress. I'm predicting things will start to slow down a bit as I near the finishing stages - here's where mistakes will have a lasting visible impact.


Images are resized automatically to a maximum width of 800px

Attachment (1)

_____________________________

troutie
  REPORT THIS POST AS INAPPROPRIATE |  Date May 28 2012 16:18:22
 
paul.troutfisher

Posts: 161
Joined: Feb. 16 2011
From: Danville, CA

RE: First Build - Troutie's Photo Jo... (in reply to estebanana

Ok, the end of a long weekend.....

Here's the back getting glued on. Boy, I really don't like the instrument glue. It sets up so fast, it hard to get the clamps done in time.


Images are resized automatically to a maximum width of 800px

Attachment (2)

_____________________________

troutie
  REPORT THIS POST AS INAPPROPRIATE |  Date May 29 2012 3:20:01
Page:   <<   <   1 [2] 3 4 5    >   >>
All Forums >>Discussions >>Lutherie >> Page: <<   <   1 [2] 3 4 5    >   >>
Jump to:

New Messages No New Messages
Hot Topic w/ New Messages Hot Topic w/o New Messages
Locked w/ New Messages Locked w/o New Messages
 Post New Thread
 Reply to Message
 Post New Poll
 Submit Vote
 Delete My Own Post
 Delete My Own Thread
 Rate Posts


Forum Software powered by ASP Playground Advanced Edition 2.0.5
Copyright © 2000 - 2003 ASPPlayground.NET

0.078125 secs.