Foro Flamenco


Posts Since Last Visit | Advanced Search | Home | Register | Login

Today's Posts | Inbox | Profile | Our Rules | Contact Admin | Log Out


Welcome to one of the most active flamenco sites on the Internet. Guests can read most posts but if you want to participate click here to register.

This site is dedicated to the memory of Paco de Lucía, Ron Mitchell, Guy Williams, Linda Elvira, Philip John Lee, Craig Eros, Ben Woods, David Serva and Tom Blackshear who went ahead of us.

We receive 12,200 visitors a month from 200 countries and 1.7 million page impressions a year. To advertise on this site please contact us.


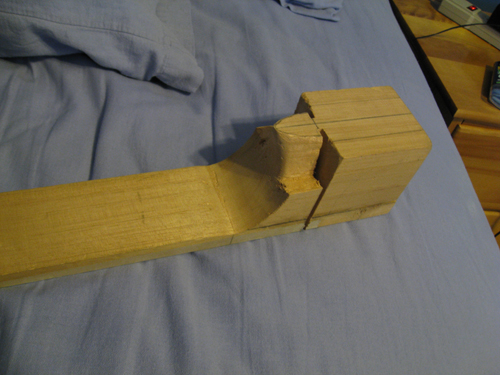
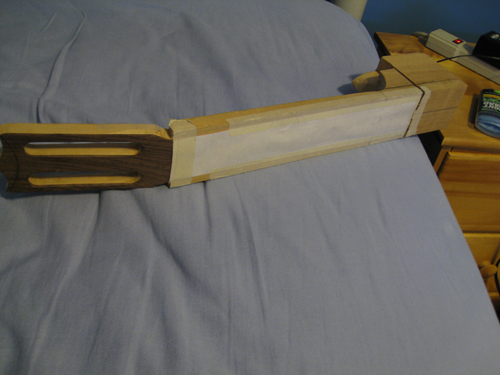
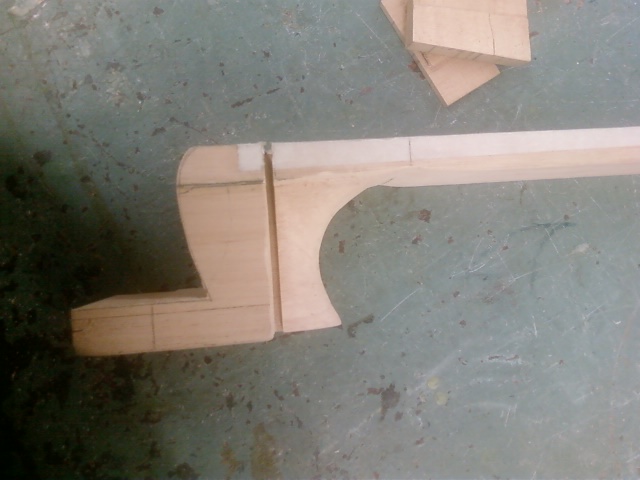
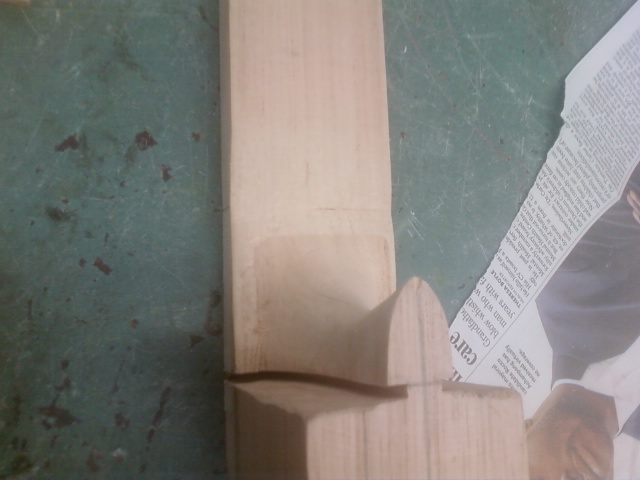
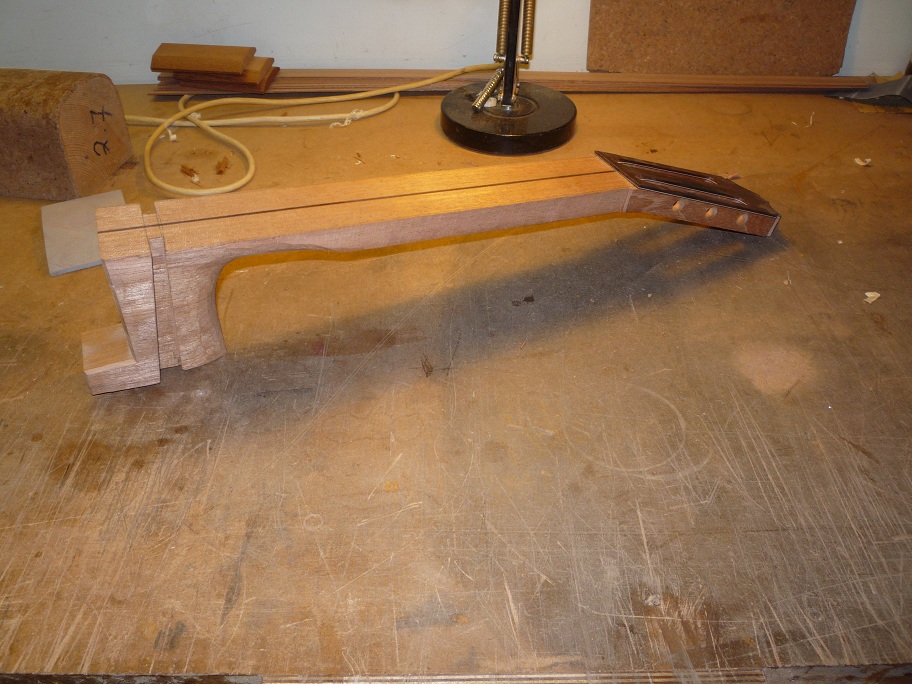
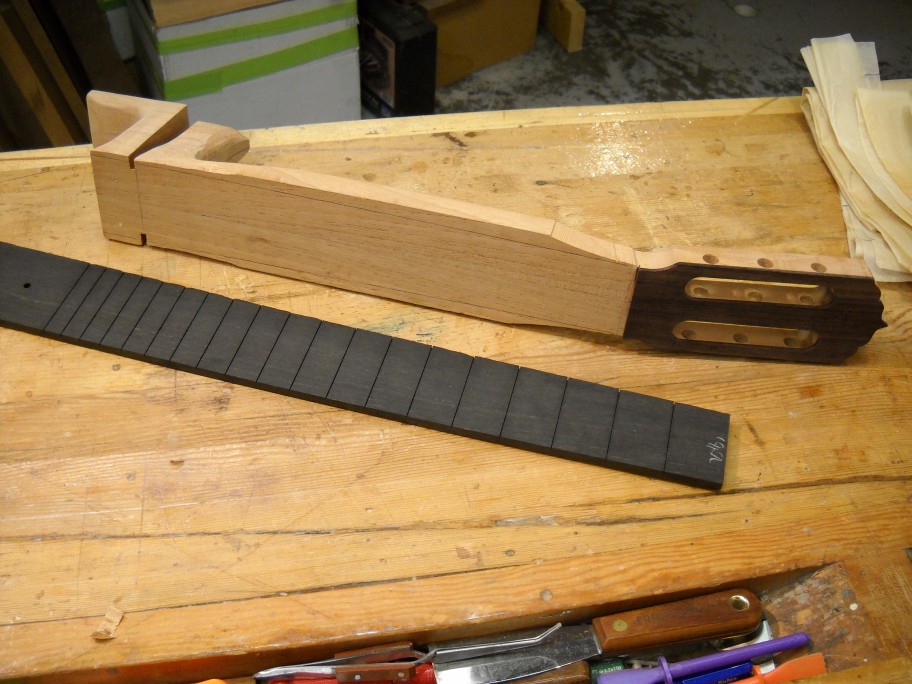
RE: The challenge issued by my school teacher   You are logged in as Guest
Users viewing this topic: none
  Printable Version
All Forums >>Discussions >>Lutherie >> Page: <<   <   4 5 6 [7] 8    >   >>
Login
Message<< Newer Topic  Older Topic >>
 
estebanana

Posts: 9351
Joined: Oct. 16 2009
 

RE: The challenge issued by my scho... (in reply to cRobson12

Here is how you lay out a peg head for wooden pegs:

Make a half pattern of your peg head, from brass, paper, thin plex or whatever will hold a mark.

Take a wooden peg, these are viola pegs and measure the diameter of the tip.

Draw the peg head on paper using the pattern and lay out the distance between pegs using the center of the peg. Then add the width of the peg to the drawing and adjust the pegs to be a nice distance from the edge of the peg head.
here are some measurements, but don't take mine at face value, prove them out for yourself.

Distance between pegs center to center: 35mm
Distance from peg center to edge of peg head: 12 mm
Distance from lowest E pegs top back of nut: 35mm

Now with that rough information and the angles at which your peg head sides expand out from the nut, you can plan your string excursion from the inner side of each peg to the nut.

Lay out the peg positions on YOUR peg head pattern and play with the placement of the string paths to the nut until you have a design in which the strings don't get in each others way and it looks pleasing to your eye. So it needs to look nice and it needs to function. Do all this on paper several time before you commit to it.

Then you'll go to a drill press and make a pilot hole with a drill bit. A 1/4 inch brad point is a good bit to choose. But do the lay out carefully, carefully.

Attachment (1)

_____________________________

https://www.stephenfaulkguitars.com
  REPORT THIS POST AS INAPPROPRIATE |  Date Mar. 8 2011 15:52:09
 
estebanana

Posts: 9351
Joined: Oct. 16 2009
 

RE: The challenge issued by my scho... (in reply to estebanana

This is an old pattern of mine. I don't use this design anymore. It is made from thin gauge brass sheet. Mostly use it as a file shield and glue recepticle now.

Just wanted to point out that once you settle on a pattern you can make holes in it and it will locate your pegs once you do the design on paper. So next time you make a peg head you'll have a pattern to go with.

Attachment (1)

_____________________________

https://www.stephenfaulkguitars.com
  REPORT THIS POST AS INAPPROPRIATE |  Date Mar. 8 2011 15:56:18
 
cRobson12

Posts: 288
Joined: Dec. 8 2010
 

RE: The challenge issued by my scho... (in reply to estebanana

Thanks for the information everyone. I am on the go right now so I don't have time too look at it all, I will respond later tonight.

But in the mean time, I was not at school today so I used my sparetime to make this capo. It's really thick right now, I will sand it down tomorrow with the belt sander - I am tired of using sandpaper right now (IT TOOK SOOO LONG TO SAND IT )

Later guys.


Images are resized automatically to a maximum width of 800px

Attachment (1)
  REPORT THIS POST AS INAPPROPRIATE |  Date Mar. 8 2011 20:27:22
 
cRobson12

Posts: 288
Joined: Dec. 8 2010
 

RE: The challenge issued by my scho... (in reply to estebanana

I decided to not make a peg head as I can't really afford to get the proper equipment right now, as that money is for my guitar that I am going to buy eventually. I have the tunning machine holes cut out and the heel block glued on. I also liked what Anders did with his headstock so I carved that elipse into the headstock design with a utility knife. Next step is to start carving the heel and foot.


Images are resized automatically to a maximum width of 800px

Attachment (1)
  REPORT THIS POST AS INAPPROPRIATE |  Date Mar. 28 2011 16:27:20
 
cRobson12

Posts: 288
Joined: Dec. 8 2010
 

RE: The challenge issued by my scho... (in reply to cRobson12

Backside heel block view


Images are resized automatically to a maximum width of 800px

Attachment (1)
  REPORT THIS POST AS INAPPROPRIATE |  Date Mar. 28 2011 16:30:56
 
jshelton5040

Posts: 1500
Joined: Jan. 17 2005
 

RE: The challenge issued by my scho... (in reply to cRobson12

quote:

ORIGINAL: cRobson12

I have the tunning machine holes cut out and the heel block glued on.

Just for future reference...you should always drill the holes for the rollers before cutting the slots in the head. It eliminates the risk of breakout from the drill.

_____________________________

John Shelton - www.sheltonfarrettaguitars.com
  REPORT THIS POST AS INAPPROPRIATE |  Date Mar. 28 2011 18:09:15
 
CuerdasDulces

Posts: 277
Joined: Jul. 12 2009
From: Toronto

RE: The challenge issued by my scho... (in reply to jshelton5040

Cant he put a piece of scrap wood behind so it can absorb the tearout?
  REPORT THIS POST AS INAPPROPRIATE |  Date Mar. 28 2011 19:01:51
 
cRobson12

Posts: 288
Joined: Dec. 8 2010
 

RE: The challenge issued by my scho... (in reply to CuerdasDulces

Thanks Jshelton I will remember that next time.

And yeah Cuerdas I can but it would have been easier if I just did the side holes first. I wasn't really thinking about that, I was too pumped about cutting out the tunning holes
  REPORT THIS POST AS INAPPROPRIATE |  Date Mar. 28 2011 19:24:41
 
cRobson12

Posts: 288
Joined: Dec. 8 2010
 

RE: The challenge issued by my scho... (in reply to estebanana

I am a bit nervous about cutting the side slots, it says the top of the guitar neck has a distance between the slots of 36mm, and a distance at the bottom of 10mm. Is this really important or can I just make the distance 10mm on both the top and bottom?

If not, can I just cut the 36mm on the table saw and then taper it with a handsaw?
  REPORT THIS POST AS INAPPROPRIATE |  Date Mar. 29 2011 17:25:12
 
jshelton5040

Posts: 1500
Joined: Jan. 17 2005
 

RE: The challenge issued by my scho... (in reply to cRobson12

quote:

ORIGINAL: cRobson12

If not, can I just cut the 36mm on the table saw and then taper it with a handsaw?

That's a fairly precise operation. I suppose as you suggested you could cut it with the table saw to the shallow dimension and then taper with a hand saw. Another option is to set the table saw blade to the maximum depth of the cut and clamp a stop onto the bed of the saw so that the blade is stopped when the saw kerf reaches the right depth on the fingerboard side. This is hard to describe and you'll have to shape the end of the side to match the curve of the saw blade. It's not a difficult as it sounds. Remember to tip the table saw blade around 2 degrees so that the side enters at a slight angle rather than perpendicular.

I made a jig for sawing those slots on the table saw but don't recommend spending the time to make one since it must be made very precisely to assure the slots intersect exactly and also requires that the neck be absolutely square.

_____________________________

John Shelton - www.sheltonfarrettaguitars.com
  REPORT THIS POST AS INAPPROPRIATE |  Date Mar. 29 2011 20:24:29
 
Andy Culpepper

Posts: 3023
Joined: Mar. 30 2009
From: NY, USA

RE: The challenge issued by my scho... (in reply to estebanana

Nice work. Are you going to be joining the sides to the heel with wedges or just slotting them in straight to a 1.8 mm or so slot?

The slot doesn't have to be angled but it makes the whole thing a bit stronger I guess.

I do basically what John described on the table saw.

_____________________________

Andy Culpepper, luthier
http://www.andyculpepper.com
  REPORT THIS POST AS INAPPROPRIATE |  Date Mar. 29 2011 21:37:00
 
jshelton5040

Posts: 1500
Joined: Jan. 17 2005
 

RE: The challenge issued by my scho... (in reply to Andy Culpepper

quote:

ORIGINAL: deteresa1

The slot doesn't have to be angled but it makes the whole thing a bit stronger I guess.

I may not have been perfectly clear. These things are hard to put in writing but easy to understand once seen. The angle I'm referring to is to allow the side to continue the shape of the upper bout into the mortise. It makes the guitar shape much more graceful. The saw cut is perpendicular to the neck with the blade angled around 2 degrees. I don't like flat spots in the guitar shape whether at the neck or end block.

_____________________________

John Shelton - www.sheltonfarrettaguitars.com
  REPORT THIS POST AS INAPPROPRIATE |  Date Mar. 29 2011 22:16:46
 
Andy Culpepper

Posts: 3023
Joined: Mar. 30 2009
From: NY, USA

RE: The challenge issued by my scho... (in reply to jshelton5040

quote:

I may not have been perfectly clear. These things are hard to put in writing but easy to understand once seen. The angle I'm referring to is to allow the side to continue the shape of the upper bout into the mortise. It makes the guitar shape much more graceful. The saw cut is perpendicular to the neck with the blade angled around 2 degrees. I don't like flat spots in the guitar shape whether at the neck or end block.


Yeah, I know what you're talking about there. I do the same. The angle I was referring to is having more meat at the top side of the neck than the bottom (36 to 10 or whatever). Lots of angles involved here

_____________________________

Andy Culpepper, luthier
http://www.andyculpepper.com
  REPORT THIS POST AS INAPPROPRIATE |  Date Mar. 29 2011 22:20:21
 
jshelton5040

Posts: 1500
Joined: Jan. 17 2005
 

RE: The challenge issued by my scho... (in reply to jshelton5040

quote:

Another option is to set the table saw blade to the maximum depth of the cut and clamp a stop onto the bed of the saw so that the blade is stopped when the saw kerf reaches the right depth on the fingerboard side. This is hard to describe and you'll have to shape the end of the side to match the curve of the saw blade. It's not a difficult as it sounds. Remember to tip the table saw blade around 2 degrees so that the side enters at a slight angle rather than perpendicular.


Sorry, this is wrong, it only works if the blade is not angled 2 degrees. This is for steel string guitars. I made the jig for doing this so many years ago that I haven't thought about this operation in a long time.

_____________________________

John Shelton - www.sheltonfarrettaguitars.com
  REPORT THIS POST AS INAPPROPRIATE |  Date Mar. 30 2011 14:28:15
 
estebanana

Posts: 9351
Joined: Oct. 16 2009
 

RE: The challenge issued by my scho... (in reply to estebanana

Gotta sharp back saw and a ruler and a pencil?
LoL

_____________________________

https://www.stephenfaulkguitars.com
  REPORT THIS POST AS INAPPROPRIATE |  Date Mar. 30 2011 15:36:29
 
Stephen Eden


Posts: 914
Joined: Apr. 12 2008
From: UK

RE: The challenge issued by my scho... (in reply to estebanana

I use the wedge system It makes more sense to me as there will always be a tight fit no matter how thick the sides. It also means you can adjust the slot if you happen to go wrong. Great for first time builder I think.

I can give you the measurements and pictures of it if you like

_____________________________

Classical and Flamenco Guitars www.EdenGuitars.co.uk
  REPORT THIS POST AS INAPPROPRIATE |  Date Mar. 30 2011 17:53:28
 
estebanana

Posts: 9351
Joined: Oct. 16 2009
 

RE: The challenge issued by my scho... (in reply to Stephen Eden

quote:

I use the wedge system It makes more sense to me as there will always be a tight fit no matter how thick the sides. It also means you can adjust the slot if you happen to go wrong. Great for first time builder I think.

I can give you the measurements and pictures of it if you like


^ Good idea!

_____________________________

https://www.stephenfaulkguitars.com
  REPORT THIS POST AS INAPPROPRIATE |  Date Mar. 30 2011 18:03:13
 
cRobson12

Posts: 288
Joined: Dec. 8 2010
 

RE: The challenge issued by my scho... (in reply to estebanana

I gave it thought and I decided to do it the way my book told me to do, 10mm on the top and 10mm on the bottom - I guess the classical way. I will give that I shot next time (I didn't feel comfortable doing it the other way). I also started carving out the heel today, here are some pictures. I think it's turning out really good considering I have never used a chisel before


Images are resized automatically to a maximum width of 800px

Attachment (1)
  REPORT THIS POST AS INAPPROPRIATE |  Date Mar. 30 2011 19:22:11
 
cRobson12

Posts: 288
Joined: Dec. 8 2010
 

RE: The challenge issued by my scho... (in reply to cRobson12

Another one


Images are resized automatically to a maximum width of 800px

Attachment (1)
  REPORT THIS POST AS INAPPROPRIATE |  Date Mar. 30 2011 19:23:15
 
cRobson12

Posts: 288
Joined: Dec. 8 2010
 

RE: The challenge issued by my scho... (in reply to cRobson12

Finished carving the the heel block! This was my first time using a chisel so I am pretty proud of myself.


Images are resized automatically to a maximum width of 800px

Attachment (1)
  REPORT THIS POST AS INAPPROPRIATE |  Date Apr. 4 2011 20:03:31
 
cRobson12

Posts: 288
Joined: Dec. 8 2010
 

RE: The challenge issued by my scho... (in reply to cRobson12

Side view


Images are resized automatically to a maximum width of 800px

Attachment (1)
  REPORT THIS POST AS INAPPROPRIATE |  Date Apr. 4 2011 20:04:59
 
cRobson12

Posts: 288
Joined: Dec. 8 2010
 

RE: The challenge issued by my scho... (in reply to cRobson12

Bottom view


Images are resized automatically to a maximum width of 800px

Attachment (1)
  REPORT THIS POST AS INAPPROPRIATE |  Date Apr. 4 2011 20:06:04
 
cRobson12

Posts: 288
Joined: Dec. 8 2010
 

RE: The challenge issued by my scho... (in reply to cRobson12

Once I touch everything up and such, is there anymore that I can do on the neck? I remember someone saying not to shape the neck until the guitar is finished. So I guess it is time to get the wood for the body and sides? Also it would be helpful if someone had a bill of material or something that I can get an idea how much kerfling, binding, and other internal materials that I will need
  REPORT THIS POST AS INAPPROPRIATE |  Date Apr. 4 2011 20:20:25
 
Andy Culpepper

Posts: 3023
Joined: Mar. 30 2009
From: NY, USA

RE: The challenge issued by my scho... (in reply to estebanana

Nice work. you can blend the heel into the neck part a little more to make it one continuous curve. And you can shape the foot.

The next thing you want to do is get your top, start working that and figure out what you want for a rosette. The sooner you get all the materials the better so they can acclimate to the shop a little bit.

_____________________________

Andy Culpepper, luthier
http://www.andyculpepper.com
  REPORT THIS POST AS INAPPROPRIATE |  Date Apr. 5 2011 2:44:09
 
cRobson12

Posts: 288
Joined: Dec. 8 2010
 

RE: The challenge issued by my scho... (in reply to Andy Culpepper

Thanks Deteresa. Can you send me a picture of what the foot should look like? I am in class drawing a blank at the moment

Does anyone know what Ander's uses to fill the gaps between the olivewood in the mainpart of his rossette? I love the way that looks and I would like to do something similiar
  REPORT THIS POST AS INAPPROPRIATE |  Date Apr. 5 2011 13:21:29
 
estebanana

Posts: 9351
Joined: Oct. 16 2009
 

RE: The challenge issued by my scho... (in reply to estebanana

You'll have a better time of it all if you rough out the width of the neck at the body join. Usually that is around 60mm, looks like you're quite a bit wider. I just roughed shaped one to 65mm. The whole neck block can be taken to it final width, it will be easier to carve the heel. Right?
You can still leave the neck wide as it is, just make a transition from block width to neck width around the 9th or 10th fret position. If you can't visualize it I have a picture and probably everyone else does too. It means the 12th fret position is closer to final dimension and the 9th is left wide for now.

_____________________________

https://www.stephenfaulkguitars.com
  REPORT THIS POST AS INAPPROPRIATE |  Date Apr. 5 2011 16:04:01
 
cRobson12

Posts: 288
Joined: Dec. 8 2010
 

RE: The challenge issued by my scho... (in reply to estebanana

Thansk Estebanana. I think I know what you mean but I think that picture you mentioned will be helpful. Why wouldn't I just cut out the final shape of the neck right now, I think that would make things either in the long run would it not?

When I get the the full scale plans I am going to make the jig for the sides. I don't think I need any fancy equipment, could I just put them in hot water for lets say an hour, put them on the jig and apply even pressure until its in shape?

I still need to make the solera, so I will get that done ASAP. This has already been explained in this thread but I am just confirming, if I make a flat solera it the top will dome itself under the pressure, correct? Are there any down sides of having a non-domed solera?
  REPORT THIS POST AS INAPPROPRIATE |  Date Apr. 5 2011 17:49:48
 
Stephen Eden


Posts: 914
Joined: Apr. 12 2008
From: UK

RE: The challenge issued by my scho... (in reply to estebanana

Here's a picture of a neck that is just about good to go. The neck Dimensions are 52mm nut 62mm 12th I have trimmed the neck down to 2mm either side of those dimensions. if you go down that route stay a bit further away as if the neck is glued in at a slight angle you still have a bit of play.


Images are resized automatically to a maximum width of 800px

Attachment (1)

_____________________________

Classical and Flamenco Guitars www.EdenGuitars.co.uk
  REPORT THIS POST AS INAPPROPRIATE |  Date Apr. 5 2011 20:41:18
 
cRobson12

Posts: 288
Joined: Dec. 8 2010
 

RE: The challenge issued by my scho... (in reply to Stephen Eden

Thanks Seden, I get it now- this will also be a really good reference picture Out of curiosity why are the side slots so massive on your neck?
  REPORT THIS POST AS INAPPROPRIATE |  Date Apr. 5 2011 20:45:04
 
Andy Culpepper

Posts: 3023
Joined: Mar. 30 2009
From: NY, USA

RE: The challenge issued by my scho... (in reply to estebanana

Here's an old picture from my first guitar.
You can see I drew on the neck roughly where the fingerboard is going to go. I could have carved it further but I don't finish carving the heel until the guitar is assembled and you never carve the neck until the fingerboard is glued on.
My fingerboard width at the 12th fret is usually about 62 mm.


Images are resized automatically to a maximum width of 800px

Attachment (1)

_____________________________

Andy Culpepper, luthier
http://www.andyculpepper.com
  REPORT THIS POST AS INAPPROPRIATE |  Date Apr. 5 2011 20:56:35
Page:   <<   <   4 5 6 [7] 8    >   >>
All Forums >>Discussions >>Lutherie >> Page: <<   <   4 5 6 [7] 8    >   >>
Jump to:

New Messages No New Messages
Hot Topic w/ New Messages Hot Topic w/o New Messages
Locked w/ New Messages Locked w/o New Messages
 Post New Thread
 Reply to Message
 Post New Poll
 Submit Vote
 Delete My Own Post
 Delete My Own Thread
 Rate Posts


Forum Software powered by ASP Playground Advanced Edition 2.0.5
Copyright © 2000 - 2003 ASPPlayground.NET

0.078125 secs.