Welcome to one of the most active flamenco sites on the Internet. Guests can read most posts but if you want to participate click here to register.
This site is dedicated to the memory of Paco de Lucía, Ron Mitchell, Guy Williams, Linda Elvira, Philip John Lee, Craig Eros, Ben Woods, David Serva and Tom Blackshear who went ahead of us.
We receive 12,200 visitors a month from 200 countries and 1.7 million page impressions a year. To advertise on this site please contact us.
|

|
|
RE: The challenge issued by my school teacher
|
You are logged in as Guest
|
|
Users viewing this topic: none
|
|
Login  | |
|

   
rodpacheco
Posts: 80
Joined: Apr. 19 2010
From: Mexico
|
 RE: The challenge issued by my scho... (in reply to cRobson12) RE: The challenge issued by my scho... (in reply to cRobson12)
|
|
|
Alright, this is the thread where I asked for advice first on finishes, and then peg fitting. This below is the response Anders Eliasson provided. Cheers Anders!!
http://www.foroflamenco.com/tm.asp?m=134932&appid=&p=&mpage=1&key=&tmode=&smode=&s=#134932
RE: advices on Finishes, por favor! (in reply to rodpacheco)
Rod.
Basically, depending on your pegshaver, make sure the blade is sharp !!!!!!!! and make sure the shaver and the reamer have the same conical angle!!!!!
shave the pegs until they are 6,5 - 7mm thick at the finest point.
drill the 6 holes in the headstock 90 degree angle. I personally prefer to position them in a traditional way, so that the 1st and 6th string are tuned the opposite way.
Ream the holes slowly with a light touch on a nice day when noone is disturbing you!
Final shave the pegs so that they fit
Make holes in the peg.
put strings on, tune the guitar, play it, sell it, get money, buy El guitarrero by Escribano.
_____________________________
Fine flamenco and classical guitars: www.eliassonguitars.com
http://news-from-the-workshop.blogspot.com/
---------------------------------------------------------------------------------------------------------
It is true, you have to go very slow and gentle with the reamer. Lay out the peghole position so that the strings clear from the post to the slots on the saddle. It might mean that you have to "push in" the A and B strings a little (1mm) so that they clear, many makers do this, specially if the shape of your headstock is "V" opened. Once again, trace the holes and imaginary strings to the slots on saddle if you will.
Then you drill the pegholes with a smaller bit (smaller than 1/4 of an inch, for that could be the width of the tip of the peg when you finish them) I believe 5.5mm would be good (so that the peg reamer can fit the drill hole at the tip, it measures a little more than 3/16'') so you use the drill hole as a guide for the reamer.
Here´s where you have to take your time and really make sure that you keep the reamer SQUARED in relation to the headstock (vertical and horizontal) because the conical shape of the reamer tends to move, like when using a corkscrew!! it tends to "curl" sideways, etc.
So take it very slow and check your progress every milimeter sort of!! so you can maintain the reamer as leveled and straight as possible. And the 6 Pegs are even!!
When you get the reamer and the shaver, they both must have the same angle, check that, and as Anders said, MAKE Sure it is SHARP and also go slow, fraction by fraction shaving the peg.
It is rewarding taking your time to perform this "complex" task, you will see that it takes its time and seems harder than it really is... you only have to be careful the first time around to understand how it works.
Alright, hope this is good!! Let's get Rockin'!!
Rodrigo Pacheco @ Delirio Hand-made Guitars
|
|
|
|
REPORT THIS POST AS INAPPROPRIATE |
Date Mar. 8 2011 0:56:43
 |
|
rodpacheco
Posts: 80
Joined: Apr. 19 2010
From: Mexico
|
|
RE: The challenge issued by my scho... (in reply to cRobson12)
|
|
|
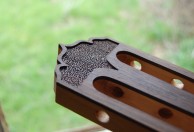
The use of knife of chisel is a matter of preference. I Think Mr. Estabanana has mentioned that the use the different tools - knife, chisel, rasp, file, scraper blade and sandpaper is almost like using words to complete the work. So you will use knife or chisel and then rasps, and so on 'til the final sanding.
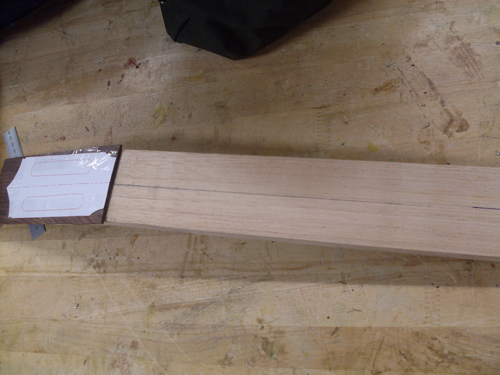
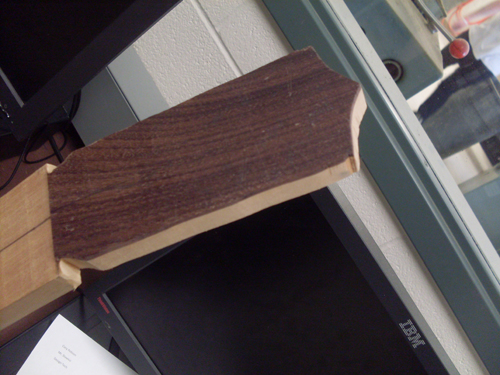
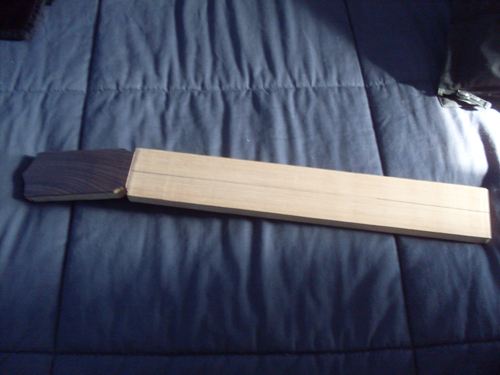
The "Cheeks" I think Señor Deteresa means the part of the block that you will carve out to make the final shape of the heel. Both sides of it above where the sides meet the heel. But this you might have to clarify with him because he mentioned foot and heel. Buuut, you can glue neck and heel block together, semi shape them on a bandsaw as Deteresa mentioned foot and heel, and after you cut the side slots, further shape the foot (inside the box) and heel (outside the box), remember you are only starting with your guitar. Neck, Top, Sides, Back, Bindings and then Fretboard. Then you will shape the neck AND heel too.
The angle of the cut to fit in the sides, is from your 12th fret mark, 32.5mm if using a 650mm scale. Only 2mm up. So from the 32.5mm, up to the 32.3mm at the center of the neck line. Imagine the the 2mm thickness of your sides will take up the space made by the upward cut. And the 12th fret when you finish the guitar will be spot on with the sides of the guitar and the neck. Fret and right below the sides (body).
On your block you will mark 32.5mm at the side of the block, and cut from right under that line (the body side of that mark) and cut up crossing that line to right above the 12th fret line to be within the 32.3mm and the 32.5mm.
Remember to cut appropriately on the front and back of the heel according to the sides, for example leaving 5mm on each side from the center line on the back of the heel (1cm total) and 1.5cm on each side of the front from the center line (3cm total).
Good day Mister!!
----------------------32.3mm
-------------------------------------12th fret line (32.5mm on a 650scale)
Body or sides
Start your cut right below the 12th fret line, up to right under the 32.3mm line.
By the way, Glue neck and heel together, and then make this cuts before you carve and shape the upper visible part of the heel or "Cheeks" as Deteresa told you. Muy Importante!!
Rodrigo Pacheco @ Delirio Hand-made Guitars
|
|
|
|
REPORT THIS POST AS INAPPROPRIATE |
Date Mar. 8 2011 3:10:23
|
|
 New Messages New Messages |
 No New Messages No New Messages |
 Hot Topic w/ New Messages Hot Topic w/ New Messages |
 Hot Topic w/o New Messages Hot Topic w/o New Messages |
 Locked w/ New Messages Locked w/ New Messages |
 Locked w/o New Messages Locked w/o New Messages |
|
 Post New Thread
Reply to Message
Post New Poll
Submit Vote
Delete My Own Post
Delete My Own Thread
Rate Posts
|
|
|
Forum Software powered by ASP Playground Advanced Edition 2.0.5
Copyright © 2000 - 2003 ASPPlayground.NET |
0.078125 secs.
|
 Printable Version

 Also I am going to add a motion sensor alarm so if anyone touches my wood they will be deafened but the 300 decibel alarm. Also their insides will turn to jelly.