|
Ramón -> Flamenco 9...Binding Hell (Jul. 3 2006 4:31:22)
|
Went into this a bit hesitant. Old fashioned way of scribing and razoring the lines for the binding and purfling, then using a chisel to remove the wood, or use the electric screaming mimi.??? Either choice was daunting....Either one, one wrong slip...
So I used Bob's bearing kit (something like $200 for a set of like 15), and made slight, repeated, 100th's of an inch cuts - depth and width, until I was where I wanted to be. Was cautious and careful to keep the router very flat, and gently but firmly pressed against the side. Used masking tape on the edges to protect the wood, too.
The scary choice; make several cuts, ensuring a chance to screw up several times, or blast away, hoping not to chip, but making only 2 cuts.... I chose low and slow. Also, was not going to go with a thick binding, and I made the slot to hold the binding AND the purfling, top and bottom, so that I could simply glue the color bands with the macassar binding into the same cut.
This is probably cheating, but it sure made things a lot easier, simpler, and cleaner. [8D]
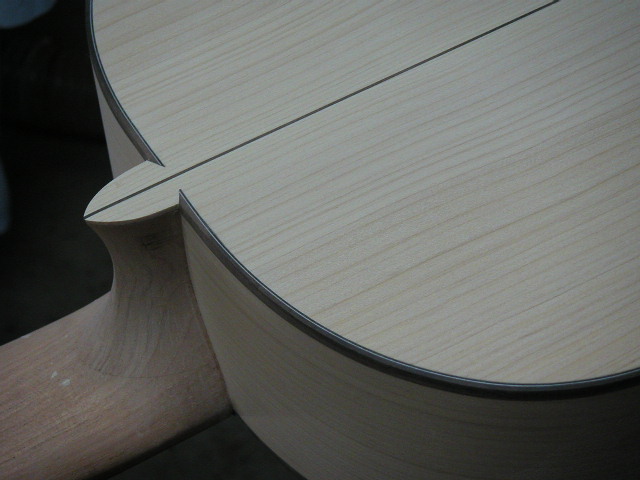
Cutting the 'arrows' or 'darts' into the bottom at the top point is fun. Many tools were tried until I found a technique and chisel I liked. Hard and tricky; can't make a mistake here, overcut, or damage the neck area. Also, my centers of the cypress sides were quite close at the heel join, so a narrow 2.5mm macassar strip slipped into an enlarged cutout.
What I did not do was add purfling into the sides of the guitar. I just didn't want to tackle this on my first effort, so the little bands of color are top and bottom only.
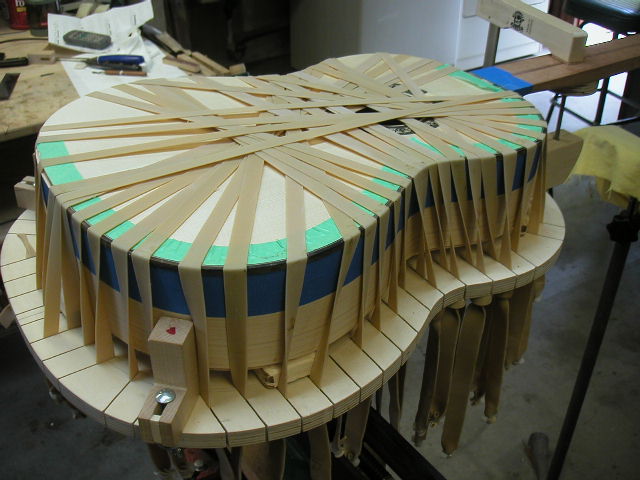
Cuts were almost perfect, and with a touch of a small wood block, I was ready to bind. Hey....it's fun to be almost glued to the guitar...You have to do each side, so there is a 4-step glue-up. Taped off each area, top and sides, AFTER putting a coat of shellac onto the Euro spruce top, so that the tape won't pull the wood out.
I'll put up a shot of the banding process, as many may not know what this looks like. You have to wet out small areas to a bend in the body, and work fast, pushing the binding down and into the slot, then pull the bands over to hold it tight...
*NOTE TO SELF* Although you can 'double up' on the slots for the rubber bands, make SURE that the wood stopper-knobs are well tucked in and cannot slip out...[:@]
S N A P! Right on the lip and my nose. Nice little cut.
Bob said they heard it in the house: "SNAP..OWWWW! F*&%!!!" He said to his girlfriend;
"Wellll...I didn't hear his body fall, so I guess he's okay..."
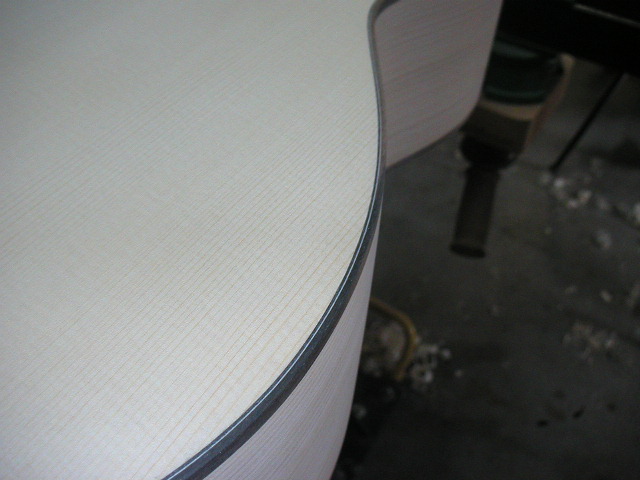
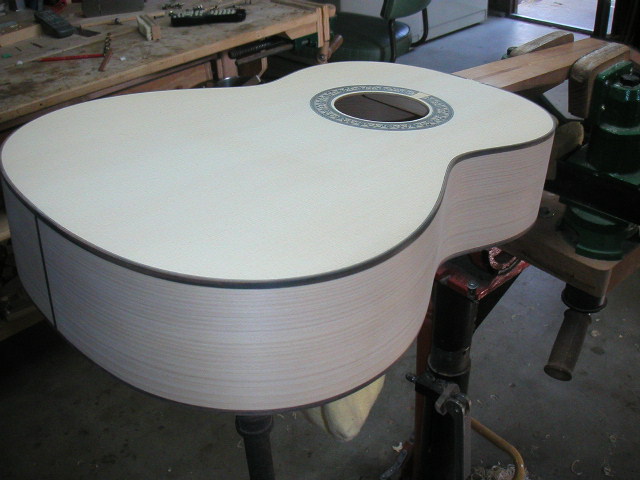
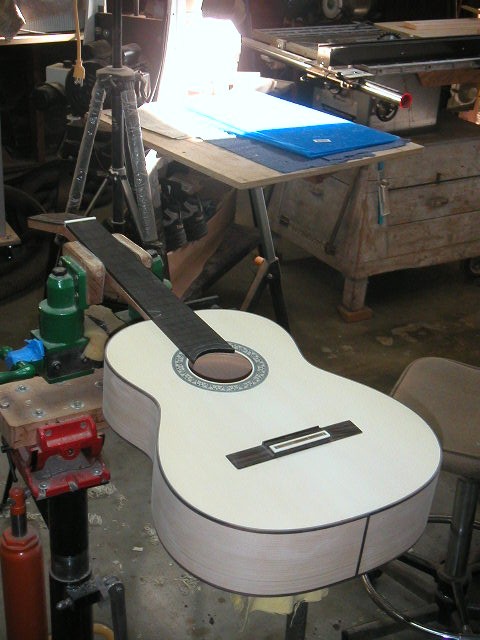
In the end, after all the scraper use and sanding blocks, I ended up with a pretty damn nice job for a first effort. Only one or two small 'flat spots' in the purfling, but joints were almost dead on, color-strips aligned, NO gaps at all - no filling was required - anywhere! [8D]
Sometimes, I even surprise myself!
First pic is binding hell....
Images are resized automatically to a maximum width of 800px
|
|
|
|