|
Ramón -> Building a Flamenco Guitar - Part 2 (Apr. 29 2006 2:12:33)
|
So….Sorry for the delays, as I’ve had to replace a hard drive on my comp….
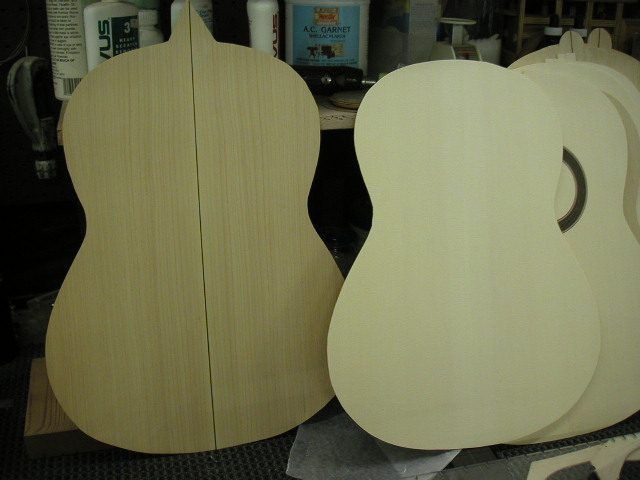
Began with setting out the woods to air a bit more, selecting grains and patterns to decide how I want to best use the beauty/grains of the wood.
Although Bob has threatened to make me do it ALL by hand, so I know and can appreciate the work involved, he realizes that I have “that work-****” that I have to do to PAY for guitars and playing, so he has graciously allowed me use of the thickness sander, joiner, band saws, etc ;-).
There IS progress, but it is s-l-o-w with ‘workshit’ interrupting the fun, AND I am going slowly. I haven’t bought any replacement wood – yet – but got close…More of that further down.
Thicknessed my back and sides of Cypress to (roughly) the Reyes plan specs, and then thinned down a binding strip of the Macassar ebony to glue between the two halves of the back. This was glued and clamped on a neat little table that Bob built for this purpose, and when this was dry, I glued up my European spruce top. I then sanded the back to 'almost there' thickness.
Set about work on the neck and head, and found that there is quite a bit of work and precision here; finding and continuously remarking centers, gluing the block, and getting the head angle just right. So after all the glue was dry, I pulled the clamps, and was told to get my thickness closer with the band saw. I ran the bottom side of the head down the blade against a fence, then ‘freehanded’ the rest, with many small cuts made at the curve of the block on the base of the neck.
Oooops. First rather significant error. Bob uses a beautiful ‘V’ joint for his head-to-neck joint, so there is little change from the angle of the head on the top and bottom. Turns out, we put the bottom joint rather far out into the head by taking the thickness of the neck ALL from the bottom….But Bob saved me….And he felt bad that he didn’t catch it, but I understand because he just doesn’t use the traditional ‘slab’ method as was I, due to less complexity.
So we re-sawed the joint (we had quite a bit of headstock off the top end we could still use), re-set the angle on the fence, took off about ½” (1.3cm) off the joint, towards the neck, and carefully reglued. SAVED IT! It came out just about perfect, with the joint almost exactly where it’s supposed to be.
Then came the Sanding Of The Headstock. This I did by hand – twice. Once before we discovered the error, and then again today to get it smooth and even, using gauges and a flatedge, and since I am going to use the ‘Peghed’ mechanical peg heads, I needed to seriously sand this down a few MM (millimeters). I have left plenty of wood in my cuts…Sometimes, too much. I’ll know better when I do this again; where to leave, where to cut it down, but at this point, YOU CAN ALWAYS SAND OR CUT…it’s rather hard to put back!
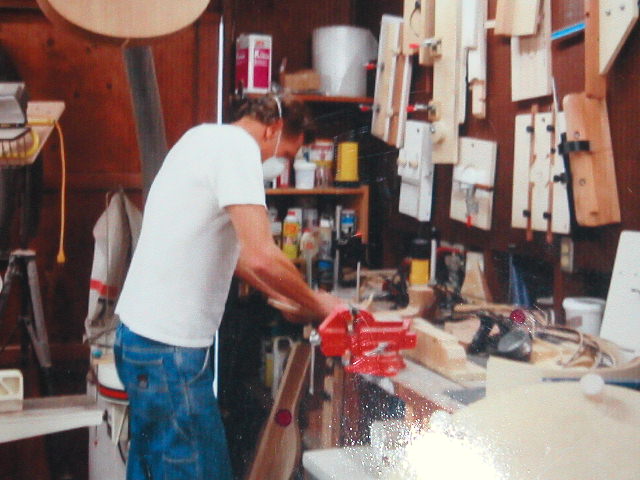
I have also found that the Spanish cedar dust and I do not get along. It not only leaves a dined-on-my-socks sort of taste in my mouth….it makes me cough. A LOT! So in the one photo, you will now see me with dust mask when sanding or cutting.
Once finished, I redrew my centers on the neck (I used a small punch to mark centers, so they are easy to find, but you cannot go down much at all in the back!), and this time, I added my nut and 12th fret widths and marks, adding 1cm per side. Bob said that if I pencil-line RIGHT at the neck width, when you glue up the fingerboard and sand, you’ll sometimes get a ‘dip’ where the line was drawn, so better to sand down to the fretboard.
I drew my headstock shape on Corel Draw. Nice program for this, as I draw a half, and then just duplicate the other side. I make a ‘whole’ shape, look, and then refine one side, slide the other ‘old’ half over, and reduplicate each, making both designs full for a look-see.
I then needed to add my headstock (Macassar), and the laminates below to add a touch of style and to get myself the an 18.5-19mm thickness of the headstock, which is what is needed for the mechanical pegs to seat flush, top and bottom.
I added: Macassar headplate, a fine sheet of bleached ash, black, bleached ash, and black against the cedar head. And glued.
Another small error. You R-E-A-L-L-Y have to watch when you glue for ‘slippage’. My centers went slight off (but even) to one side – maybe a MM…Bob says it’s not that critical, but I have plenty of room to redraw my centers based on the headplate-centers. I will watch more closely for this…BTW...I also did this on the heel block on the neck. It slid back slightly, so when I set the plan down to draw the curve to the bottom of the guitar? I was RIGHT on the edge. I got lucky. Again...NOTE TO SELF! - WATCH SLIPPAGE DURING GLUE UP! lol
So….tomorrow I have tennis with a fellow flamenco player, then we play for a dance class, and I will head back to the ‘factory’ to unclamp and wait for my next set of instructions.
It’s very exciting. I had thought about this before, but without the proper tools and space, I would imagine this to be an ordeal and would probably turn out quite crude, even with my extensive wood-experience.
You always want things to go faster, but I really want this to by an amazing ‘first guitar’, so I’m keeping it low and slow…
Any tips or critiques from luthiers is welcomed! Bob is making me read Oribe’s book right now, along with Big Book of American Lutherie, and re-reading Dryad’s The Classical Guitar.
Salud!
Images are resized automatically to a maximum width of 800px
|
|
|
|