|
RobF -> RE: filling gaps (Jan. 15 2022 2:15:55)
|
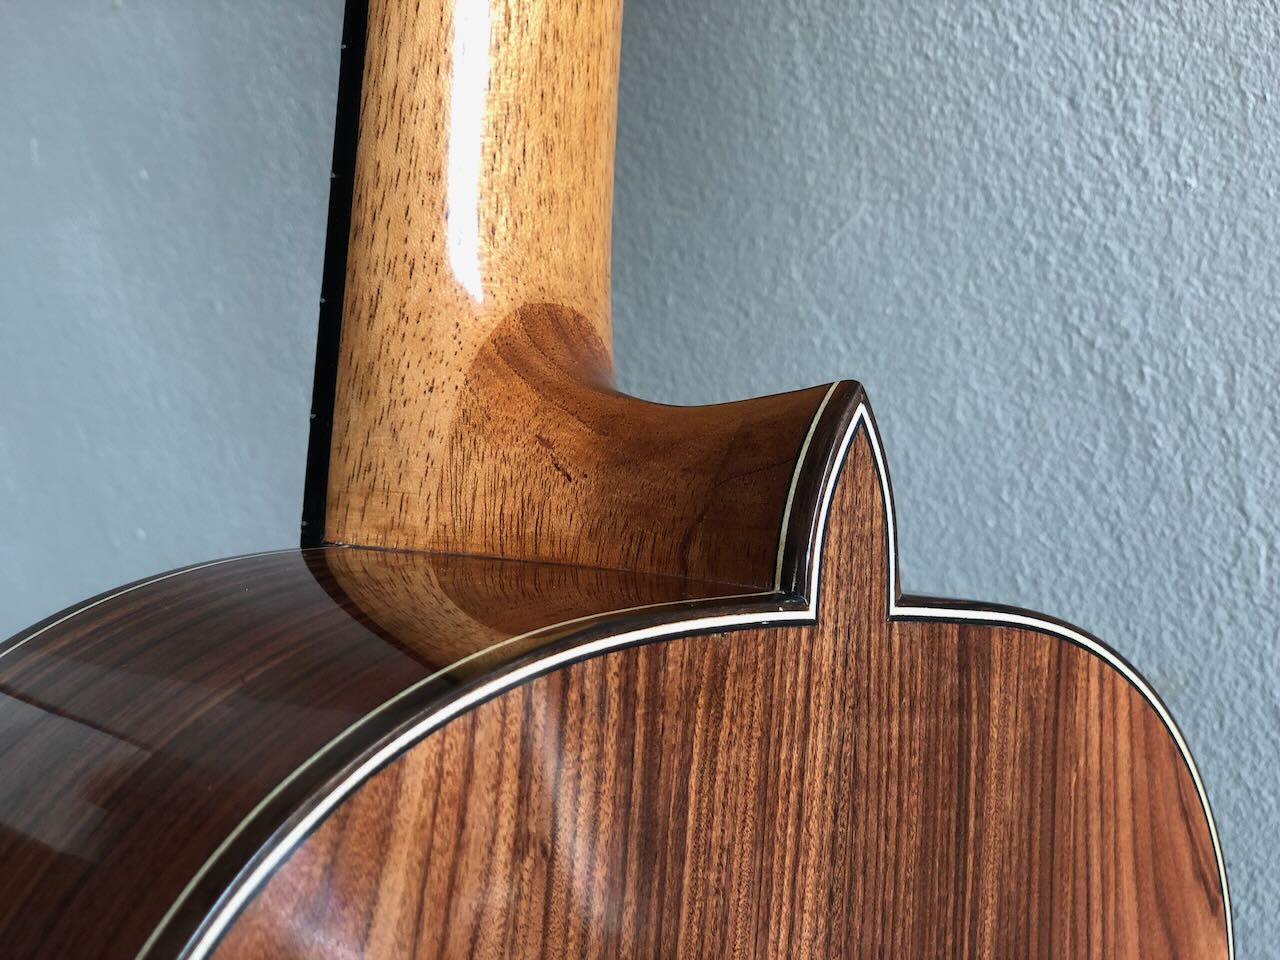
Geez…I composed a big response and didn’t realize the fingerboard was already glued…
Personally, I would remove the fingerboard and either adjust it as outlined below and reglue or, if the fingerboard is ruined by removing it, make a new one and do the described fitting before gluing it. I wouldn’t try to cosmetically cover it up, your workmanship is better than that and replacing the fingerboard is good experience to obtain, so it’s not a disaster, it’s not out of the ordinary to have to redo stuff, it happens….
At any rate, I’ll leave the original reply here because it might be useful information for future use even if you do decide to go the gap filling route (see the P.P.S. at the end for some gap fill suggestions, lol).
Original reply….
Hi Mango,
This is likely due to not fitting the fingerboard to the neck angle, and the bottom of the fingerboard needs to be adjusted to account for the offset. A way to do this is:
- ensure the bottom of the fingerboard is nice and flat.
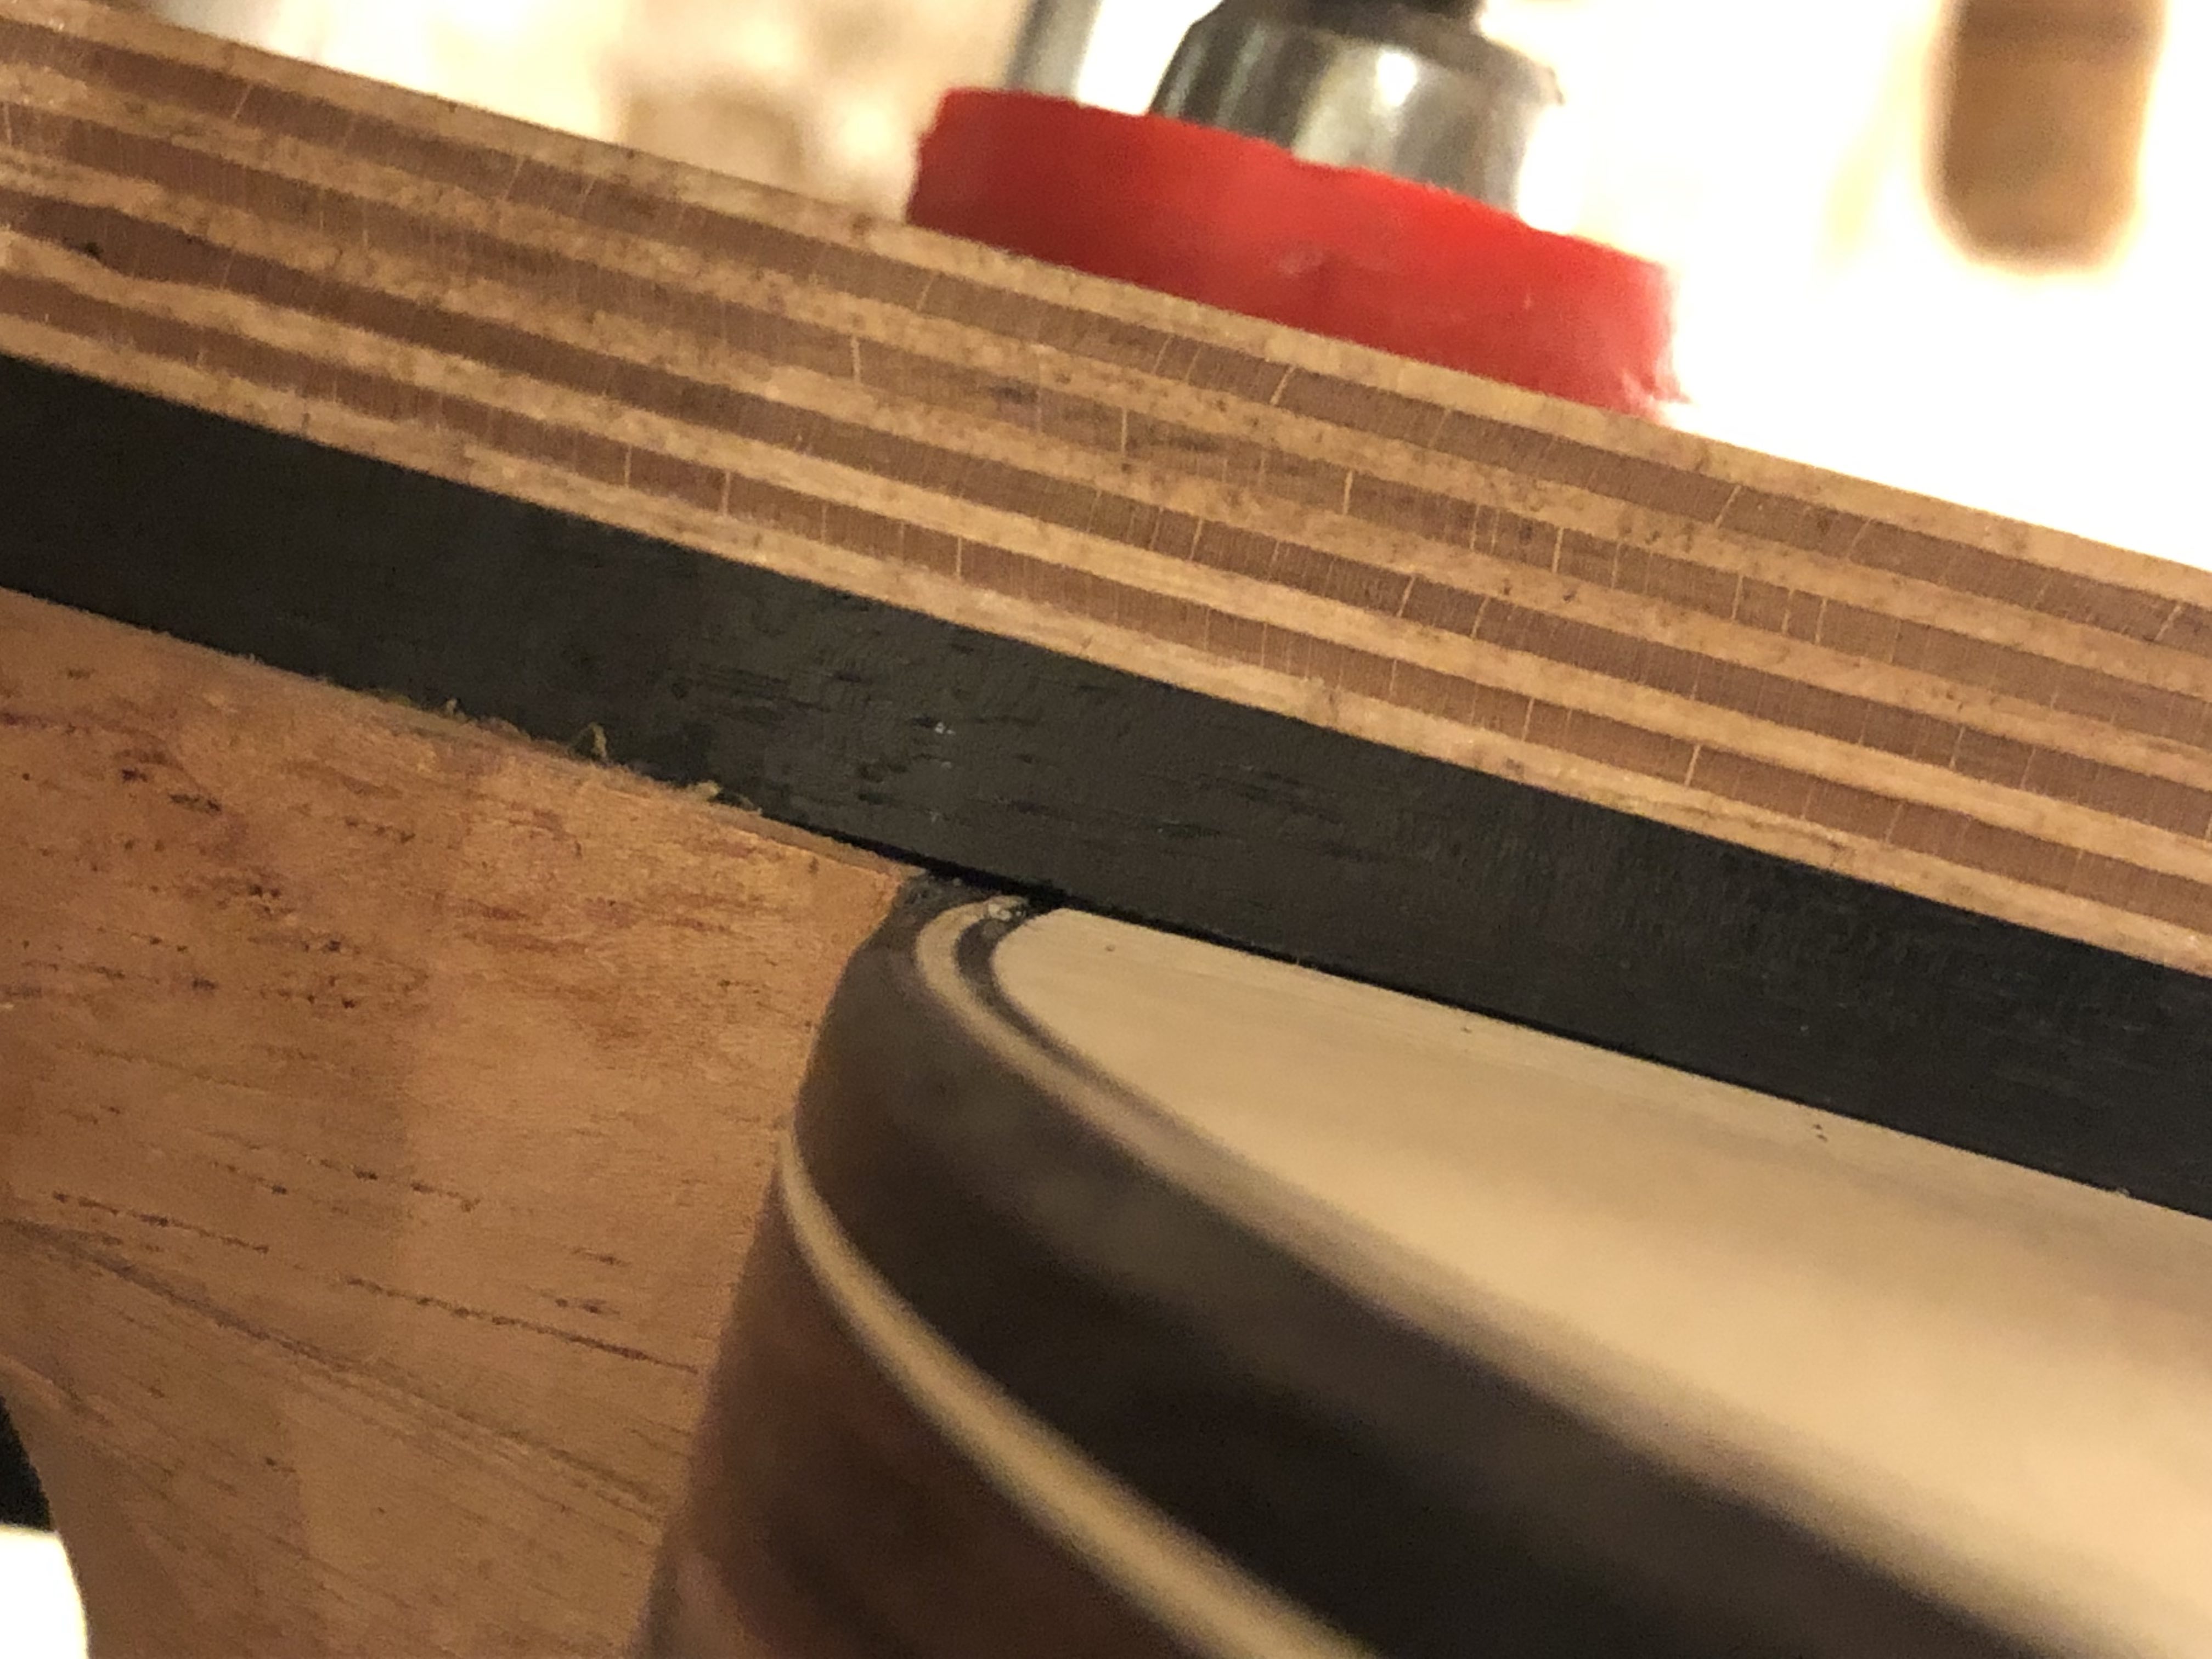
- place the fingerboard on the neck (as was done in your picture) and measure the gap between the bottom of the fingerboard and the junction of the neck and body.
- mark the position of the twelfth fret across the underside of the fingerboard and at the 19th fret end of the fingerboard mark the amount of gap you measured.
- starting at the 19th fret end, plane the underside of the fingerboard with each swipe starting a little closer to the 12th fret position. The idea is to plane a ramp from the 12th fret to the soundhole whose drop will match the distance of the gap you measured. Constantly check for flatness while doing this to avoid planing a curved drop. Also constantly check the work against the guitar to confirm the gap is closing and that the fit is accurate.
- ultimately the goal is a flush fit. It can be checked by putting a slip of paper between the fingerboard and the top of the guitar and pulling it to see if the slip is held tight when light pressure is applied to the top of the fingerboard.
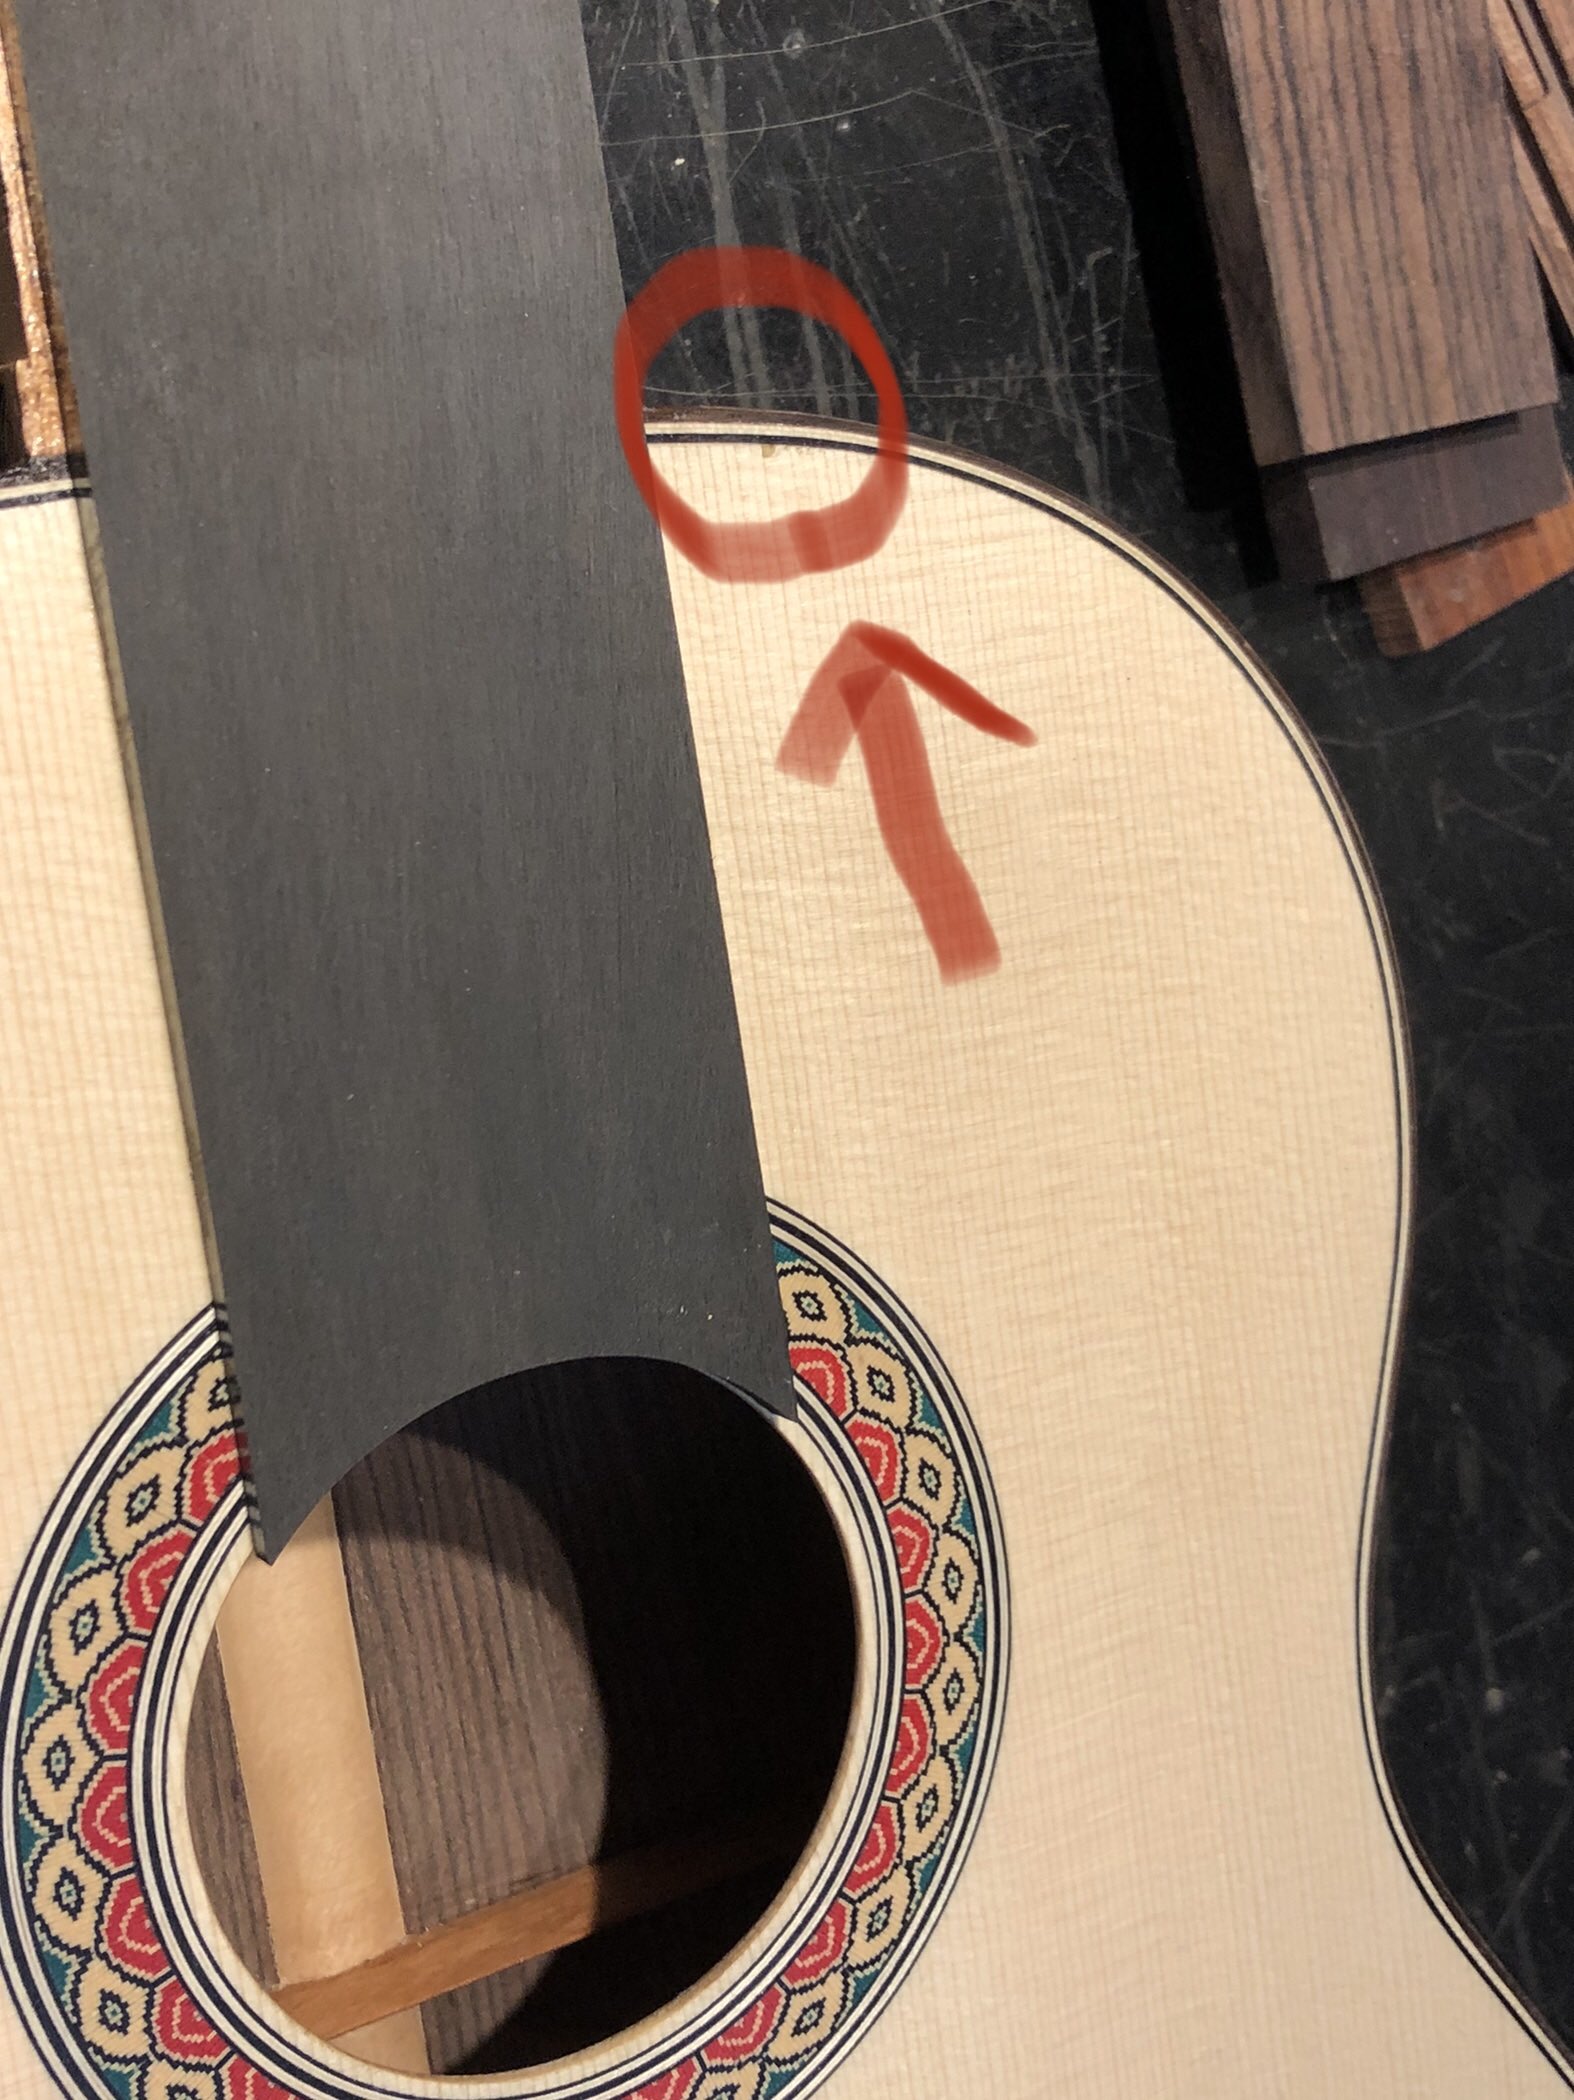
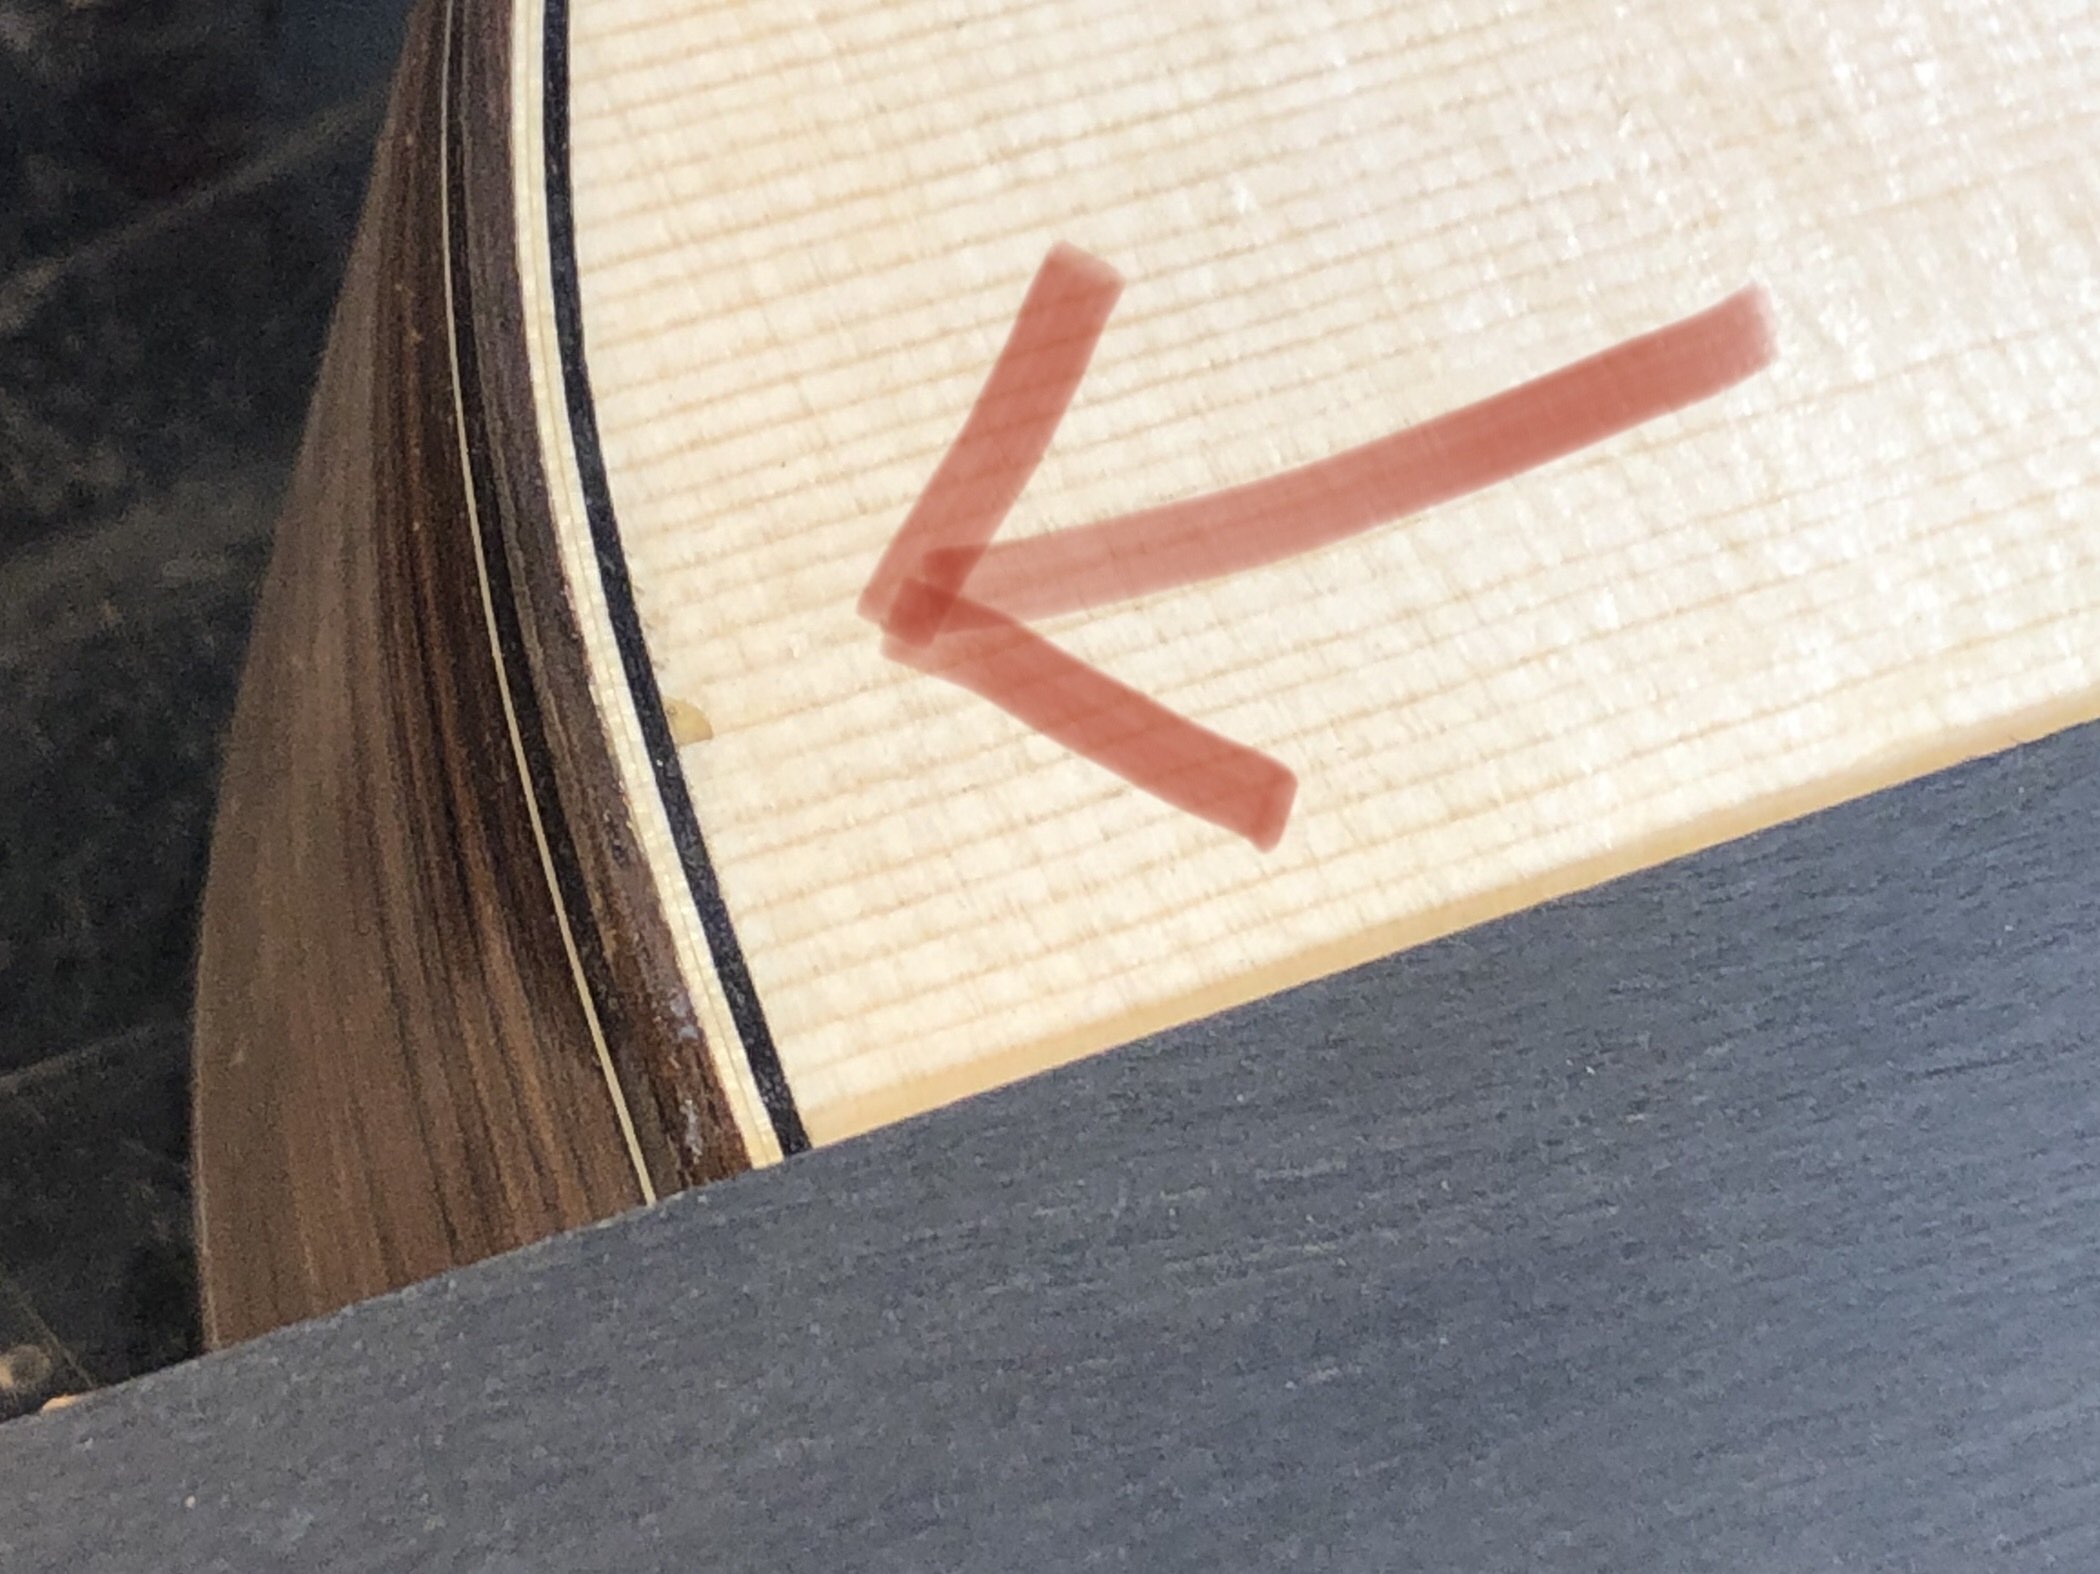
Looking at your picture, it appears the gap is about 0.65mm and also it appears that the neck might not be hitting the body quite flush (with the neck appearing to be slightly proud). This can be rectified using a long sanding block on the neck and pulling it away from the body join to remove enough material to make the join flush. It’s important to check both sides as one side of the neck can be sitting taller than the other at the join and this is the opportunity to correct for that. It’s also difficult to maintain flat when using a sanding block so the neck should be both checked lengthwise and also across its width while making the correction, and a small block plane can be used to flatten any humps.
And, of course, there’s always more than one way to do anything when it comes to guitars so this is just how I’ve done it.
Best,
P.S. Number 3!! Make sure you post your progress if you can. It’s a lot of fun following these projects.[sm=Smiley Guitar.gif]
….end of original reply
P.P.S. If you do choose to fill it you could make a paste out of white glue and ebony dust and cram it into the gap. I wouldn’t use epoxy darkened with pigment as that’s bound to make a huge mess that’s going to be very difficult to clean up (the ebony paste would be more manageable). I don’t think CA will get you where you want to go. But, regardless, it’s going to look like crap and may or may not resurface as a hairline later on in the guitar’s life. Doing a sprayed lacquer finish instead of French Polish might help hide the gap filling work. But it’s still going to bug you…it’s really better to just remove the fingerboard and do a closer fit.
|
|
|
|