RE: Building a Student Model (Full Version)

Foro Flamenco: http://www.foroflamenco.com/
- Discussions: http://www.foroflamenco.com/default.asp?catApp=0
- - Lutherie: http://www.foroflamenco.com/in_forum.asp?forumid=22
- - - RE: Building a Student Model: http://www.foroflamenco.com/fb.asp?m=261713


Message


Leñador -> RE: Building a Student Model (Jun. 18 2014 20:16:11)

I kinda noticed that too but I was thinking later maybe he just needs it set up enough that it doesn't move around when he works the other parts, guitars are pretty light compared to heavy cabinet panels and table legs etc....


Andy Culpepper -> RE: Building a Student Model (Jun. 18 2014 20:39:10)

quote:

personally I would let the joints dry for at least 24 hours before working them. Am I just overly cautious?


I tend to leave joints with a lot of surface area overnight, but there is a good chance I am being overly cautious too [:)]


Stephen Eden -> RE: Building a Student Model (Jun. 18 2014 22:26:27)

Hey Guys, Cheers for the questions about gluing times. I use Titebond Original wood glue for all gluing operations. This was taken from the FAQ at the titebond website.

What is the clamping and drying time of Titebond Wood Glues?

For most of our wood glues, we recommend clamping an unstressed joint for thirty minutes to an hour. Stressed joints need to be clamped for 24 hours. We recommend not stressing the new joint for at least 24 hours.

There are some things that have to be left longer than 24 hours. When gluing stacks of veneers like logs for tiled rosettes I clamp them for 48 hours. This is one reason I don't use any veneers on the head, Just a plate.

Also I have noticed (with some gluing mistakes in the past) that after only 5 minutes of clamping time with well seasoned timber in a dry atmosphere the wood will not come apart at the join even with heat.

Timoteo - The scarf join is left to clamp for the recommended 1 hour as I prepare other things. The next operation does not stress this join as it is the reinforcement. so the planing of the head only occurs after some 2-3 hours of curing time. then gluing on the Zoque. The rest of the work on the head happened in the last 1 hour of the day. The heel was carved on another day.

I hope this helps.


Andy Culpepper -> RE: Building a Student Model (Jun. 18 2014 22:34:24)

I've always admired your organized and efficient approach to building, Stephen. And your guitars look and sound great, and presumably are not falling apart too often, lol.

One question about Titebond as I've started experimenting with it, I take it you don't think Titebond II or III provide better results than the Original?


Stephen Eden -> RE: Building a Student Model (Jun. 19 2014 9:18:54)

Cheers Andy, It's just how I am wired. Studies in time keeping and efficiency were always my best subjects when I studied statistics. It's a shame the rest of course was soo dull to me. I have not had a single joint failure in the 117 guitars I've built so far :) and used Titebond and the same gluing methods on them all.

I have to admit I have not tried Tite bond II or Titebond III. I think the fact they are water proof puts me off a little. The original Titebond can be reactivated with water and more glue just like hide glue. So it appeals to me more on that front as I'm not sure the other two will act in the same way.


Ruphus -> RE: Building a Student Model (Jun. 19 2014 10:38:38)

I am surprised how appealing this inspiring thread is even to fellas like me who never built a guitar.
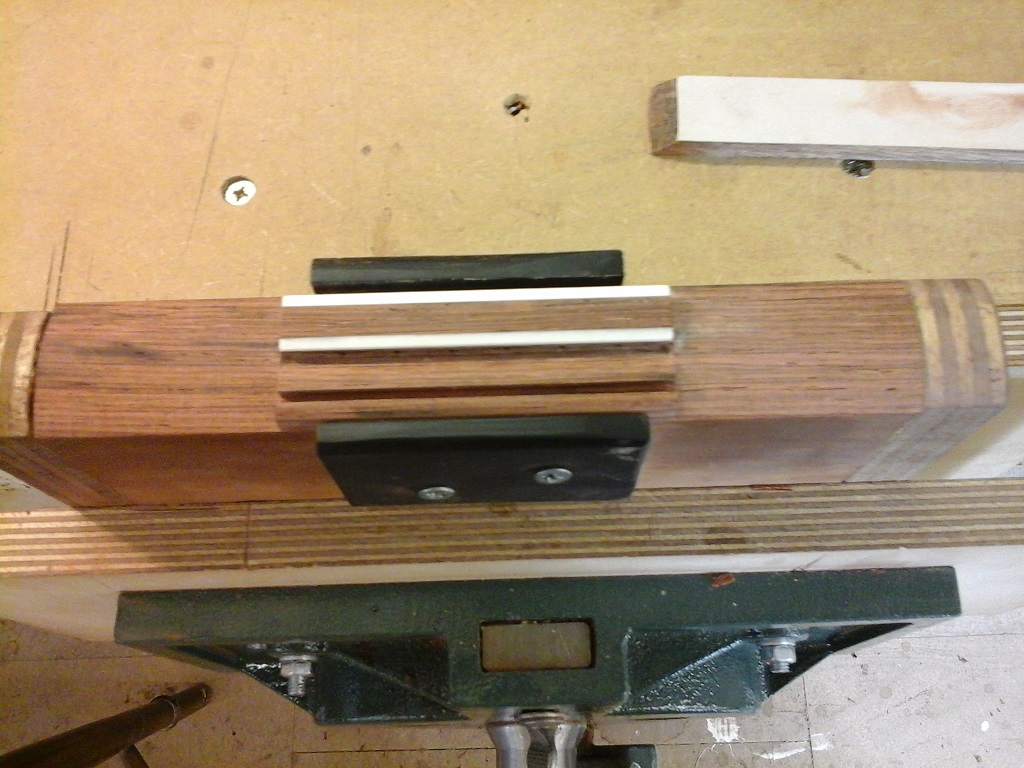
And it contains generally useful clues, like that clamping of a plane, using permanent wedges etc.

With its working routine and great explanation & pics supposedly worth a pin in the luthier section.

quote:

ORIGINAL: SEden

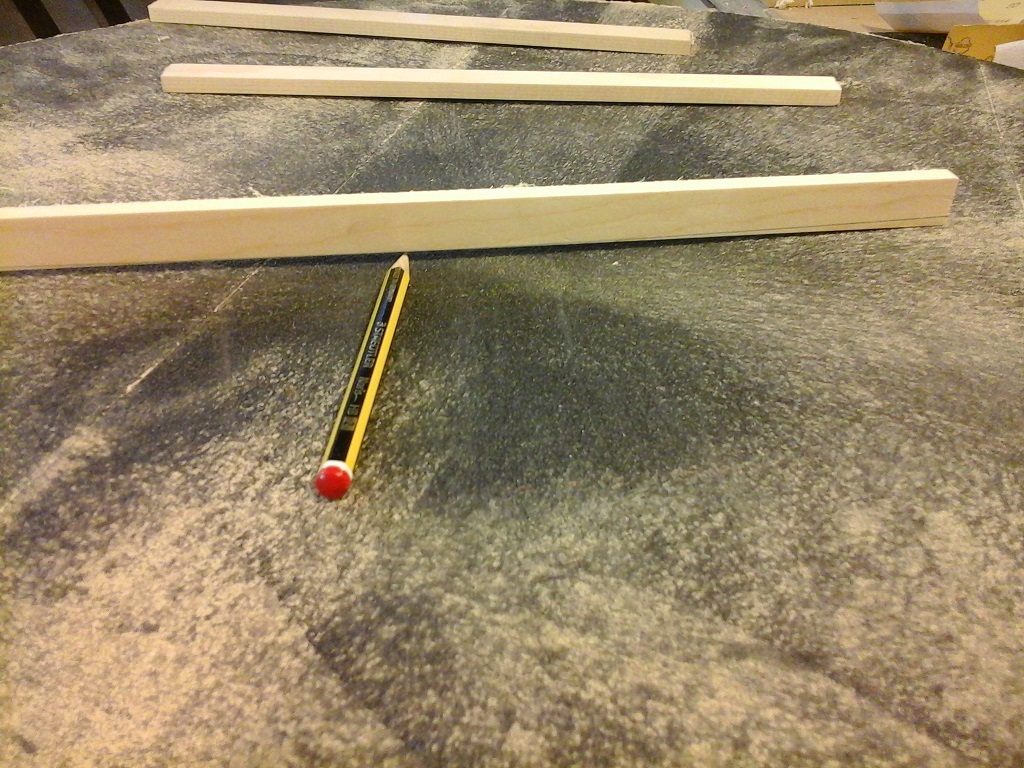
You just cant beat fine Japanese steal!

Seems the Chinese have not found out about such yet. Instead of buying from their neighbour, I read their tourist´s prime purchase in Germany during `Europe-in-3-days´ tours or so being German steal products like kitchen knives and scissors from Zwilling.

These Japanese hand saws appear to have conquered the worlds DIY and tool markets. Even yours truely got himself one, eventhough likely of no special steal, as it was a cheap specimen.
I suspect their design to be practically intriguing. It seems to intuitively tell one´s eye that this saw can be handled well. ( And its teeth promise a smooth bite.)


quote:

ORIGINAL: SEden

I have always found that I end up doing more work to it later in the build to theres no point going all out with the cleaning now.


I am of the impression as if this could be efficient in general / advanced artisans´and workers´ experience.
It seems typical that a beginner will try to final a section right away, which then for some reason might end up more time consuming way to proceed, and more risking to result in mismatch with the whole of the work piece.

Like say when a beginner in drawing while working on a portrait will finish the eyes while the rest being merely lightly sketched. Only to then discover that all the detailed work was a waste, because of disproportionate overal dimensions.
Whereas a skilled painter tends to commonly advance the work evenly across the motif.

-

Anyway, great thread!
And thanks for showing the roller jig later!

Ruphus


Ricardo -> RE: Building a Student Model (Jun. 19 2014 13:57:44)

quote:

When gluing stacks of veneers like logs for tiled rosettes I clamp them for 48 hours.


so your rosette here came pre-made then?

and everyone stop saying "steal" when you mean "steel"


Stephen Eden -> RE: Building a Student Model (Jun. 19 2014 14:07:59)

Nope this rosette was made here on the day. The picture of me using masking tape to take the rosette out is on the first page.

This style of rosette requires far less operations. I can work with the sound board 2-3 hours after gluing it in. Once glued in I carefully flatten the veneers and clean up. All remaining work is done on the other side of the board so the veneers are under no stress.

To make tiles takes a lot longer which is why I do not include them on the guitar.


Ruphus -> RE: Building a Student Model (Jun. 19 2014 15:10:46)

quote:

ORIGINAL: Ricardo

... and everyone stop saying "steal" when you mean "steel"


Thanks for the pointer, before me establishing a new typo!

Ruphus


Stephen Eden -> RE: Building a Student Model (Jun. 19 2014 17:42:05)

Here it is day 3 of the build. I had a student in the shop today so not a huge amount of work today but hopefully you will find it interesting.

Picture one is how I shape the linings. I shape both sides before cutting for two reasons. One to save my fingers and two, So I know I have shaped the right side!

Picture two shows the template I use to fit the back.

Picture three is the big controversial radiused dish I used to shape the sides to the perfect shape for the back.


Images are resized automatically to a maximum width of 800px


Stephen Eden -> RE: Building a Student Model (Jun. 19 2014 17:49:48)

First picture is gluing the linings on with some handy little clamps.

The second is how I scribe a line on the back bars so I can plane to that line and finish in the sanding dish.

The third is a picture of the fitted back bars


Images are resized automatically to a maximum width of 800px


Stephen Eden -> RE: Building a Student Model (Jun. 19 2014 17:53:35)

The first picture shows gluing on the back bars plus a handy little glue scraper so the back remains clean.

The second picture shows how I have shaped and scalloped the bars.

The third shows the linings with the recesses cut ready for the back to go in.


Images are resized automatically to a maximum width of 800px


Stephen Eden -> RE: Building a Student Model (Jun. 19 2014 17:57:23)

The first shows how I use the same dish to apply an even pressure when gluing the back on.

The second is a picture of the wedge for the end block decoration ready to be glued in.

The third is the guitar assembled waiting until tomorrow for the bindings to go on!


Images are resized automatically to a maximum width of 800px


Stephen Eden -> RE: Building a Student Model (Jun. 19 2014 17:58:54)

A special picture just for Ruphus is The Roller Hole JIG! Simple yet effective


Images are resized automatically to a maximum width of 800px


Ruphus -> RE: Building a Student Model (Jun. 19 2014 23:34:39)

With the bindings already tomorrow, Anders was almost close with the joke about the guitar being finished next day. :O)

quote:

ORIGINAL: SEden

A special picture just for Ruphus is The Roller Hole JIG! Simple yet effective


Thank you, Stephen!
Will you clamp the head into the jig and than put the whole thing under a drill on a stand, or will you be holding the drilling machine by hand?

And should it be the latter: Is there no lateral touching of the metal plate and the MDF with the drill?

Ruphus

Images are resized automatically to a maximum width of 800px


Vince -> RE: Building a Student Model (Jun. 20 2014 12:18:20)

Very impressive how fast your working progress is.
I build 2 Guitars a year!
I'm very happy that this is not my only income!

Please post!


constructordeguitarras -> RE: Building a Student Model (Jun. 20 2014 22:20:27)

Nice thread and work! I like your masking-tape trick for the rosette. I would not have thought it possible to take all the lines out together and get them back in like that.

I am curious to find out what finish a "student model" gets.


Stephen Eden -> RE: Building a Student Model (Jun. 23 2014 8:57:26)

So I was so busy enjoying the weekend I didn't get round tp up loading day 4! So today you shall get 2 installments. Lucky!!![:D]

These depict the whole binding process in three easy stages.

The first is cutting the channel. I use my trustee Makita laminate trimmer with a guide. The only area I find that needs a little work after routing is just in the heel area where because of the angle of the back the binds usually go a little thin if the slots are not widened out a touch.

The second shows the binding channel I have cut by the heel ready to put the bindings on.

The third shows the method I use to glue the bindings on. Yup one at a time!


Images are resized automatically to a maximum width of 800px


Stephen Eden -> RE: Building a Student Model (Jun. 23 2014 8:59:30)

This is the sort of thing I do whilst I'm waiting for the glue to set in between binding.


Images are resized automatically to a maximum width of 800px


Stephen Eden -> RE: Building a Student Model (Jun. 23 2014 9:01:00)

Still in between gluing sessions


Images are resized automatically to a maximum width of 800px


Stephen Eden -> RE: Building a Student Model (Jun. 23 2014 9:05:42)

The bindings are all glued up now so before any cleaning I get the fingerboard on!

Here are three stages to gluing it on.

Stage one position then pin. I use old broken 1.5mm drill bits. Once glued they can be taken out with pliers and reused!

Stage two cut the fingerboard to fit the sound whole. I like to use my band saw then a sanding drum in the drill press.

Stage three Glue!


Images are resized automatically to a maximum width of 800px


Stephen Eden -> RE: Building a Student Model (Jun. 23 2014 9:07:06)

With just a touch more time left on the clock I finish off the bridge.


Images are resized automatically to a maximum width of 800px


Stephen Eden -> RE: Building a Student Model (Jun. 23 2014 9:20:02)

Ruphus - I use a wedge to clamp the head in place and then use a drill press to cut the wholes. The drill bit only cuts the holes in the head stock. there is a gap of 4.75mm from the edge of the hole to the wood holding the metal guide.

Hey Vince - cheers. I have designed this guitar to put together very quickly. My concert guitars take a great deal longer to make. I first decided I would just see how fast I could build a guitar that I would be happy to sell. The idea is progressing very well I must say.

Ethan - The guitar will have a french polish finish! It won't be a classic piano finish. It will have a moderate build and no grain filling. This guitar is going up against the higher end factory models that are adorned top to bottom with decals. I am trying my best to stay away from the super shiny over produced stuff. I have tried other finishes but always come back to fp.


Ruphus -> RE: Building a Student Model (Jun. 23 2014 10:11:24)

Thank you for explaining, Stephen.

There was a time, many years ago, when I used to wonder why so many tuners appeared so badly manufacturered that their gear or rollers ( without end bearings ) were hempered / locking. Then over time I realized that it often times was not the fault of the mechanics, but actually unevenly and slantingly drilled holes in the headstock.

Since then I have been wondering how a jig and procedure could be looking like that would allow accurrately adjusting to the different angles. This is the first time that I come to see such a fully adapting jig and routine.
Gracias!

Ruphus


constructordeguitarras -> RE: Building a Student Model (Jun. 23 2014 13:47:09)

quote:

The guitar will have a french polish finish! It won't be a classic piano finish. It will have a moderate build and no grain filling. This guitar is going up against the higher end factory models that are adorned top to bottom with decals. I am trying my best to stay away from the super shiny over produced to stuff. I have tried other finished but always come back to fp.


That makes sense. I think the only other finish that can be applied more efficiently is nitrocellulose lacquer--if you happen to have a spray booth. I used to brush on varnish, and had so many problems with it not curing in places or creeping afterwards, and all the coats and leveling in between them and risk of sanding through the final coat. I have to say, though, that the work that went into this guitar is so excellent that it seems a shame not to have paired it with the best of everything else. But I understand the economic need to get something out there that can sell for less.


Stephen Eden -> RE: Building a Student Model (Jun. 23 2014 19:04:54)

Good Evening Folks.

Here are the pictures from day 5.

I missed out the planing of the fingerboard as you won't really see much of a difference but I did do it! So the first picture shows that I have just banged all of the frets in ready to be glued in place with super glue!

Picture number 2 shows a great way to hold a guitar while scraping the bindings and other jobs. While being very inexpensive.

Picture 3 shows how I glue the heal cap on. The masking tape is stretched from the cap and then stuck to the back. It adds pressure towards the binding as it glues.


Images are resized automatically to a maximum width of 800px


Stephen Eden -> RE: Building a Student Model (Jun. 23 2014 19:06:26)

All three pictures shows the stages I use to shape a neck.


Images are resized automatically to a maximum width of 800px


Stephen Eden -> RE: Building a Student Model (Jun. 23 2014 19:08:42)

More neck shaping procedures! The last picture shows a very secretive technique marking out the head to neck transition.


Images are resized automatically to a maximum width of 800px


Stephen Eden -> RE: Building a Student Model (Jun. 23 2014 19:12:24)

The last three pictures of the day! An hour or so of sanding and we have three finished surfaces. Tomorrow will see the last few stages before I can start really polishing.


Images are resized automatically to a maximum width of 800px


constructordeguitarras -> RE: Building a Student Model (Jun. 23 2014 19:17:27)

Beautifully efficient work. Is the thickness of your neck the same from the 1st to the 9th fret?


Page: <<   <   1 [2] 3 4    >   >>

Valid CSS!


Forum Software powered by ASP Playground Advanced Edition 2.0.5
Copyright © 2000 - 2003 ASPPlayground.NET